


View the entries from the 2021 Anyone Can Win contest.
The Winners!
 1st Place Over 18: Debi Fornero
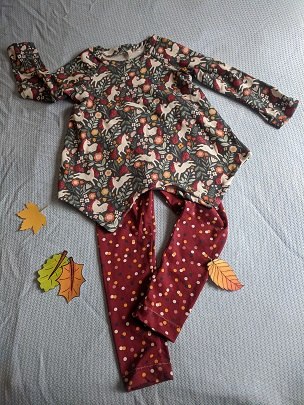 2nd Place Over 18: Merri Kriewall
 1st Place Under 18: Lizzie T.
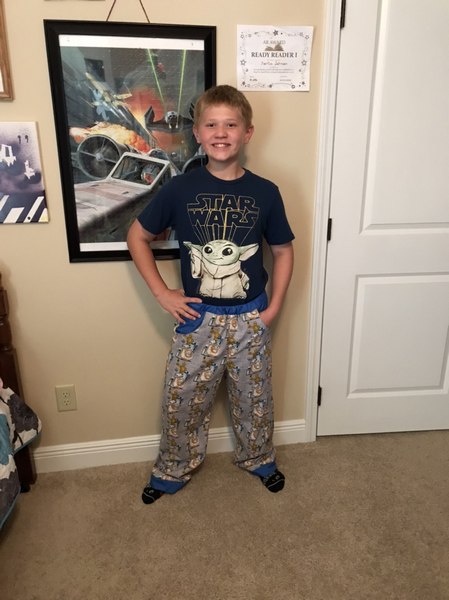 2nd Place Under 18: Markus J.
View the entries from the 2021 Anyone Can Win contest.
1st Place Over 18: Debi Fornero 2nd Place Over 18: Merri Kriewall1st Place Under 18: Lizzie T.2nd Place Under 18: Markus J.Our short video will show you how easy it is to create a baby hem. Sew simple, sew easy!
~Sheryl Belson
Ho hum! You may never give much thought to your ironing board—it works fine for pressing and that’s all you need…or so you thought. There are lots of options for this important sewing room tool.
Depending on the amount of space you have, the ironing board can be freestanding, fold down from a wall cabinet, slide out from a drawer, hang over a door or sit on a tabletop.
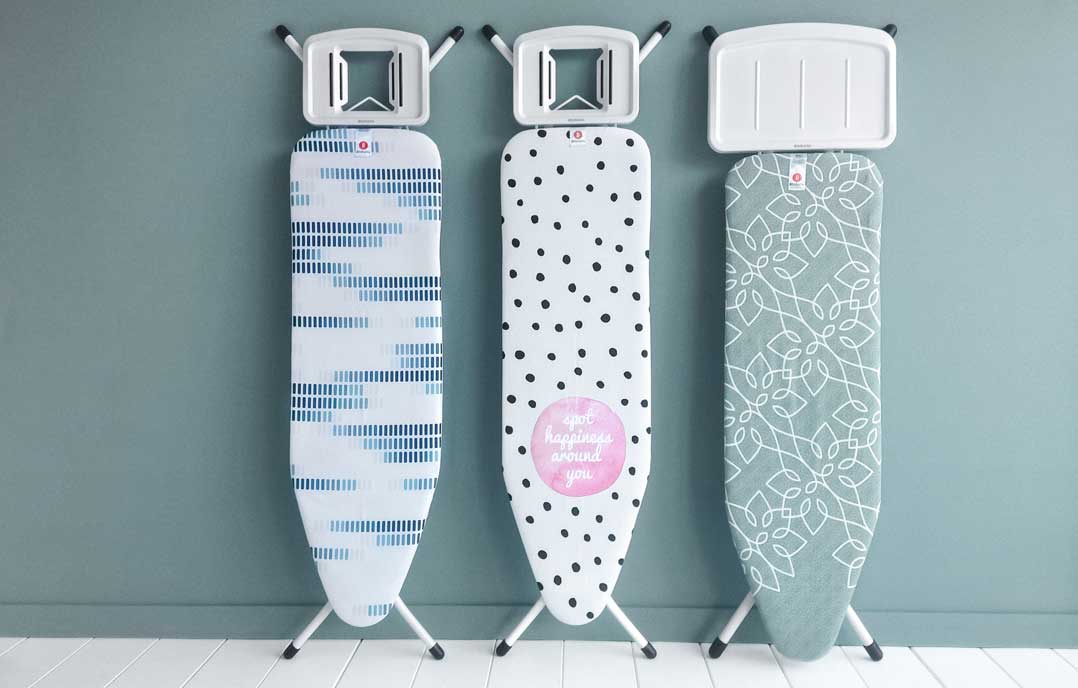
Boards are available in a variety of shapes and sizes. Most standard floor models are 14”-18” wide and 48”-54” long. Almost all brands offer one wide end and one tapered end to make ironing clothes easier, but when the board is located in your sewing room, check for some other features as well.
If you’re a quilter, there are larger wooden surfaces that fit over a standard board to extend it in both directions so there’s more support for a large quilt top.
Most ironing boards offer adjustable heights so they can be used sitting or standing, and by users of differing heights. The board can also be locked into table-top height so you can use it as an additional work table surface if needed.
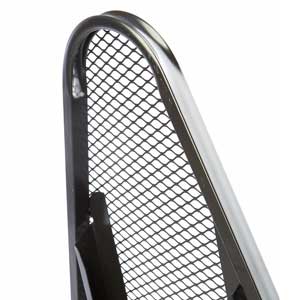
The top surface of an ironing board should be permeable so steam and moisture can pass through without damaging the pressing surface. Most board tops are metal mesh covered with a pad and a cotton cover to allow moisture pass-through.
Ironing boards come with a variety of leg styles—from loops and T-shapes to three or four legs—so be sure to double check for stability if you’re purchasing one in person. Accidental tipping can be dangerous to both you and your iron.

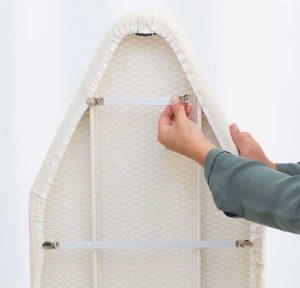
If your ironing board comes with a standard metallic cover and thin foam pad, consider replacing them with natural fiber options. Cotton or wool padding allows for steam absorption and it should be thick enough so as not to see the imprint of a metal mesh board top on your project.
Look for a cotton cover that’s removable and washable. Some designed specifically for quilters and sewers offer printed grid lines, bias lines or common appliqué shapes on them.
Whatever cover you choose should fit tautly on the board to avoid wrinkles. Look for one with a drawstring, elastic or use stretchy clamps to keep it in place.
For even more fun, make your own ironing board cover from colorful cotton prints. Use the original as a guide for sizing and shape and add a casing around the edge. Thread elastic or a drawstring through the casing and pull it tautly over the board.
~Linda Griepentrog
Linda is the owner of G Wiz Creative Services and she does writing, editing and designing for companies in the sewing, crafting and quilting industries. In addition, she escorts fabric shopping tours to Hong Kong. She lives at the Oregon Coast with her husband Keith, and two dogs, Yohnuh and Abby. Contact her at .
GSM stands for grams per square meter and is a standard industry-wide method of measurement of the density or weight of a fabric. (In the US, because we haven’t embraced the metric system of measurement, you might see this measured as oz/sq yard.) The GSM measurement is not thread count, which is a different method of classifying fabric, as explained below.
A thread count measurement — which is what we may be used to seeing — counts the number of threads in a square inch, but is a less precise measurement. A higher thread count should indicate a higher quality, softer fabric. However, some manufacturers are not counting the threads in a square inch, but are counting the fibers of the threads and thus arriving at a higher number. This could mean you’ll see a high thread count, but it could be based on the fiber count and doesn’t mean better quality.
A thread count measurement based on fiber count can be four times higher than the actual thread count. This means that a bed sheet labeled as 1000 thread count could actually be 250 thread count.
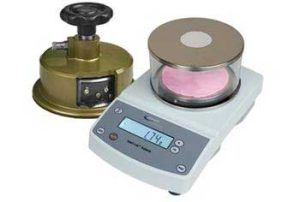
To determine GSM, a precise circle of fabric is cut using a system such as is pictured here. Once cut, the fabric is weighed and a GSM number is applied to it. There are several general categories of fabric weight, and each has different usages.
Basically, the higher the GSM number, the denser or more weighty the fabric will be. Think about how your quality jeans can last for years, but a light tee-shirt or delicate blouse may only make it a season or two. Those jeans are made from a fabric with a high GSM, which leads to longer life of the fabric. As you might expect, a higher GSM can mean a higher price tag on fabric and thus on a garment you may purchase which is made from it, or on fabric that you purchase to create your own garment.
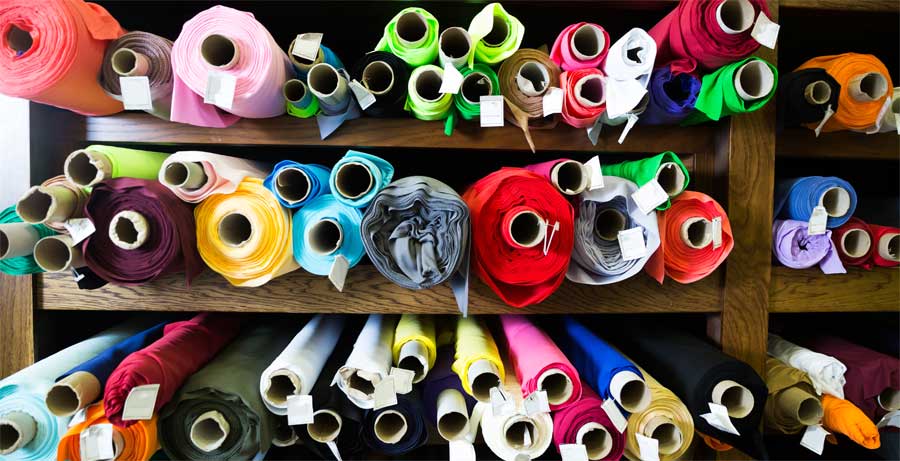
Most lightweight fabrics are used for clothing. Medium weights are made into bath and bed linens, but also include fabrics such as velvet, taffeta, or charmeuse. Heavier weights will be used for upholstery and projects needing strength and durability, such as home furnishings. This category can also include wearable fabrics such as brocade, poplin, or denim.
Weight |
GSM |
Fabric Types |
| Light | 8-200 | Voile, Chiffon, Lace, Mesh, Light Cotton, Organza |
| Medium | 200-300 | Bath Towels, Light Velvet, Taffeta, Sateen, Charmeuse |
| Heavy | 300-400 | Canvas, Denim, Wools, Home Dec Fabrics |
| Extra Heavy | 400-500 | Thick Denim, Fabrics with Coatings |
In the US, because we don’t use the metric system as widely as other countries, fabric weight may be shown in ounces. If you want to determine GSM and see an ounce measurement listed for a fabric instead, there are formulas for conversion.
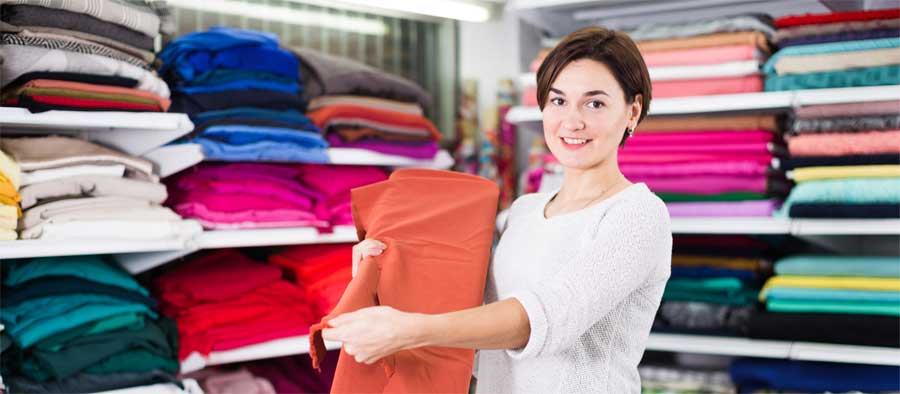
Are you wondering how this impacts you, or could help you decide on a fabric purchase? Since well before the pandemic, we’ve been losing our brick-and-mortar fabric stores. Then the pandemic hit and even more were lost. Today, many of us are ordering fabrics online. Wouldn’t it be helpful to know what the weight of a fabric was before you made your purchase? If you’re making tee-shirts, knowing that the GSM on a piece of knit is closer to 200 will let you know the fabric will have more body, and may last longer. At the same time, purchasing towards the low end of the Light category might be fine for casual shirts for kids (since they’re going to grow out of them in a season anyway).
Knowing GSM gives you more information about what to expect from a fabric you may be purchasing without the opportunity to touch it, and can help you
Jan McMinn, Denver Chapter
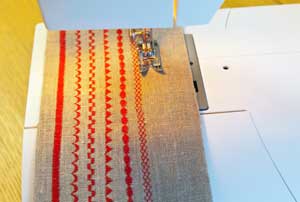 Have you ever tried to use the decorative stitches on your sewing machine and some of them bunched up or didn’t stitch evenly, or you ended up with crooked rows? The really wide stitches can be especially tricky to keep centered where you want them. The best option for a quality result is to bring them into the hoop. The result of using embroidery mode will be perfectly balanced columns of stitches, and you’ll be even happier with the ease of stitching and the precision-aligned results.
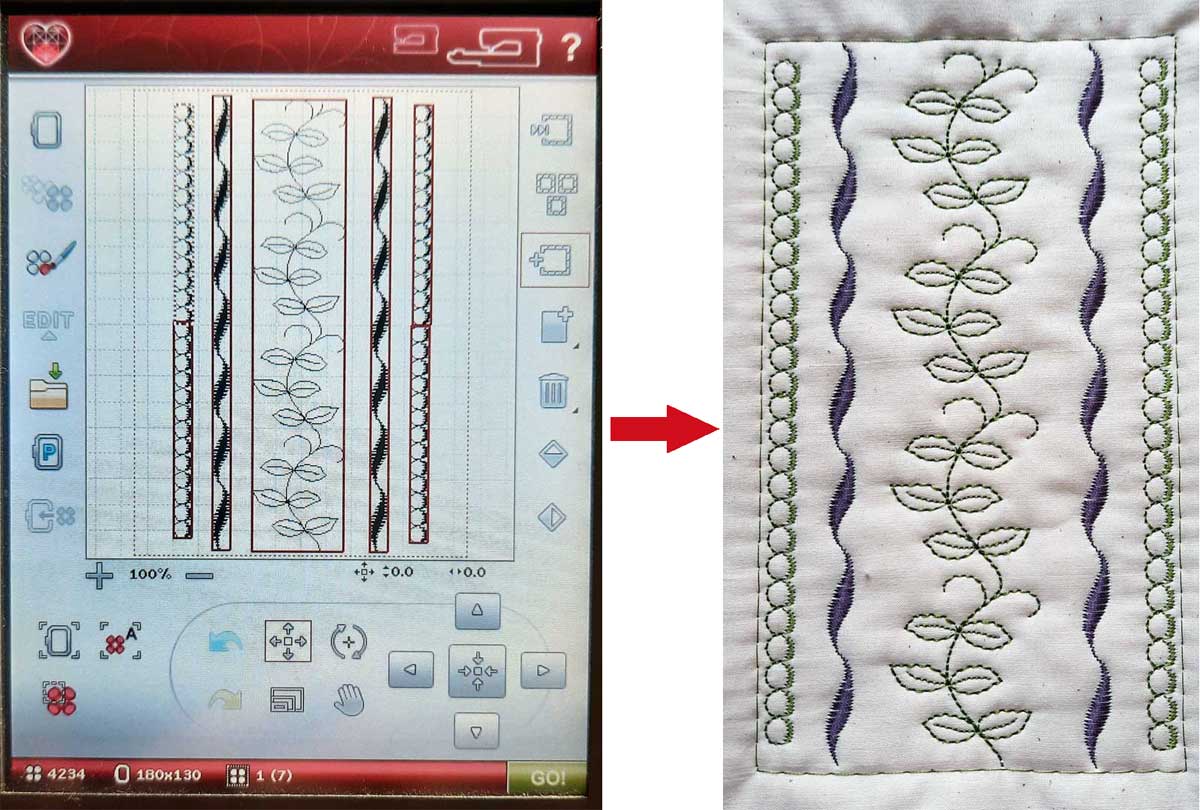
The first thing to do is check your manual to see if your machine can load sewing stitches into the hoop in embroidery edit mode. My Husqvarna-Viking Designer Ruby calls it “loading a stitch program.” On the Ruby, the stitches come into the hoop in vertical alignment but can be rotated to the horizontal position after they’re brought into the hoop. The Ruby also allows you to program how many times to repeat the stitch, as well as providing an opportunity to choose different stitches to use in a particular column of stitches. Alternatively, you can use just one of the fancy stitches by itself and then duplicate it and arrange them in the hoop. (Note that your machine may or may not have these options.)
Consider what hoop size you want to use and make note of the hoop’s stitch area measurement. For example, the Ruby’s 130 x 180 hoop would use a design that is just slightly smaller in size. It could fit a series of stitches that measured up to 178 mm. The Ruby also reports the size of one “stitch unit,” as well as the combined size of the column of stitches being created. In addition, you can edit the stitch length and width of an individual unit of stitches to make them fit, if needed, as well as tell it how many repeating units are desired.
Notes:
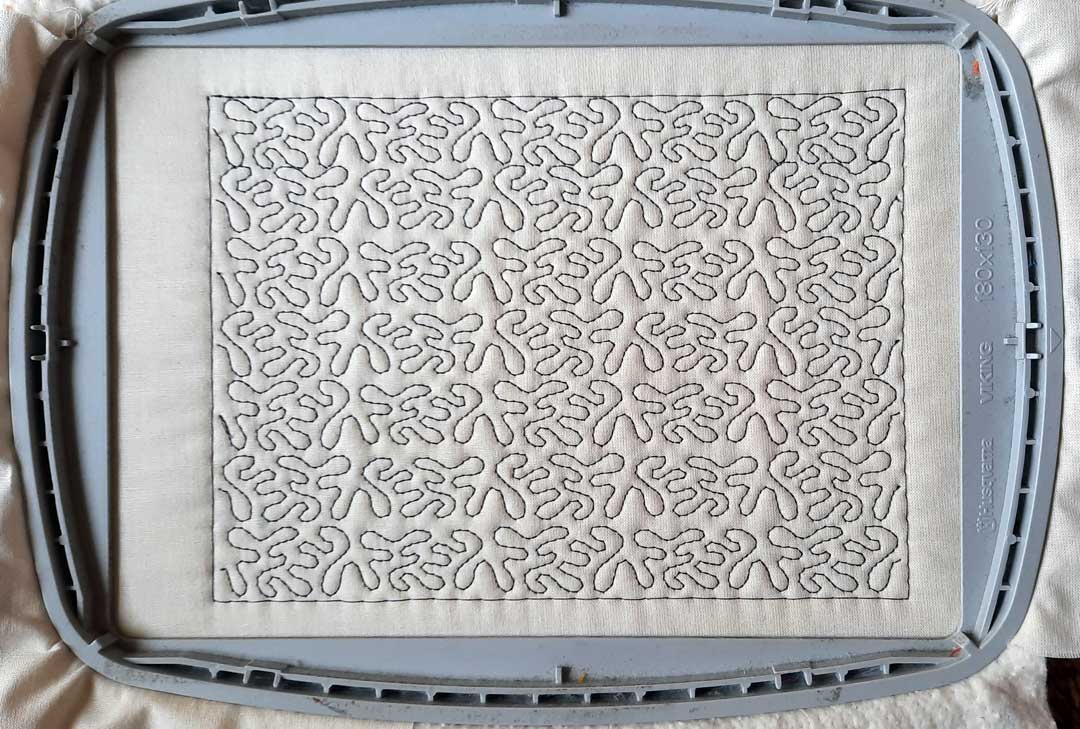
Some stitch units are merely running stitches and some may be triple stitch, or have some satin stitches, meaning some are more dense than others. For some of the samples that I created, I did not use stabilizer in the hoop, but just had a quilt sandwich of two fabrics with batting in the middle. If you are embroidering on one layer of fabric, you will need to use stabilizer in your hoop. Starching your fabric helps too.
If you are not sure if your embroidery machine can do this, do a Google search on “using decorative stitches in the embroidery hoop,” and you should find links on how to do it for a variety of machine brands. You can also do a Google search using the term “stitch stacking.” Your sewing machine dealer may also be able to determine if your particular model has the ability to do this technique.
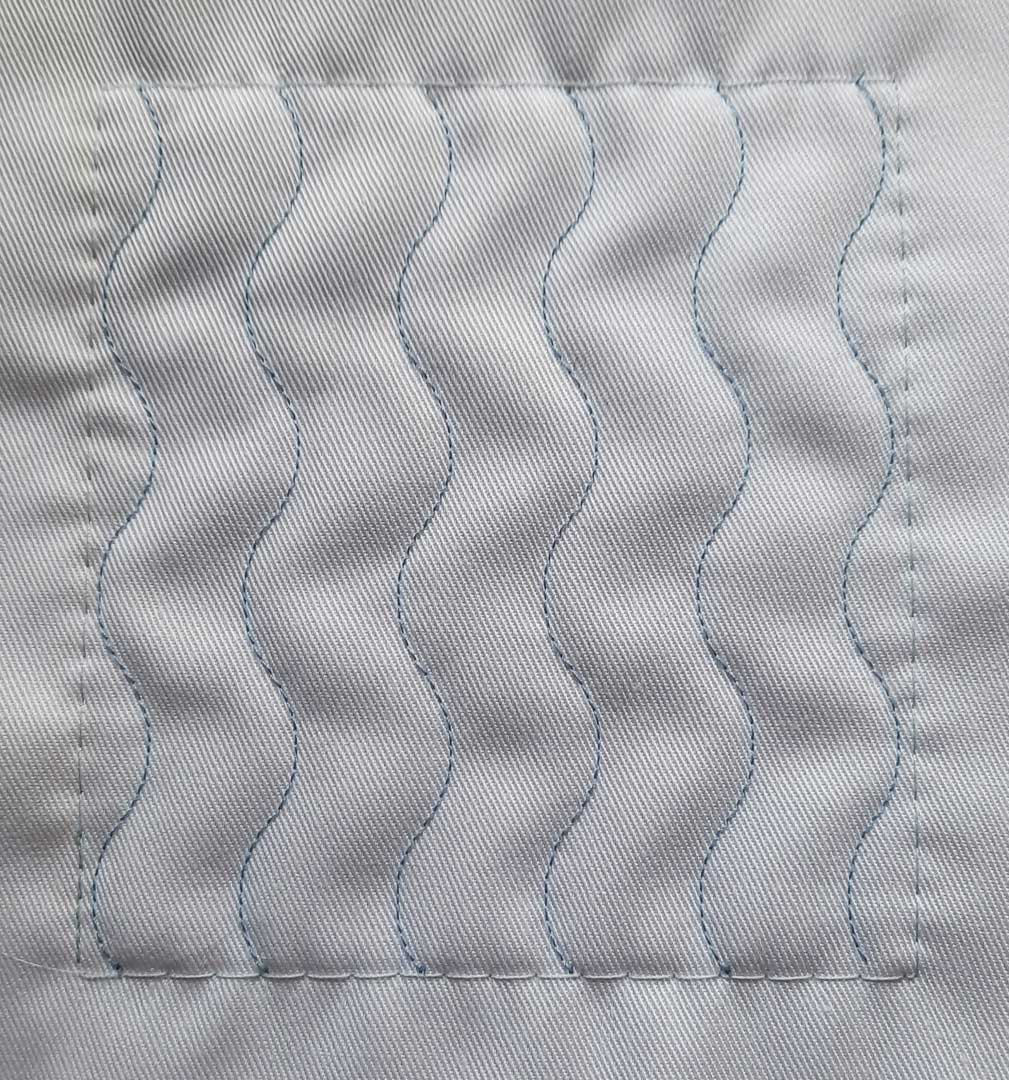
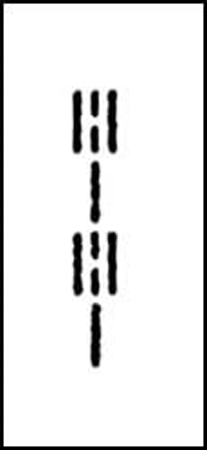 Check to see if your machine can create a hand look stitch (see image at right). The stitch symbol may look something like this. When stitched using the correct color threads, it looks like a row of small stitches sewn by hand. Thread the bobbin in a contrasting color so that the threads will show on the top of your fabric. Thread the needle with a thread color that matches the fabric or with clear/invisible thread. Select the stitch and try sewing a sample first. You may have to increase the needle tension so that the bobbin thread shows more. The stitch length may also need to be adjusted to get the effect you are looking for. They are great for creating lines of stitches and may be brought into your hoop to give the look of quilting by hand.
For more information on using decorative stitches in the embroidery mode on machines, check out the following sources:
~Beverly Betz
