


This article is Part 2 of the Fabric Sources: Living Things series
Plants (part 1) | Plants (part 2)
Living Things: Silk | Living Things: Wool | Other Living Things
Minerals: Acrylics, Polyester, & Nylon (part 1) | Minerals: Spandex and Rayon (part 2)
When you think of wool, you probably think of sheep, but did you know that the hair of some other mammals such as goats, alpacas, and rabbits may also be called wool? Let’s look at all of these, starting with sheep since it is the most common and affordable.
Sheep
The hair of sheep is the most commonly used animal fiber. Merino wool is most prized as it is a particularly soft and warm fiber. Wool varies in diameter — the finer the wool, the softer it will be, However, coarser grades are more durable and less prone to pilling.
How is it processed?
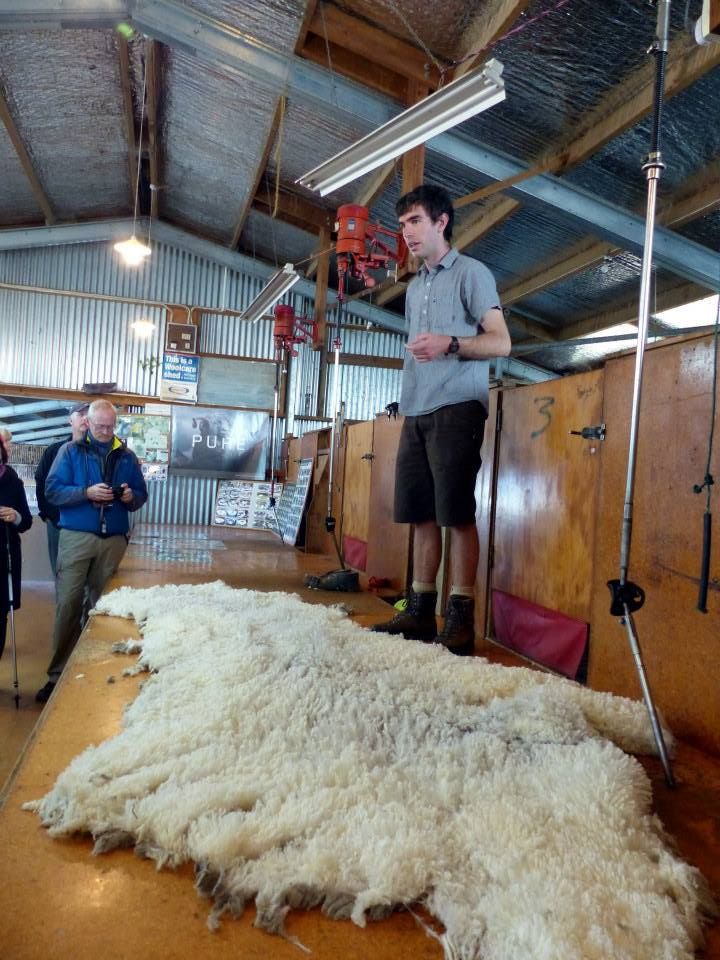
Sheep are shorn of their wool usually once a year. After scouring to remove grease and dirt, wool is carded and combed, then spun into yarn for fabrics or knitted garments. While on vacation in New Zealand, I had the opportunity to stay on a sheep farm and see a sheep being shorn. I was amazed at the amount of wool that came from a single sheep! To watch the process of taking shorn wool to wool fabric, watch this 7 -minute video.
Pros
Wool fabric is warm and insulating, making it a great choice for winter apparel. It is wrinkle and odor resistant, has good drape, and easily accepts dye. And its ability to absorb and release moisture makes woolen garments comfortable as well as warm.
Cons
Pure wool can be scratchy on the skin and must be dry cleaned to avoid shrinking and felting (become more compact/dense). However, this felting effect can be used to your creative advantage if that is the effect you are going for.
Impact on the sheep
Shearers are often paid by volume, which encourages fast work. Shearers are encouraged not to be hasty and careless so that no injuries occur to the sheep.
Where can I buy it?
Wool is readily available almost anywhere.
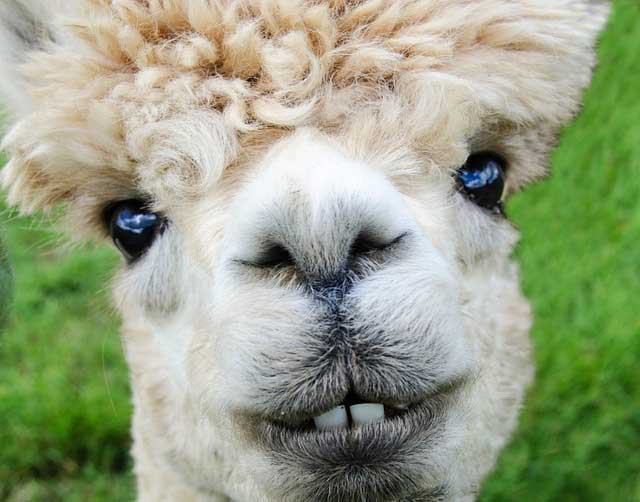
Goats
Goat hair is the source of two luxurious fabrics – cashmere and mohair. Cashmere, also known as Pashmina, is made from the downy undercoats of the Cashmere goat. It is a very insulating fabric and can be woven in light or heavy weights. Mohair is made from the hair of the Angora goat and is known for its silky feel and beautiful sheen.
How is it processed?
Cashmere goats are sheared once a year in the Spring and produce a smaller volume of wool per shearing than the Angora goat. It takes the hair of approximately 6 goats to produce a single cashmere jacket. This hair is combed out over a period of about two weeks’ time and is then collected, cleaned, and processed. The combing process only harvests the finest undercoat hairs. For a chance to see these cashmere goats, watch this 2-minute video.
Angora goats can be sheared twice a year as the hair grows much more rapidly than the Cashmere goat. Plus, these goats produce more volume per shearing than the Cashmere goat. The mohair is scoured, carded, and sometimes combed, much like wool. Although angora goats are raised for mohair around the globe, the two major producers are South Africa and Texas. Watch a Texas farmer talk about raising and shearing his Angora goats in this 2 ½ minute video.
Pros
- Cashmere is prized for its softness and fine quality. It is warmer than sheep’s wool yet lightweight, breathable, and less irritating to the skin. It is also wrinkle-resistant.
- Mohair also possesses qualities such as warmth, lightweight, wrinkle-resistance, and softness. It is dyes exceptionally well, and it is more durable and affordable than Cashmere.
Cons
Cashmere is a luxurious fabric which means it is an expensive one. Its delicate nature means you will want to dry clean it and store it folded rather than hung. Like wool, pilling can be an issue. Mohair is also an expensive fabric option, though less than cashmere. It is not as soft as cashmere and can have a slightly frizzy look.
Impact on the goats
Shearing (most common) can be stressful to the goats and robs them of their natural insulation. This could leave them vulnerable to cold temperatures and illness so weather should be considered when planning the shearing schedule. Combing is an option but requires more time and physical effort and is thus less common.
- Mohair production is stimulated by a high protein diet. However, as protein in the diet increases, so does the fiber diameter, which is an undesirable side effect. Nutrient requirements for mohair are relatively low. The Angora goat is extremely sensitive to undernourishment, especially during reproduction and must be taken in to consideration.
- Cashmere goats produce only a small amount of finer fiber relative to mohair and are less sensitive to environmental stress.
Where can I buy it?
Both cashmere and mohair fabrics can be found in many upscale fabric shops. You will need to look a little harder to find them, but they are available. A few sources are listed here:
Alpacas
 Alpaca fiber is sourced from the wool of alpaca, a variety of camel native to Peru. Its wool is soft, very warm, and can be blended with wool, mohair, and silk to create beautifully soft, high-end textiles. Certain premium alpaca fibers shorn from young animals are even considered lighter, warmer, and softer than cashmere. Generally, alpaca wool is available in white; however, colors such as blackish blue, brown, silvery gray, and blackish brown are also found.
How is it processed?
Alpacas are shorn once a year. The fiber is washed to remove sweat and oils, then dried and sent through the picker to open the fleece and prepare it for carding. Carding will separate the fibers and drop out the less desirable hairs. The result of this step is a thin sheet, called a web, which is wrapped around a drum to form batts or run through a pair of rollers to form a loose tube, called roving. Next comes the combing which aligns the fibers neatly into slivers which can be spun. Once the slivers are spun, they can be twisted into multi-ply threads/yarns which are now ready to be wound onto cones and woven or knitted into fabric. Watch this 4-minute video on YouTube if you would like to see a bit of the shearing and processing described.
Pros
Alpaca wool is warmer, lighter, and stronger than sheep’s wool. It is soft, fine, glossy, and luxurious. Another advantage is that it is hypoallergenic.
Cons
Alpaca fabric is typically expensive, and it can be itchy. It is also susceptible to moths so it must be stored in a manner to protect against them.
Impact on the animals
Raising alpaca has less of an impact on the environment as compared to other wool-bearing animals. However, as with any animal, if the farmer is not committed to quality and gentle animal care, they can experience harsh treatment during shearing.
Where can I buy it?
As with cashmere, you will need to look in upscale shops to find this luxury fabric. I found it listed in these online shops:
Rabbits
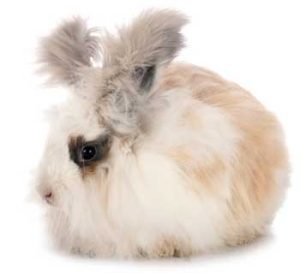
Angora fiber refers to the soft down coat produced by the Angora rabbit. Angora wool has been used in the production of sweaters and suits for quite some time and it’s an ideal fiber for thermal clothing and for people suffering from arthritis and wool allergies.
How is it processed?
Angora wool is harvested during molting season, which happens three to four times yearly. It is harvested by shearing or plucking the rabbits. Careful and gentle plucking of the shedding hairs is a better harvesting technique as it reduces the number of guard hairs retrieved, adding to the roughness of the coat. Removing the loose wool also helps to prevent wool block from the rabbit grooming itself and ingesting the loose wool fibers.
The premium wool is taken from the back and upper sides of the rabbit. Fiber quality diminishes on the belly and neck, and further diminishes on legs and rump. Angora rabbit wool is ready to shear when it has grown to between 3 and 5 inches in length.
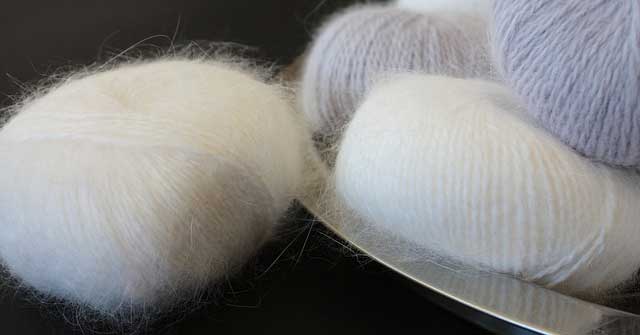
Once collected, the fibers are carded and spun before being dyed and finally woven or knitted into a fabric. The fineness of these fibers makes them quite difficult to spin.
Pros
Angora is prized for its softness, quality, and fluffiness. The fiber also felts very easily. It absorbs water well and is easily dyed.
Cons
Garments made of 100% angora wool are sometimes considered too warm so it is usually blended with other fibers, such as wool. It is very expensive since production is costly and time consuming. In addition, the rabbits need a lot of maintenance for their fur to be in top condition.
Impact on the animals
Angora rabbits raised in large operations are intensively farmed in hutches, usually in semi-darkness, and often experience cruelty, abuse, and intense stress during the farming and wool removal experience. The extremely long furs are best removed gently by hand to help preserve the health of the rabbit; however, this is quite time-consuming and many farmers will shear instead.
Where can I buy it?
As you might expect, this is another fabric you are only likely to find in upscale fabric shops. Here are a few I found:
~Sheryl Belson
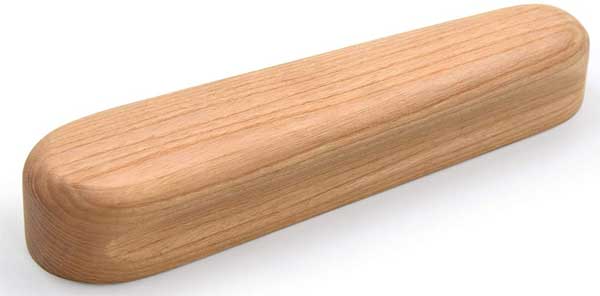
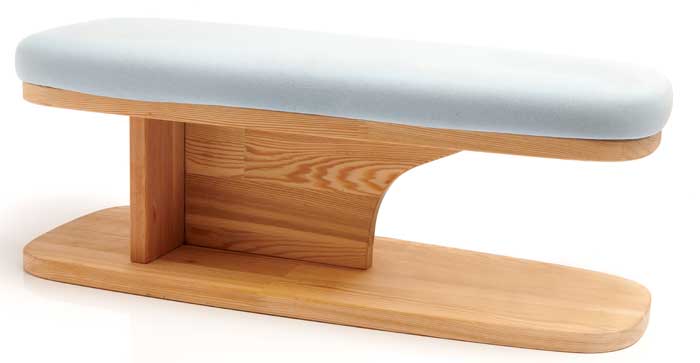
 Sleeve board sizes vary depending on the manufacturer, and the size of the pressing surface obviously affects what can fit over it. But all sleeve boards have at least one end tapered so that it’s narrower than the opposite end attached to the base.

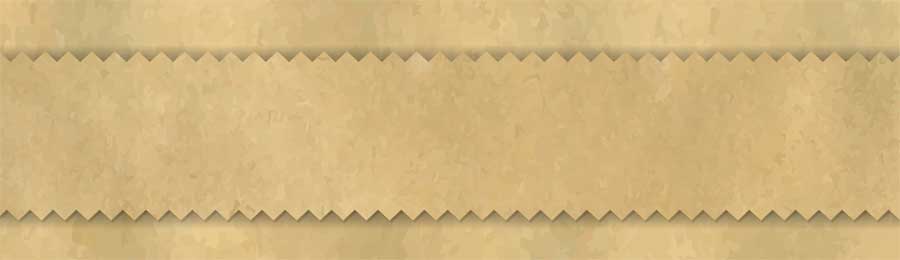
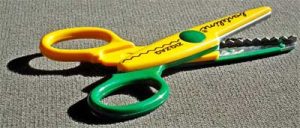
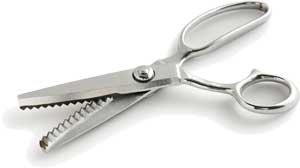 Chances are good that if you’re serious about your craft, you have multiple pairs of scissors and shears in your sewing tool arsenal, and that may include at least one pair of pinking shears. These specialty shears have blades that cut fabric in a mini-zigzag or sawtooth pattern instead of just a straight line like most shears. But, how do you use these funny-looking shears?
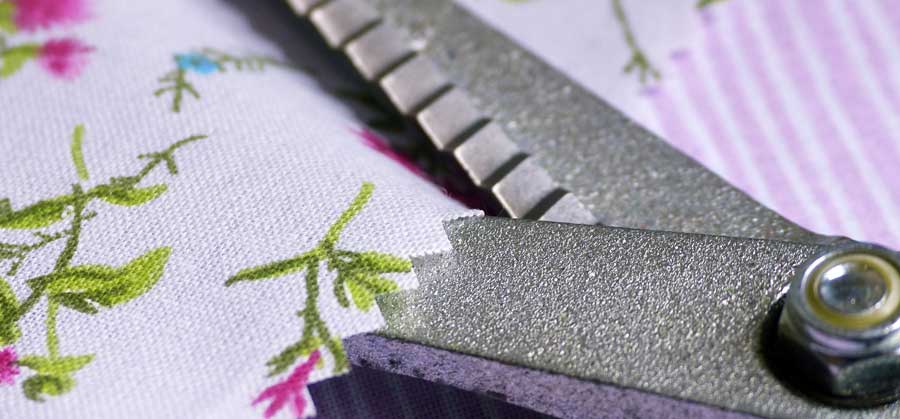
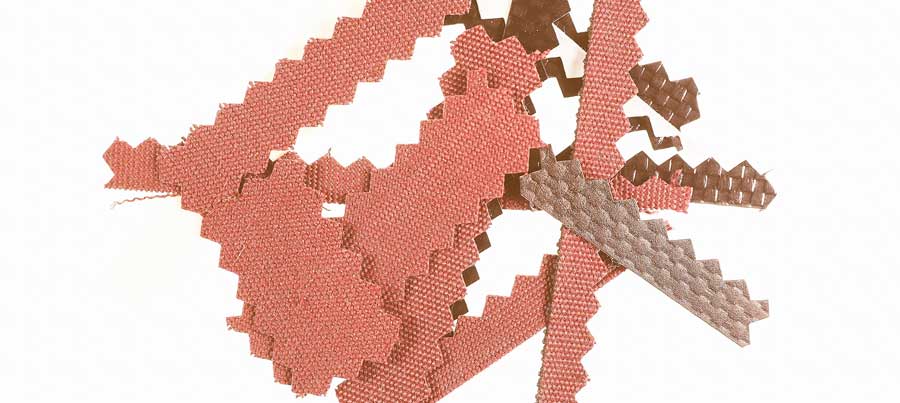
 If you wander into the scrapbooking department, you may see paper edgers—these small scissors are designed for use only on paper and cardstock, not for fabric. The blades on these edge finishers may look like pinking, scallops, waves or more elaborate trim options, but they will not cut most fabrics cleanly.