


November 16 is National Button Day! Buttons can be utilitarian, decorative, functional, collector’s item, or works of art and this special day is a celebration of buttons, whether they are in a tin in a drawer, attached to a garment, or displayed in a competition. National Button Day was founded in 1938 by the National Button Society and recognizes button collecting as an organized hobby. Watch our video interview with Jerry Dawson with Benno’s Buttons and see some of his unique buttons, then ASG members are invited to take advantage of a 15% discount from Benno’s Buttons using the code found in the Special Offers area of ASG.org.
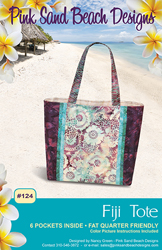
What I’m Sewing: Pink Sand Beach Designs Fiji Tote
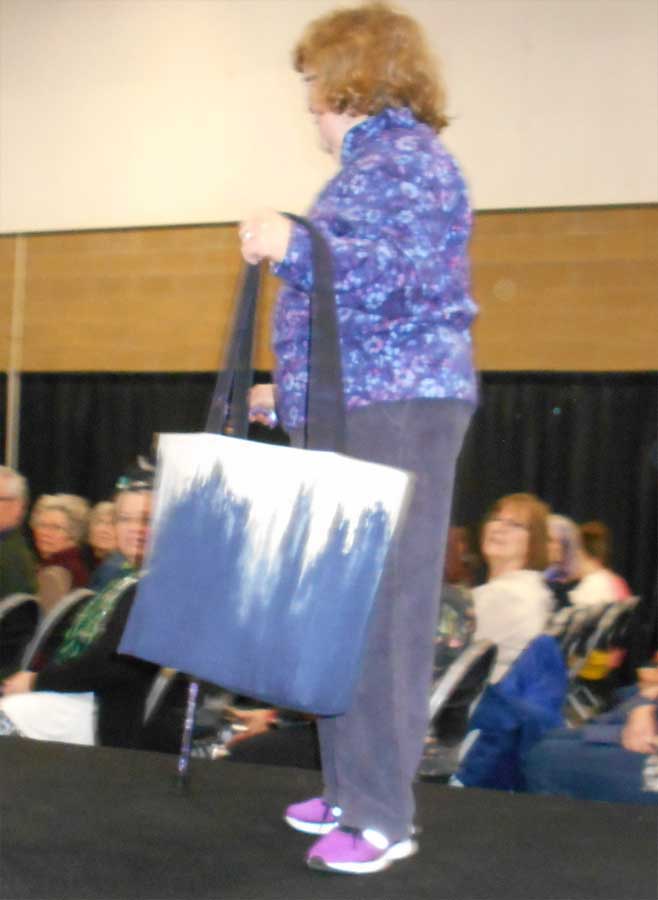
Charlotte Trayer from the Seattle Chapter of ASG created this roomy, fat quarter friendly tote bag.
 Q. Item Created
A. Tote bag
Q. Independent Pattern Designer
A. Pink Sand Beach Designs
Q. Name and Number of Pattern
A. #124 Fiji Tote
Q. Fabric Used:
A. Cotton/linen for exterior, Japanese cotton print for lining, other cotton fabric for trim
Q. Special Embellishments/Notions Used
A. A Czech glass bead on the inside, to fasten a strap for my water bottle tote
Q. Skill level required?
A. Medium
Q. Are the instructions easy to follow?
A. The instructions were very easy to follow. It did use some Pellon products with which I wasn’t familiar. In the second rendition (in the first tote, I used all cotton fabrics from my stash), I did make one substitution and changed a couple of things about it.
Q. Are you pleased with the finished result? Did it meet your expectations?
A. Very much so to both questions. I receive compliments whenever I carry either tote.
Q. Did it look like the picture?
A. The first one did as I made it exactly according to directions to test the pattern. The second one is similar, but with changes listed below.
Q. Did you make any modifications in the pattern?
A. I made modifications on my second tote. First, I used a solid fabric for the exterior instead of piecing it as the pattern directs. Then I made the handle a little longer so I could put it over my shoulder. I also added a strap with button/buttonhole to the interior–the strap goes thru the handle of my water bottle tote (which I also made), to hold it upright. Finally, I made a slight change to the spacing of the stitching on the pocket panels so that the center pockets would be a little wider.
Q. Are there any changes you would have made?
A. None, other than the handle length, etc. mentioned above. Although, next time I may add an exterior pocket to the center panel.
 Q. Did the pattern teach you any unique or special techniques?
A. Just working with the Peltex, which is very stiff! Sewing the corners was a bit of a challenge for that reason.
Q. Would you make this again?
A. Probably.
Q. Would you recommend this pattern to others?
A. Yes!
Pattern Link: http://www.pinksandbeachdesigns.com
~ Rosemary Fajgier
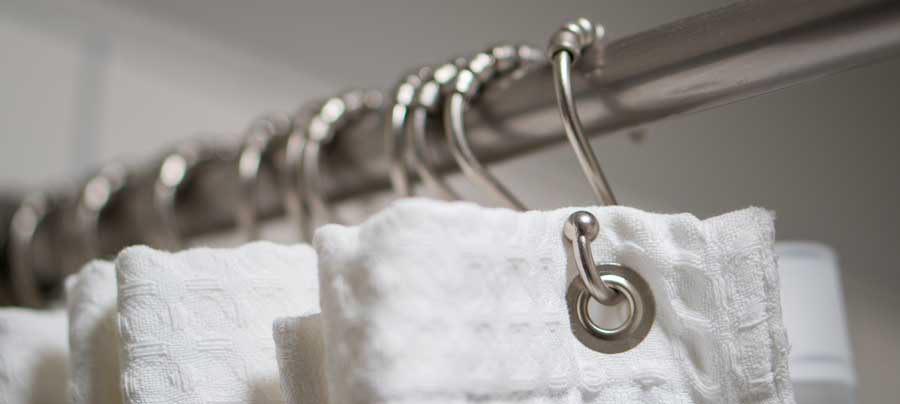
Shower Power: Sew a Fabric Shower Curtain
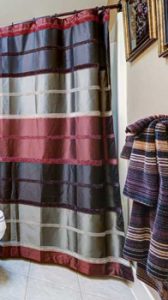 Nothing’s more fun than sprucing up your home and as sewers, a little refresh is easy to do. So, why not start in the bathroom with a fun fabric shower curtain!
- Choose a bold print, fabulous stripe or even a luscious solid cotton or polyester fabric.
- Decorator weights work well and often come with coordinates for window treatments.
- A standard size shower curtain will take 5 yards of either 45” or 54” fabric; if you opt for a wider fabric (like 108” or 110”) then you’ll need only 2 ½ yards.
- Remember that you may need extra fabric if you have a print that requires matching.
A standard shower curtain is 72” square, so be sure to measure your tub/shower before you buy fabric and adjust as needed.
Preparation
From 45” or 54” wide fabric, cut two panels 88” long, trim the selvages and seam the lengths together. Press the seam open. Trim the seamed piece to 80” wide. Use the extra fabric to trim towels or make a fabric basket for the bathroom.
Making the Curtain
Press a double 2” hem on each side of the curtain and stitch in place close to inner fold.
Press up a double 4” hem along the bottom of the curtain and stitch in place close to the upper fold. To make the shower curtain hang smoothly, include a plastic covered weight in each corner of the hem, or if your tub is metal, a plastic covered magnet for a sure hold.
To make the top hem, fuse a 4” strip of medium-weight interfacing to the wrong side of the upper edge, abutting the seams as needed for the entire width. This provides support for the buttonholes or grommet openings. Press a double 4” hem at the top and stitch close to the lower fold.
Top Treatment
Shower curtains can have one of many options at the top, but a 72” curtain should have 12 openings for attachments of some sort, either metal or plastic hooks or rings. The openings can be stitched buttonholes, or metal or plastic grommets—either large or small–so choose your desired feature. You can even choose spring clips and avoid creating holes altogether.
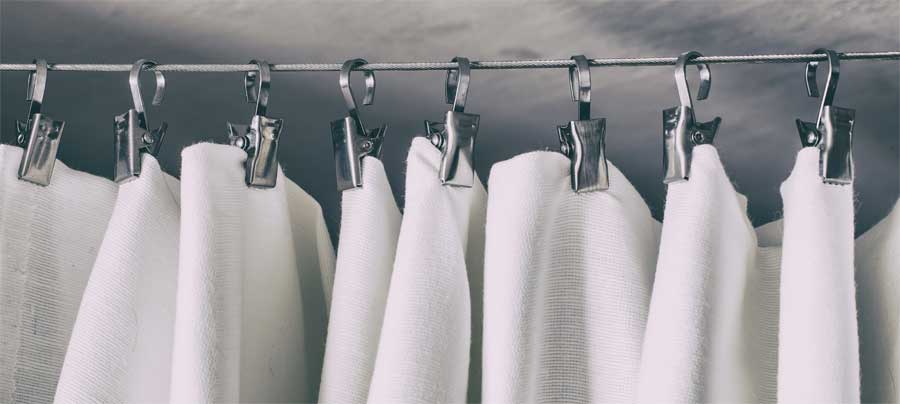
If you opt for buttonholes, you can hang the vinyl liner on the same rod using the hook/loop set. If you opt for large grommets, then you’ll need a separate rod for the vinyl liner.
For buttonholes, evenly mark 12 hole placements 1” from the finished upper edge. Stitch a 1” long buttonhole at each mark. For quick and easy marking, lay your vinyl shower curtain liner on the wrong side of the fabric curtain and mark through the liner openings so they’ll align. Carefully cut open the buttonholes after stitching.
If you’re using either small or large grommets, follow the manufacturer’s instructions for insertion.
Decorating idea
As easy as it is to make a shower curtain, stitch some for different seasons and holidays to change up your décor. Or if company is coming, try a different theme they can relate to. Personally, we have friends who love everything Disney, and a Mickey print shower curtain brings a smile to their faces when they visit.
~Linda Griepentrog
Linda is the owner of G Wiz Creative Services and she does writing, editing and designing for companies in the sewing, crafting and quilting industries. In addition, she escorts fabric shopping tours to Hong Kong. She lives at the Oregon Coast with her husband Keith, and two dogs, Yohnuh and Abby. Contact her at .
Sew Special Gifts
 It’s never too early to start thinking about fun little holiday giftables for your sewing BFFs. They don’t have to cost a lot, but the sentiment of “thinking of you” is what’s important. So check out some fun things we hope our sewing besties might think about sending our way!
Sewing & Vintage Thimble Necklace
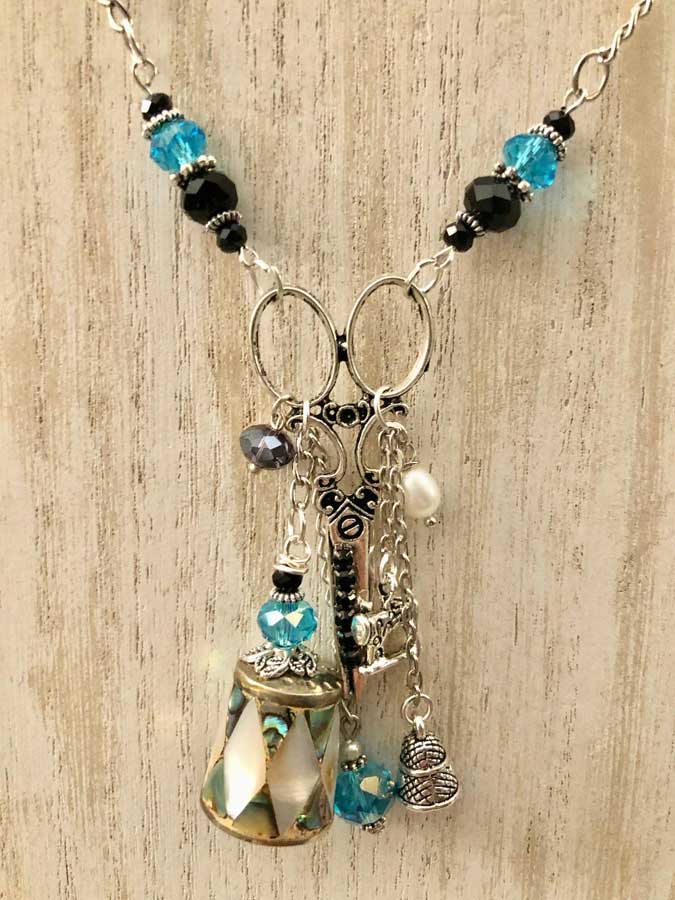 Letting the world know you love sewing is easy with these beautiful on-of-a-kind jewelry pieces. Some come with scissors, some with thimbles and all with heirloom looking sewing notions on beautiful chains for dressing up or just wearing to your favorite ASG group meetings. Most components are repurposed, from thimbles, beads and buttons to jewelry findings, bits of fabric and even chandelier parts and skeleton keys. In addition, the company will create custom pieces from your own components—a great way to showcase your vintage sewing items or special family items. Sizes and metal finishes vary, but I bet you can’t settle for just one. www.blingmyneedles.net, prices vary
BladeSaver Thread Cutter
This colorful plastic holder turns used rotary cutter blades in a practical thread cutter for sewing. Whether you’re a quilt bock chain piecer or sewing multiples of a charity project, this handy cutter sits next to your machine and separates pieces in no time. Available in multiple colors. www.purplehobbies.com, $18
Threads of Life
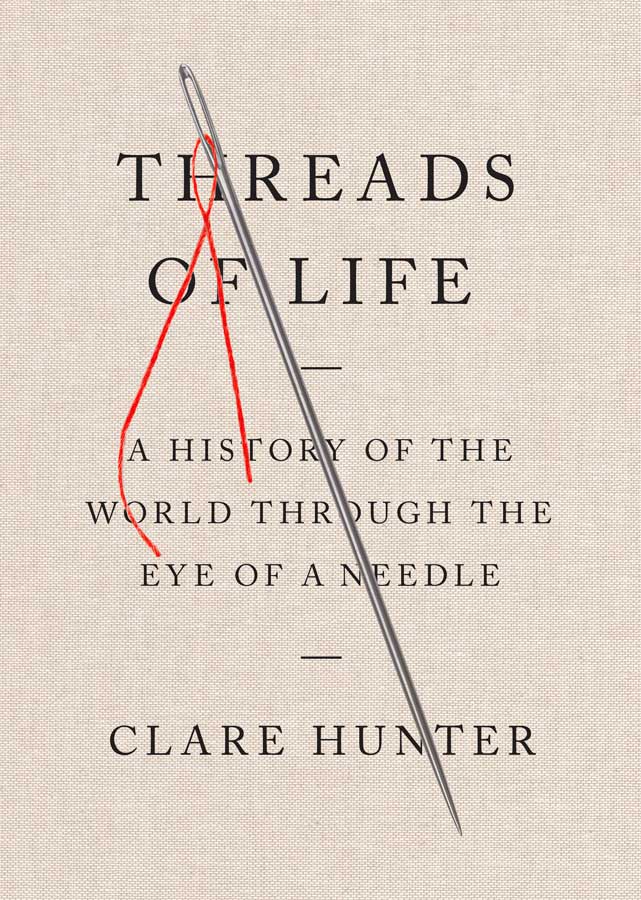 Learn about the importance of sewing and needlework in our world history. From the famed Bayeux Tapestry to the traveling AIDS quilts, sewing and stitchery have been prominent means of expression for both men and women for centuries. Snuggle up for some great reading about our favorite pastime. Available in both hardcover and paperback; 320 pages. www.abramspress.com, $26/$17
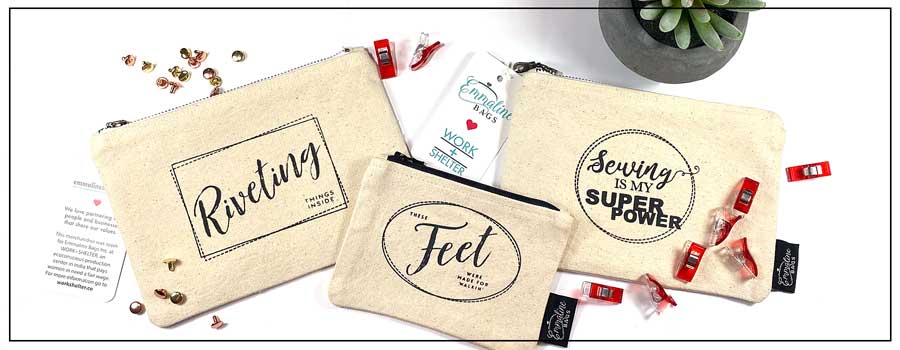
Clever Zippered Pouches
You can never have enough zippered pouches, especially if you travel with your sewing friends, as they’re an easy way to keep things corralled. These cute 3 ¾” x 5 ½” and 7 ½” x 5 ½” lined zippered pouches are made of 100% organic cotton with three clever quips—Riveting Things Inside, Sewing is my Superpower and These Feet are Made for Walkin’. They’re ideal for storing presser feet, small sewing tools, spring clips and even basic cosmetics. These bags have a humanitarian side as well as they’re made at WORK+SHELTER in India, which pays a sustainable wage to the women who make them. www.emmalinebags.com, $12.99
Sweet Thoughts
Sewers and food always seem like a match made in heaven, so why not have a little fun with it? Gift these cute cookie stamps and set a fun theme for your next sewing get-together. The grouping included three food-grade silicone stamps, an acrylic handle and a yummy cookie recipe. The stamps say “Sew Happy,” “Material Girl” and “Sassy Stitcher.” www.sayitwithapplique.com, $12.95
True Confessions
 OK, admit it…you and your friends are addicted to fabric, so why not proudly tell the world about it with this fun handcrafted sterling silver charm? Add the 13/16” pendant to a chain, cord or a charm bracelet. If you have other “issues,” there’s probably a necklace for that as well, or the company can do customized pendants to meet your needs. www.jessicas-gifts.com, $18
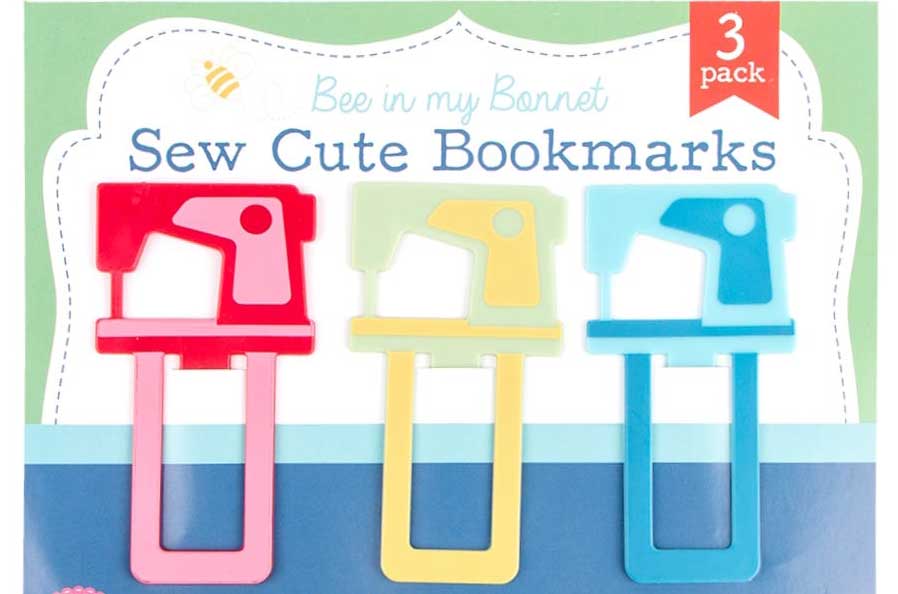
On your Mark…
Whether you’re marking your favorite spot in a new book, or highlighting where you are in the pattern directions, this set of three die-cut vintage sewing machine Sew Cute Bookmarks is handy as can be. The machines are made of plastic and measure 1 ¾” x 3 ¼” each. They’ll tuck right into anyone’s holiday stocking! www.itssewemma.com, $9.98
Card Tricks
If you’re looking for a sewing or quilting themed card for your sewing BFF, look no further than this site. The cleverly quipped 4 ¼” x 5 ½” offerings are blank inside so you can personalize them. One favorite (food related, of course) is “All you need today is a little bit of chocolate and a whole lot of fabric!” www.katicupacke.com, $4.99
~Linda Griepentrog
Linda is the owner of G Wiz Creative Services and she does writing, editing and designing for companies in the sewing, crafting and quilting industries. In addition, she escorts fabric shopping tours to Hong Kong. She lives at the Oregon Coast with her husband Keith, and two dogs, Yohnuh and Abby. Contact her at .
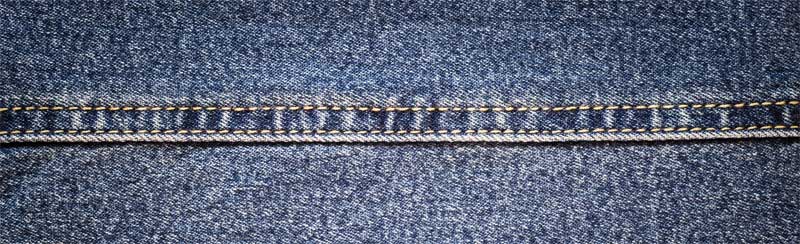
Denim Dynamics
One of America’s most beloved fabrics, denim can be a delight to sew if you know the tricks.

Tools
- Always use sharp scissors or a new rotary cutter blade to cut clean edges on this dense fabric.
- On heavier denims, use spring clips to hold edges together for sewing, as opposed to pins which may bend.
- If you have a walking foot, use it to help keep bulky layers from shifting.
- A definite must—a denim/jeans needle with a sharp point for piercing the closely woven fabric.
- For decorative topstitching, use heavy thread and a topstitching needle.
Preparation
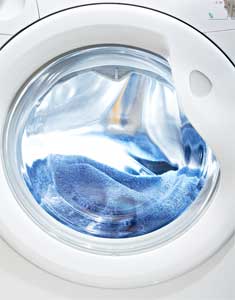 No doubt about it, denim shrinks, so pre-wash and dry it at least once. Wash it alone or with similar colors to prevent dye transfer.
- Use a with-nap layout for your pattern to avoid shading. Denim’s twill weave is really a one-way design.
- Once your pieces are cut, serge or zigzag all the edges to prevent fraying.
Seaming
Standard seams are ideal for denim and pressing seam allowances open creates a flat finish. Other options include pressing the seam allowances to one side and topstitching, or creating a real flat felled seam aka Levi’s look.
Topstitching denim helps to keep the bulk controlled. Look for matching or contrasting threads, or a blended denim thread for this purpose, and heavier weights for more prominence. Topstitch with a single, double or triple line of stitching.
A twin denim needle with 6mm spacing will create two parallel rows of topstitching in a single pass.
Hemming
A single-layer topstitched hem is easy to do in denim—just serge or zigzag the hem edge and topstitch in place. A double hem is also an option for lighter weight denims, but may be too bulky for heavier ones.
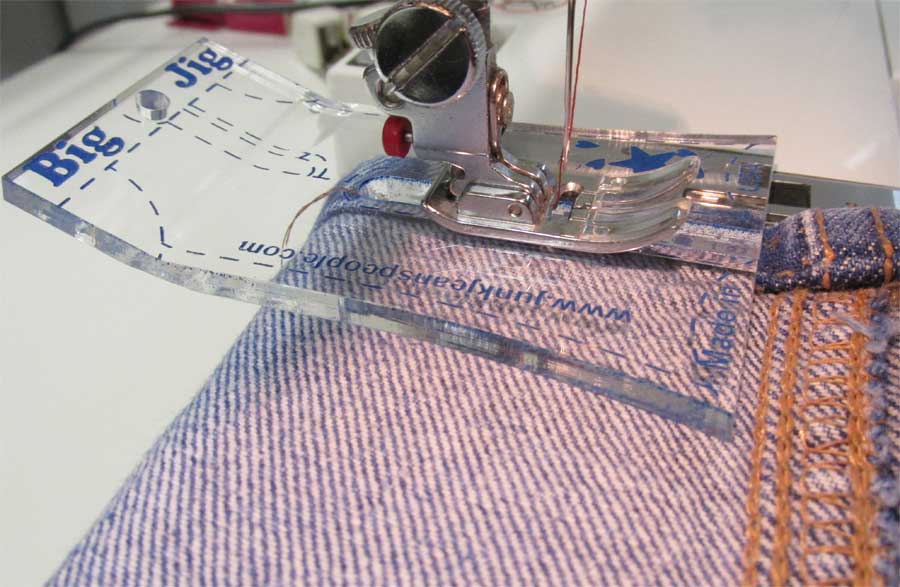
The biggest issue with hemming denim is crossing perpendicular seams, as there are multiple denim layers to contend with—feeding may not be even and stitching may become uneven due to the bulk. However, clever sewers have a tool to help with that situation, like the Big Jig. These are small plastic tools designed to level out the layers when stitching across bulky pile-ups. Simply place the tool under the presser foot at the start of the bulk and when the foot is level with the highest part, move it to the front of the foot to help with the decline.
Trimming out seam bulk and even pounding layers with a rubber mallet will also help reduce the bulk of multiple denim layers.
Fun touches
As noted, denim is prone to fraying, and you can use that characteristic for fun trims and design features on a denim garment. Sew a matching or contrasting line of straight stitching at the fringe depth you want, then pull threads up to it. Most denims have white threads in one direction and colored in the other, so choose which ones you’d like to expose.
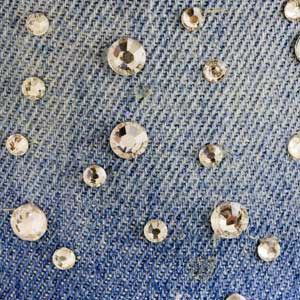 Rhinestones and nail heads make perfect embellishments to add bling to your favorite blues. Look for the easy iron-on version for quick application.
Looking to copy your favorite Calvin’s? Add bartacks to pocket corners. Simply set the machine for a dense zigzag and stitch a few stitches to make the “bar” about 1/4” long. Check your machine: it may have a bartack setting built in.
~Linda Griepentrog
Linda is the owner of G Wiz Creative Services and she does writing, editing and designing for companies in the sewing, crafting and quilting industries. In addition, she escorts fabric shopping tours to Hong Kong. She lives at the Oregon Coast with her husband Keith, and two dogs, Yohnuh and Abby. Contact her at .
- « Previous Page
- 1
- …
- 49
- 50
- 51
- 52
- 53
- …
- 79
- Next Page »
