Do you know the different types of pins?
 Pins may not be the most exciting item in your sewing box, but they are a vital tool to anchor your fabric when you are sewing. When choosing the type of pin to use, there are several elements that should be considered as each type of pin is made with unique characteristics that target a specific purpose, depending on the type of project, the fabric used, or even how it’s going to be sewn. We will look at:
- Head style
- Length
- Thickness
- Point style
After a review of the characteristic of each, we’ll suggest four common pins you may want to keep in your sewing box to be prepared for almost any type of project.
Head Style
Pins come in three basic head styles, each with a different purpose. The choice comes down primarily to your need for visibility and ironing.
- Flat/No Head: This type of head can be difficult to see but has the advantage of working well when you need to iron the project with pins in place since there is no head to melt. It is also a good choice for hand sewing as there isn’t a head for your thread to catch on.
- Glass: Like flat head pins, glass pins are good for projects which need to be ironed with pins in place because the glass heads will not melt on the fabric. They also have the advantage of better visibility since there is a colored head that shows more prominently than flat/no head pins.
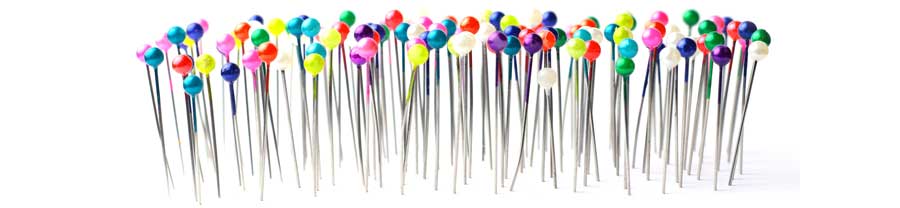
- Plastic: These pins come in all sorts of brightly colored ball or flower shaped heads and are the easiest to spot on your project. If you keep that hot iron away from those plastic heads, they can be a great choice.
Length
Pin length is tied to the thickness and layers of fabric you are working with. The thicker the fabric and the more layers you are working with, the longer length pin you should choose.
- Short and stubby: The shortest pins are about ¾” long. These work best for small delicate projects. Due to their short length, they are not well suited for anything other than the sheerest of fabrics.
- Universal/dressmaker length: This is one of the most common lengths and will work well on most fabric types and thicknesses. They are 1 – 1 ½” long which is long enough to pierce through most fabric types but short enough to avoid bending too much as you pin through the layers.
- Quilting length: These pins are longer since they need to handle multiple layers of fabric, as well as batting. They are usually 1 ½ – 2” long which can easily manage all those thicknesses.
 Thickness
Pin thickness choice will be impacted by the delicacy of the fabric you are working with. Pins make holes so your fabric’s ability to recover from those holes drives your choice. The general rule is the finer the fabric, the finer the pin.
- .4mm: This size passes beautifully through the finest of sheers.
- .5mm: These may be called extra-fine, super-fine, silk, or satin. They are recommended for fine, lightweight fabrics, including some sheers.
- .6mm: Most all-purpose pins are labeled fine and are best paired with medium-weight fabrics.
- .7mm or .8mm: These may be harder to find, but the diameter is great for thicker fabrics like heavy wools, denim, and quilted layers. Just remember that they will make larger holes.
Point Style
The point style choice is directly impacted by the fabric you are working with, in particular woven vs. knit. Think about how you choose your sewing machine needle — one type for knits and other types for different wovens. The same logic applies in choosing the right pin.
- Sharp: These all-purpose points work well with most woven fabrics in all but the more delicate weights.
- Extra-sharp: These have a more defined, tapered point that will pass cleanly through the more delicate fabrics.
- Ball point: Ball point pins are intended only for use with knits. The point is rounded so it slips between the loops of the fabric and does not pierce or pull the yarns.
What should you have?
 Now that we know about the various elements of pins, let’s get to the point for what is a good mix to have in your stash of pins. With this variety, you will be well prepared to handle almost any project.
We suggest:
- Glass Head: Keep a stash of universal glass head pins on hand. They will probably be about 1.5” long and .6mm thick which is a great choice for most projects and won’t melt if you touch them with a hot iron.
- Ball Point: Keep a stash of these for your knit projects. They are likely to be about the same length as your glass head pins but are likely to have a plastic head since knits are much less likely to be ironed with a hot iron.
- Silk: If silk or similar delicate fabrics frequent your projects, this is a good pin to include in your stash. In addition to having a delicate shaft, they usually have a flat head or no head so ironing over them is not a problem. Always test your pin on a scrap to see how the fabric recovers and keep pins within your seam allowance to help avoid unwanted holes.
- Quilting: Even if you are not a quilter, these are good pins to include in your stash. They usually have plastic ball heads, but melting isn’t usually a concern since most ironing on quilt projects happens before and after pinning. And because quilts are usually made with a sturdy cotton, your fabric should be able to handle the heavier weight of the pins.
Now that you know the point of pins, you should be able to choose the right type of pin to use for your project.
~Sheryl Belson, ASG