


This quick video has 3 tips for sewing with vinyl.
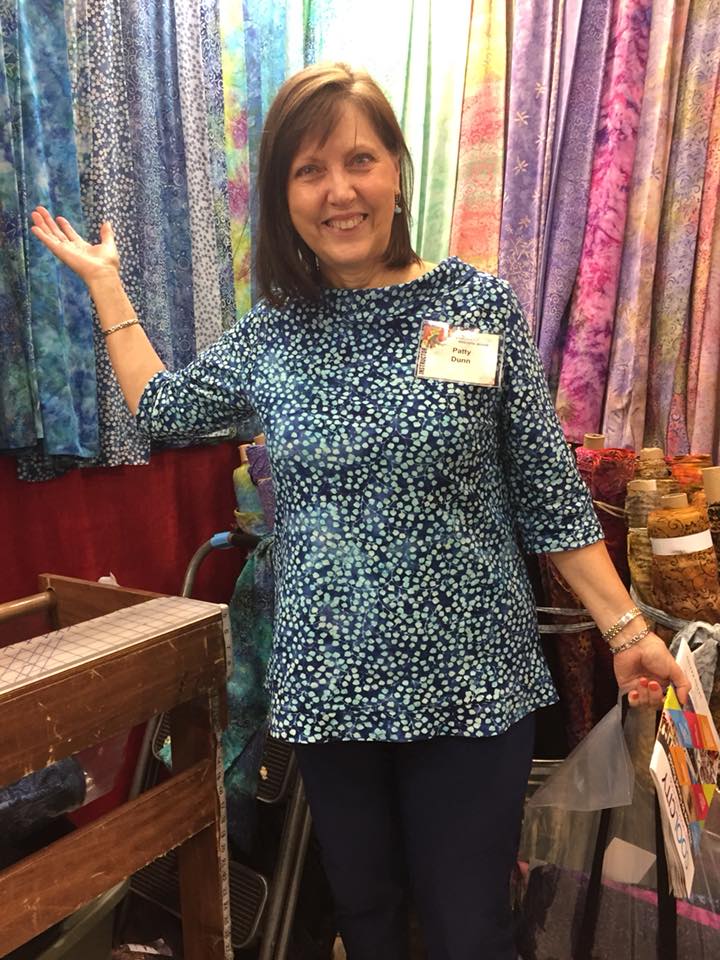
Meet Patty Dunn with All Dunn Designs
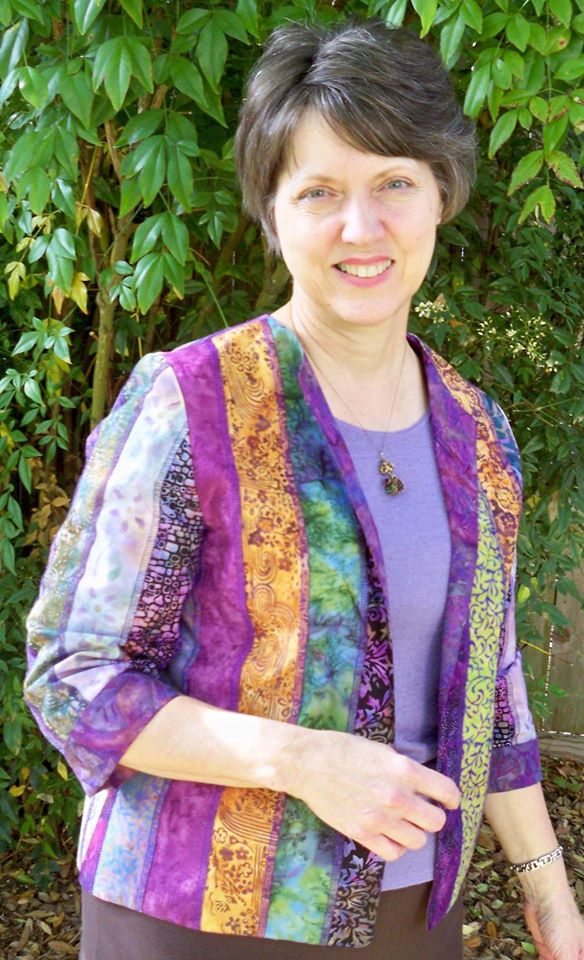
This month we are pleased to turn the spotlight on a very special independent designer, Patty Dunn of All Dunn Designs and part of the Corpus Christi Chapter.
 Many of you may already know the All Dunn Design line from ads in sewing magazines, from her nine years of sewing shows on PBS, or from her many classes she has taught at our ASG conferences. But did you know that it was just such a class that gave birth to the Corpus Christi Chapter 24 years ago? Patty taught a fitting and tailoring class at the local junior college and the students wanted to stay in contact and continue to see each other after the class. Patty explained, “So I agreed they could come to my house once a month. The group started with 9, and there were 20 in just a couple months. So we rented a space at the art center. It grew real fast. I had heard about ASG, presented it to the group, and we signed up. I think we had been going for about a year when we decided to join.”
It started with a Christmas gift
And how did Patty develop her interest in sewing? She credits it to the Christmas she turned 9 when her parents bought her a child’s, metal, hand cranked sewing machine. That started her sewing clothes for her bride doll that she still has today. By the time she was in 8th grade, she was making her own clothes with a little help from her Home Ec. Class.
Patty was also inspired by a friend of her mother’s who had a sewing room. She says, “When I saw everything she was creating and the machines all set up with fabric everywhere, I was amazed! I was probably around 7 years old, but it really impressed me.”
In the 1980’s, Patty became a certified mechanic for Bernina, Viking, and Janome sewing machines and was trained in sales for those machines. She continued her sewing education by taking classes at various conferences.
From dolls and bags to something more
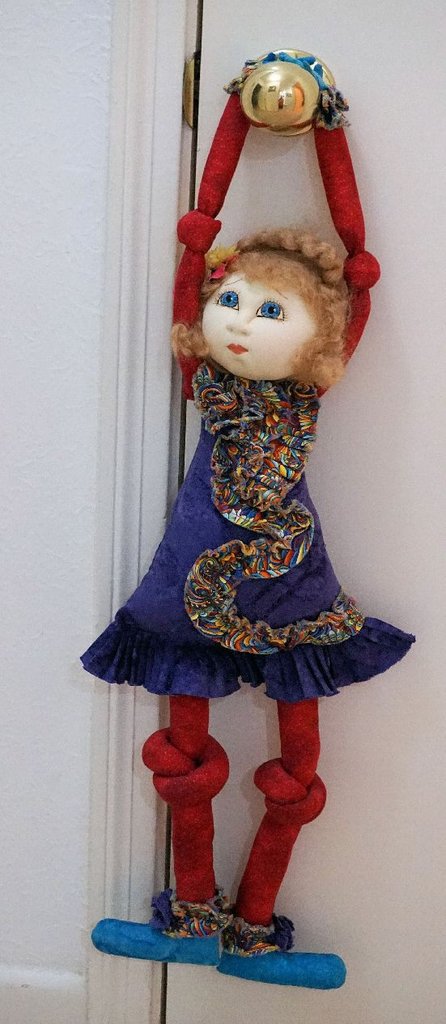 When asked how she got started in her own business, Patty explained, “I began by selling dolls and bags at craft shows. Then people began to want me to sew for them. Many of my clients wanted me to copy something they loved or something they saw in a magazine. Many had unique fitting issues, so I began making a basic shell that fit them, and then I designed from that. In the late 1990’s, I began making patterns for clients to sew, and from there I began my own pattern line.”
Her patterns are simple, easy to make designs that differ from the big four. She explains, “I use a more realistic base pattern that starts narrower at the shoulders and gives more room in the hips. My patterns are not for the models on the New York runway, but then, who really looks like that? Our bodies have changed to much fuller proportions.”
Patty offers a 15% discount to all ASG members. See the Special Offers page in the ASG members area for more information.
Patty credits her inspiration for her designs from clothing in stores, catalogs with creative clothing, and internet browsing. She says, “You never know where you might find inspiration. There is a shop in the Houston airport I always love to go in when I’m there. It might be the embroidery or the color combinations, sleeves, or collar. Just one thing can be incorporated into something I might try. Designing is my favorite aspect of sewing, but teaching is also a favorite. I’m thrilled when I can help someone be successful in what they create. And I love to problem solve, just NOT with math.”
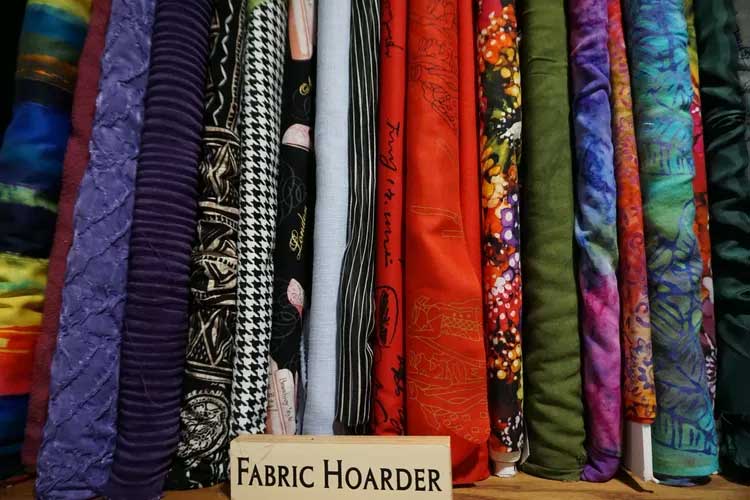 Like most of us who sew, Patty laments the changes in local fabric stores with so many of them going out of business. “The fabric stores change with the trends, now believing that people aren’t sewing clothing anymore. I hate the concept that people don’t sew because it is cheaper to buy clothes already made. Although this is now true, it is discouraging. Thread can cost as much or more than we used to pay for a yard of fabric.”
An eye to the future
 Looking to the future she says, “At some point, and I already see it changing, people will respect you if you are able to sew. We have become a society of ‘get everything quick and easy.’ Knowing a skill like sewing will be valuable because EVERYONE wears clothing and no matter where they get it from, someone ran a sewing machine through the fabric. I believe someday there will be more recognition for the value in knowing how to put a garment together from beginning to end and people will pay well for that service. More independent designers have become respected for their expertise.” She went on to praise the blogs and sharing that are so popular on the internet and noted the fabulous new machines and sewing tools that have made it more convenient to sew.
We are pleased to have Patty as a part and know she has much more to contribute to her craft, for after all, she is not “done” yet. (Sorry, I couldn’t resist!)
To see Patty’s designs and to get fitting and sewing information, she provides two links:
- Patterns: www.alldunndesigns.com/
- Fitting and sewing: www.patternmd.com
Patty offers a 15% discount to all ASG members. See the Special Offers page in the ASG members area for more information.
~ Rosemary Fajgier
The American Sewing Guild is truly fortunate to be able to count many gifted sewing designers and instructors among our friends, members, and supporters. Throughout this coming year we will be featuring some of them in our Notions Blog. We hope you will enjoy reading about them and take the opportunity to get to know them better and explore their many talents by visiting their websites, taking their classes, and discovering the wide variety of designs they bring to the home sewing market.
Oh, the Places Our Sewing Will Go
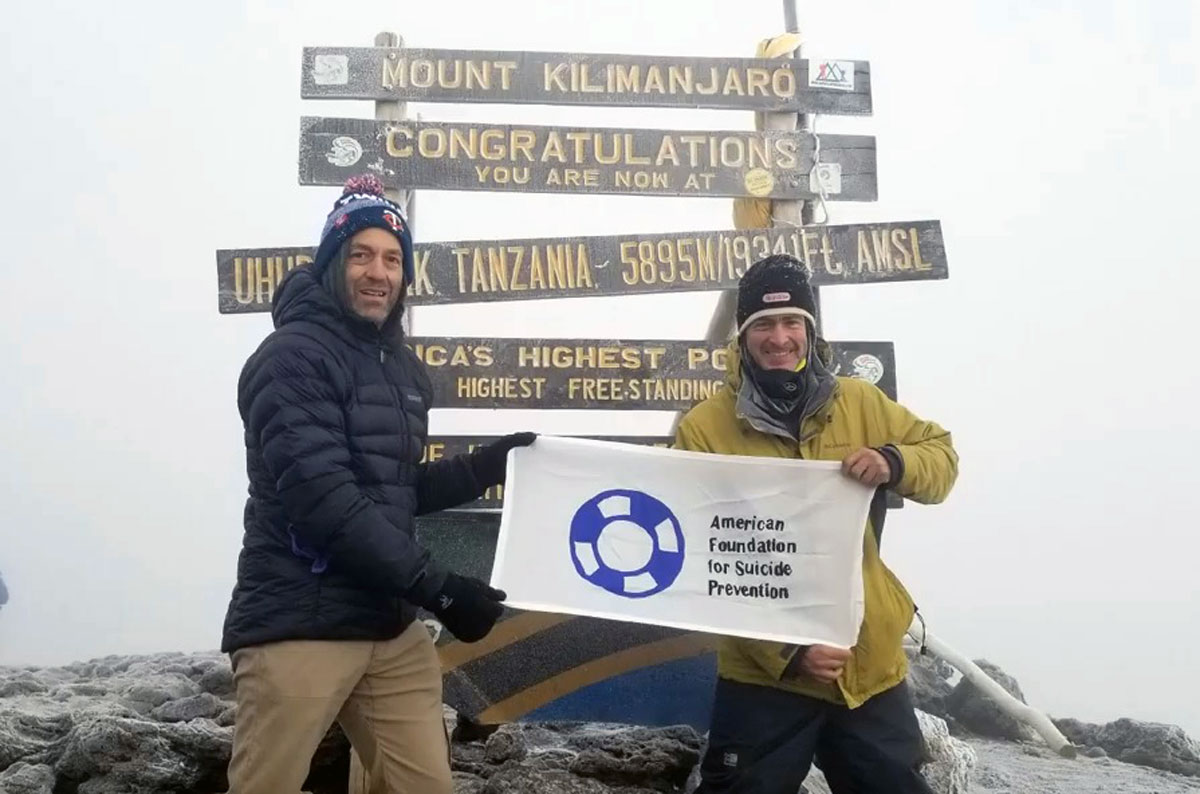
When my 40-something son, Todd, invited me to join him on a Mount Kilimanjaro climb, I thought about it, laughed, and then declined. I am too much of a risk, even though others my age and older have done it. When he said he would like a banner of some kind to wave when he reached the summit, I knew I had a job!
Climbing for a purpose
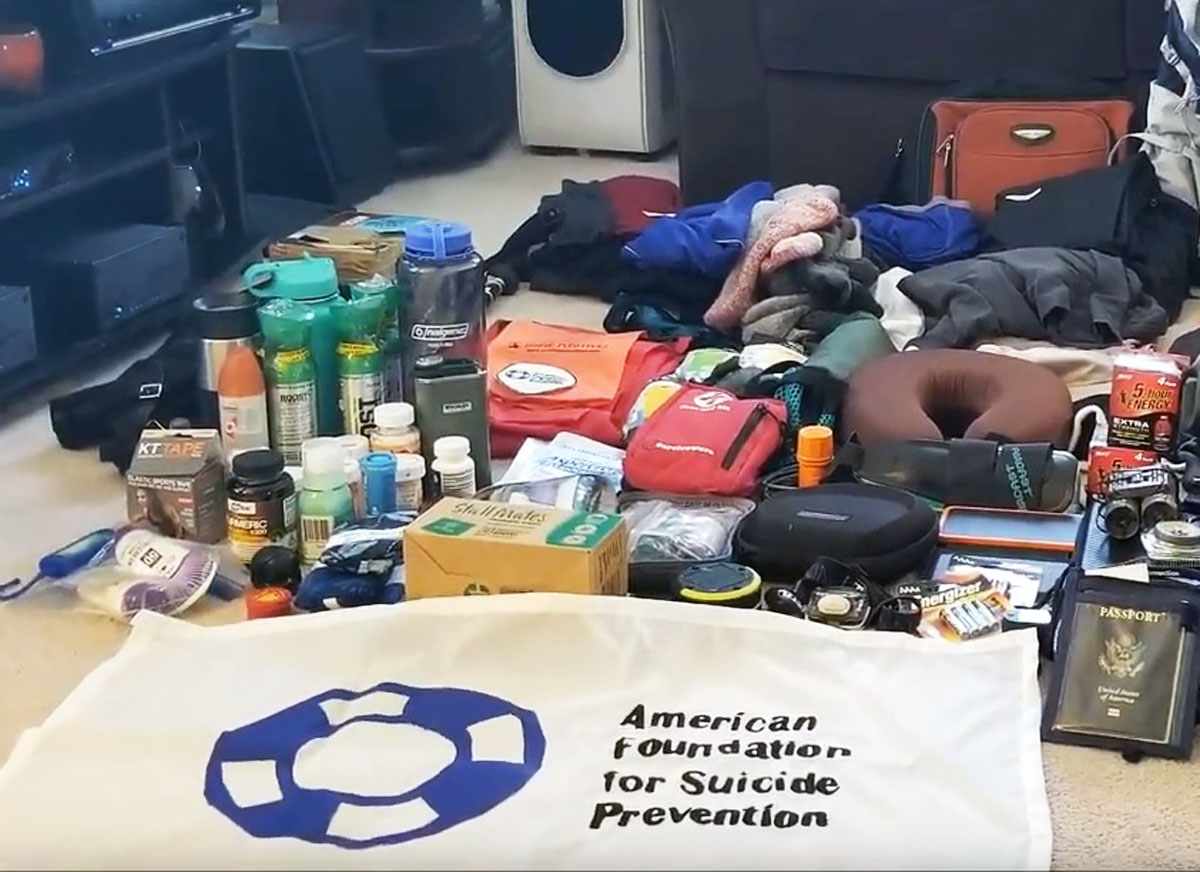 Todd was training and climbing for a purpose… suicide prevention. And yes, he had recently lost a high school classmate. He would pay all his expenses himself and was hoping he could raise money for the American Foundation for Suicide Prevention. It took me a while to realize that their logo is a life preserver. I found the logo on the ASFP web page and copied, enlarged and printed it, and used Steam-a- Seam to trace it and iron it to a piece of nylon ripstop. I wanted it to be lightweight, yet big enough to be a banner. Sewing down the letters was a bit tedious, but he was really excited about it, so that gave me energy. In the meantime, I also sent the ASFP logo to a digitizer and was able to embroider out a couple of patches, which he could put on his jacket, as did his hiking partner. He had invited several people to train with him.
“Since he was raising money for a worthy cause, I started thinking about what else I could do with my trusty sewing machine and years of sewing guild meetings, where we share skills and ideas.”
Aha! Pocket Tissue covers! I have great fun making these and giving them out! I printed out the AFSP logo, using the mailing label size, and June Tailor Colorfast Sew-In Fabric Sheets for Ink Jet Printers. Now I had the logos on cloth! So, I cut them apart and added dark blue batiks around them, in order to make pocket tissue holders (definitely from a Neighborhood Group meeting!!).
I also started obsessing about a picture of the mountain… so once again I went to the computer and printed an image out on cloth, added some more grass and some sky from my stash, and made it an outside pocket on a bag which would be big enough to hold the banner.
I made about a dozen tissue holders and mailed them and the new bag to Todd in Massachusetts so he could give them to friends and co-workers who made donations to AFSP.
Time to climb
In the meantime, he was training. Every weekend was devoted to climbing somewhere, and every bite of food was recorded on an app on his phone. He used a special mask that helped him prepare for the altitude sickness that interferes with many climbers. He got his shots. He made his reservations. He chose a plan that took eight days and used a team of guides and porters, who carried the tents and food, prepared the meals and took care of the details. Todd and his partners carried their personal gear. One of his partners made a valiant try at the climb, but when they reached the high altitudes, her asthma made continuing impossible and she turned back (with one of the porters as a guide). Todd texted and even called during the climb (of course at odd hours…) and had brought along a solar-powered charger for his phone. We were able to follow along, and knew which day he would summit (who knew summit is a verb?).
He has since put together a slide show and showed it to us at a celebration party after his return. Lots of pictures of the banner! I’m so glad it is over. And so proud!
~ Judy Spinney, North Jersey Chapter
Ending it All (serger stitching, that is)
We all love sergers for stitching and finishing our seams all in one operation. Those loopers and needles just seem to zing along the edges, but what happens at the ends is something to note. You can’t backstitch with a serger like a conventional machine. Do you just cut off the threads and hope for the best, or do you plan a neat finish for the threads that would make your home ec teacher proud?
There are several options for finishing the ends of serger seams, depending on the location and actual type of seam you’re using.
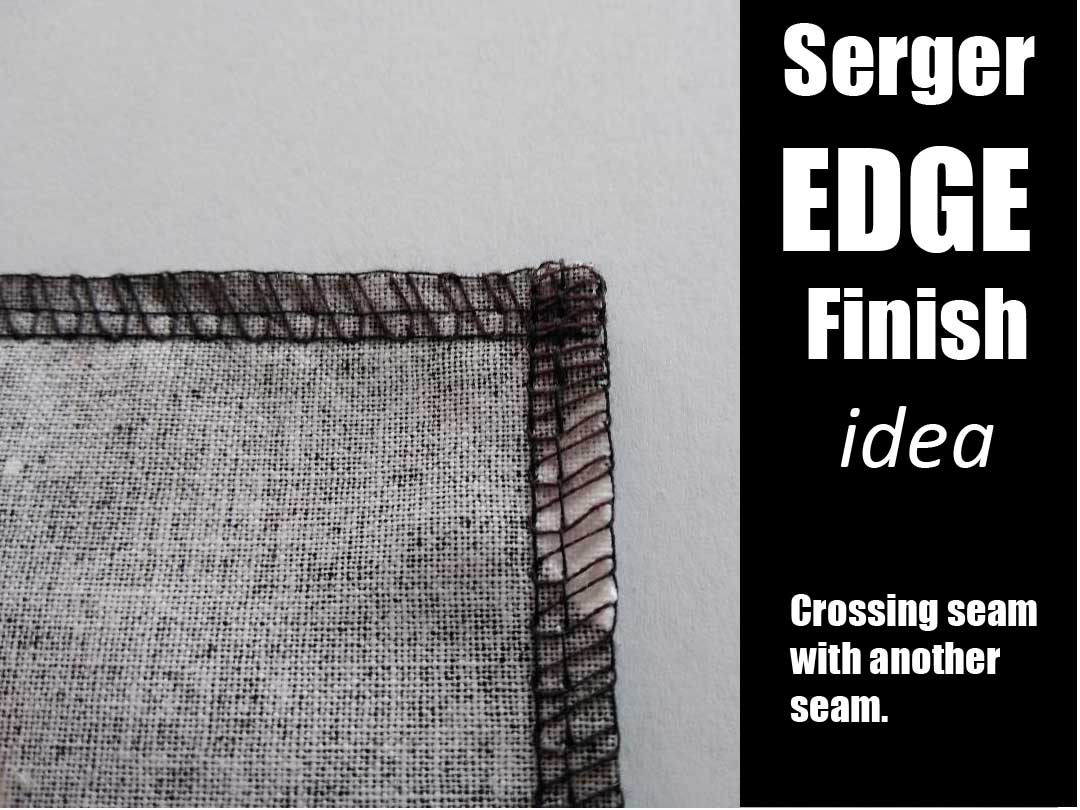 The easiest way to anchor serger threads is to cross them with another line of stitching. For example, if you’ve serged seams in a skirt, you’ll be crossing them with a waistband or facing and a hem finish. The perpendicular stitching is enough to hold the serger threads in place and keep them from raveling.
Another way to finish serger seams is to apply seam sealant to the threads, let it dry, then trim the threads close to the fabric. This is a great option for rolled hems or places where you don’t want other visible fastening of the threads. The down side of this method is that seam sealant can make the threads a bit stiff (depending on the product brand), it can be a bit messy to apply so best to do so with a pin to avoid getting it on the adjacent fabric, and you have to wait for it to dry before moving on in the construction process. (You can speed up the drying process by sandwiching the area between paper towels and pressing.)
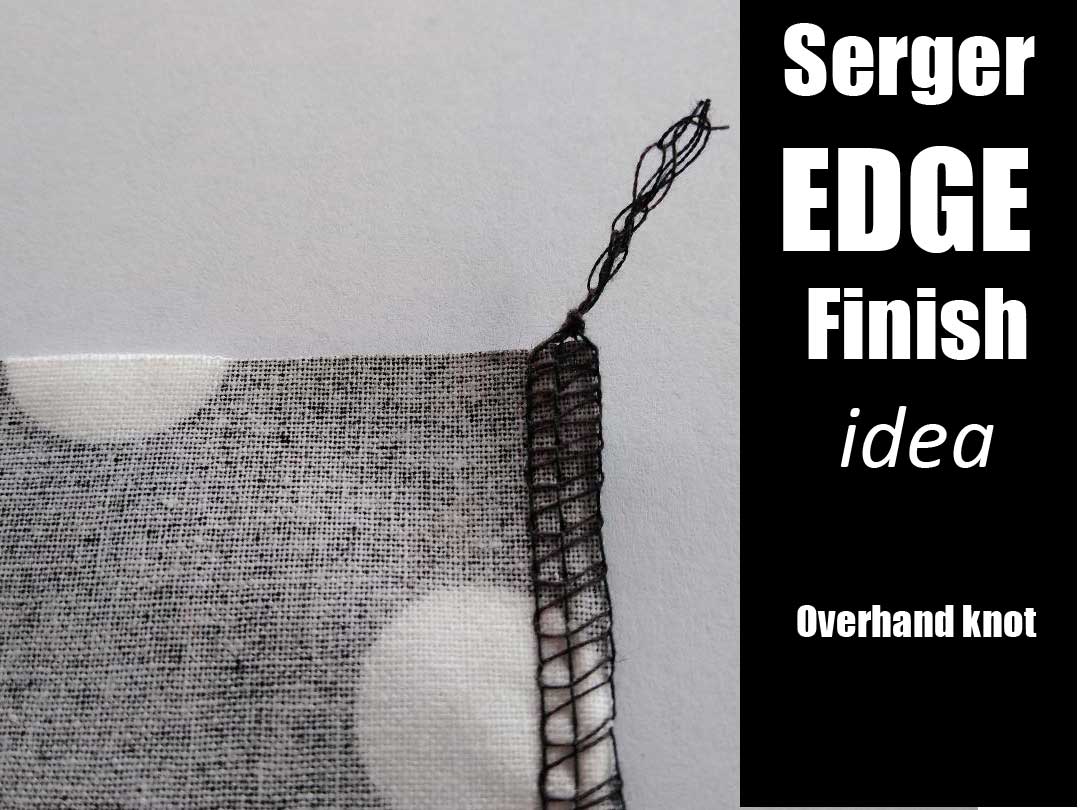 How about knotting the threads? Good idea, and it can be done two ways. First, simply tie the serger chain in a loose overhand knot, use a pin to push it down to the fabric edge and tighten the knot to secure. Cut off the thread ends close to the knot. Depending on the thread and location, this can make a highly visible fastening. Another knotting option is to separate the threads from the serger chain so that you have them paired—one looper and one needle together, and tie a small knot with the two close to the fabric, then clip the ends. This makes a more discreet knot than the overhand version, and is great for decorative threads or outside stitching.
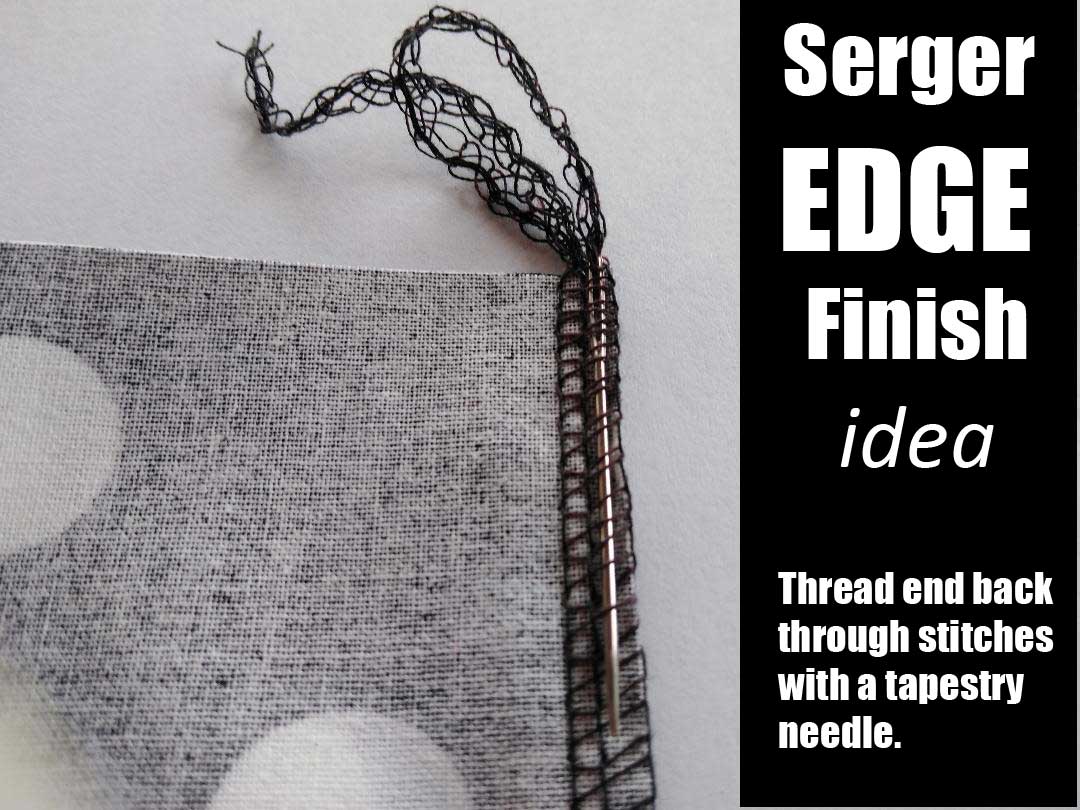 Yet another option is to thread the serger chain ends back through the serger stitch itself. You can use a tapestry needle or loop puller to slide the chain ends back about an inch through the looper stitches before trimming the ends. A needle threader can be helpful for getting the chain into the needle eye and corralling multiple threads together. {photo}
As you begin to sew a line of serger stitches, it’s easy to secure the tail at the same time, by simply lifting the presser foot and bringing it around to the top surface of the fabric. Lay it on the fabric where the looper stitches will encase it as you serge the seam. It’s important that the chain lies between the needle and the blade to avoid cutting it.
Wrapping it up
Choosing the right method for ending it all depends primarily on the location of the area you’re securing. For outside and decorative stitching, choose a method that’s as unobtrusive as possible. Inside, select a method that gives a secure finish without too much bulk for your project.
~Linda Griepentrog
Linda is the owner of G Wiz Creative Services and she does writing, editing and designing for companies in the sewing, crafting and quilting industries. In addition, she escorts fabric shopping tours to Hong Kong. She lives at the Oregon Coast with her husband Keith, and two dogs, Yohnuh and Abby. Contact her at .
Adding Ease to Your Garment
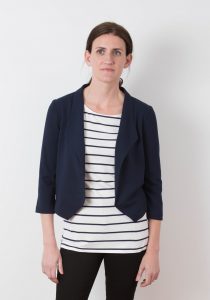
A few years ago, I adapted my knit Grainline Studio Morris blazer pattern so I could make it with some luscious silk matka. I knew I had to adjust the pattern since my fabric of choice had absolutely no stretch in it. I decided to take a tried-and-true (TNT) pattern designed for a woven fabric and “frankenpattern” the knit blazer into a woven blazer. I took some of the pattern pieces from the Archer Buttonup pattern (also designed by Grainline) and came up with new cutting lines for the Morris. I used the Archer upper back, arm scythe, and upper sleeve to redraft the blazer pattern and was just sure I had made all the pattern adjustments to shift from a zero-ease design that works with the stretch of a knit to a design that would work with a non-stretch woven. I finished the blazer and couldn’t wait to put it on only to discover it was a bit too tight across the upper back. I hadn’t added enough EASE! I know I am not the only person who has experienced this.
Can We Put Your Mind at Ease?
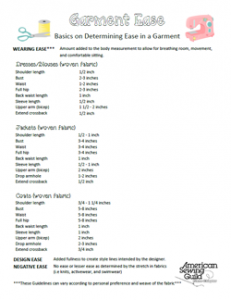 We’d like to put your mind at ease with some information and a free garment ease template created by members of the Plano, TX chapter that shows the minimum amount of ease you’ll need to add in your garment for a comfortable fit. Identifying the correct amount to include is vital to avoid an outcome like the one in my blazer story. We hope this ease cheat-sheet helps you!
What is ease?
In its simplest form, ease is the additional room in a garment in excess of the actual body measurement. There is much more to ease than this simple definition though — there is wearing ease, design ease and negative ease. Each of these impacts the finished measurement of a garment in different ways.
- Wearing ease provides ease of movement. It is the difference between the actual body measurement and the finished garment measurement. The template will help you understand this kind of ease. It gives you guidelines that will help you be sure you have at least enough room in your garment for comfortable movement as you wear it.
- Design ease provides the style. It is also referred to as style ease or fashion ease. It is additional ease added beyond what is needed for movement to create specific styles ranging from close fitting to very loose-fitting garments. It also comes into play when the design of the garment includes things like pleats, gathers, or tucks.
- Negative ease is associated with fabrics that stretch (such as knits or woven fabrics with lycra added) or are cut on the bias, producing a certain degree of stretch. In this case, the finished garment measures the same as the actual body measurements, or more often, even smaller. The degree of stretch produced in each fabric plays a big role in how much negative ease a garment will need for good fit. Negative ease is used in garments like activewear and swimwear.
How do I calculate the right amount of wearing ease?
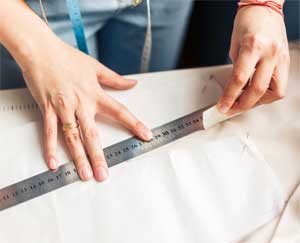
When choosing the size you will make in a pattern, look not only at the body measurements, but also the finished garment measurements. Many patterns will include this information for at least the 3 primary measurements – bust, waist and hips. If your pattern does not include this information on the pattern, you can calculate it yourself by simply measuring the pattern pieces in those locations and removing the amount included for seam allowances. Compare the finished garment size to your personal body measurements to be sure you will have a comfortable fit before you start cutting.
More about Negative Ease
 As already stated, negative ease simply means that your finished garment measurements will be the same or smaller than your actual body measurements. When sewing with knits or stretch woven fabrics, the same accommodation for wearing ease is not required since the fabric will stretch as the body moves. Just because your finished garment is smaller than your actual body measurement doesn’t mean you won’t be able to get it over your head. The more negative ease you incorporate just means you will get a more fitted look in the final garment. In most cases, you will probably target no more than 1”-3” negative ease in your design. More than that and you may wander into that “Incredible Hulk” look that has people wondering if you will burst through the seams at any moment.
Of course, the percentage of stretch in your fabric choice and whether it has 2-way or multi-directional stretch play a huge role in determining the right amount of negative ease. The higher the percentage of stretch built into the fabric you have chosen for your project, the higher the percentage of negative ease you are likely to need in your pattern.
There are lots of “rules” out there for how to calculate the right amount of negative ease for a given fabric, but here is a good starting point:
- Cut a 6”x3” piece of fabric.
- Stretch the fabric to its comfortable maximum length.
- Calculate the percentage of stretch
- Addition stretch length/original length = percentage of stretch
- Examples:
- If the 6” piece stretches to 9”, the fabric has 50% stretch.
- If the 6” piece stretches to 7”, the fabric has 15% stretch
- For a comfortable fit, try starting with the same amount of negative ease at the percentage of stretch in your fabric, up to but not exceeding that 1”-3” guideline mentioned earlier.
- Thinner fabrics do best with less negative ease to avoid a see-through effect. Thicker fabrics can handle more negative ease and give a more acceptable form-fitting look.
Remember, these are starting point rules and you will develop your own that best fit your own personal taste and adapt with each fabric you choose to work with.
Don’t forget Design Ease
With all this talk about negative ease, let’s not leave this discussion without going back to the concept of design ease. Even with stretch fabrics, design ease has a role to play. It is perfectly acceptable to decide to add design ease into a garment made with a very stretchy fabric. It will take your garment from form-fitting to soft, graceful drape and still have a beautiful look. You are the designer and you are in charge!
Now it’s you turn!
We hope this gets you started on your journey of understanding ease and fit. This is a topic often discussed in ASG monthly group meetings around the country. Many groups focus on this kind of topic frequently and would love to meet you. Talk to someone in your local chapter to find out what is happening there. ASG loves to walk alongside fellow sewing friends in their sewing journey!
~Debby Bowles and Sheryl Belson, ASG Plano Chapter
- « Previous Page
- 1
- …
- 58
- 59
- 60
- 61
- 62
- …
- 79
- Next Page »
