


Fabric grain refers to the direction in which the threads run. It’s important for the lengthwise and crosswise threads to meet at right angles, or the project will twist or hang crooked. Do you understand fabric grain, why it is important and how to work with it? This video will tell you everything you need to know to begin building your understanding.
Meet Pamela Leggett of Pamela’s Patterns

Always a favorite at ASG conferences and other sewing events around the country is this month’s independent designer, Pamela Leggett, owner of Pamela’s Patterns.
Pamela’s tag line is “Designed to fit and flatter women with REAL figures.” Her patterns are designed for women with curves and fluff and scallops, not the slender 14 year old frame that commercial patterns cater to. Instructions are carefully written and crafted, and there is even YouTube support from her channel to assist with pattern altering, sewing, and fitting. If you go to PamelasPatterns.com and check out the photos of her garments, you will see the hint of a waist in all of her designs for tops. This gives even the “fluffy” figure the illusion of an hourglass shape. This flattering aid makes her patterns a favorite among many ASG members.
Pamela’s Patterns started in 2005 when she realized the need for patterns that fit mature figures. But that was not the start of her career. Pamela recalls, “My parents owned their own business and encouraged me to do the same. I started sewing to earn money at 14. I did alterations and made bags and clothes from jeans. At 16, I started doing custom work in clothing and home dec. At 20 I opened a boutique in an artist/tourist town with vintage, retail, and my own designs. At 24 I started in the retail sewing business and teaching, continuing with custom work and a short delve into small manufacturing of my designs.”
Childhood Sewing Memories
Her first recollection of sewing dates back to when she was around 4 or 5 and used her grandmother’s treadle machine to draw pictures, which was after she had no luck with knitting. She made her first dress with her mom when she was 7 or 8 and then couldn’t make enough clothes in junior and senior high. Along with her mother and grandmother, Pamela credits Stretch & Sew classes for shaping her sewing aesthetic. “Even though Stretch & Sew classes were expensive, my mother let me take many. She said she thought that would keep me out of trouble. I grew up in a family of makers. My mom and both grandmothers sewed beautifully. And they also were involved in many other crafts – pottery, painting, upholstery, needlework, knitting – even engine repair! My dad is an amazing recycling artist, leatherwork and scrapbooker.”
Pamela explained that she apprenticed for two years with a Japanese tailor who taught her a lot about alterations and fine handwork. Her biggest mentors have been Ann Person from Stretch & Sew (sewing and designing for knits), Pati Palmer from Palmer/Pletsch (pattern fitting) and Nancy Zieman from Sewing With Nancy (teaching). She says, “These women were incredibly generous and giving with their encouragement and sharing knowledge.”
 When asked where she finds her inspiration for her designs, she explained, “I look at trends in ready-to-wear shops, catalogues, pinterest, online stores, and on the women around me. My students are also always happy to share a particular garment they love and hope that I will make a pattern for it. I keep everything rather classic – my best selling patterns are the patterns that are almost 15 years old! Some of my patterns take a little break in popularity, and just when I think I will discontinue them, they come back in style! This season it is the funnel neck – I created that pattern in 2007, and it is everywhere this season.”
In addition to her pattern company, Pamela is the East Coast director for two Palmer/Pletsch schools – Connecticut and Philadelphia. She said, “I am honored to carry on the excellence of teaching started by Pati Palmer and Marta Alto.” Other highlights she talked about included, “Being on two episodes of Sewing With Nancy was like a dream come true. My work with Taunton Press Publishers and Threads Magazine has been a wonderful experience. Creating class material for Bluprint/Craftsy was a great learning experience, they have such a high standard of production and work well with instructors. I have also sold my patterns on The Shopping Channel in Canada (the U.S. version of QVC) – live television is crazy!” (Be sure to check out Pamela’s book and DVD on serging produced by Taunton Press and reviewed in a previous Notions article.)
A Love of Teaching
When asked what her favorite aspect of her career is, she replied, “I LOVE teaching! It is what inspires me to do everything else. I love working with women who share the common obsession of sewing. So much more than sewing happens when you gather caring and creative women together. The networking and support is unstoppable and addictive. Women who sew are the most generous women in the world.”
Each year Pamela teaches at Camp Workroom Social, a conference that pulls in sewists and instructors from all over the world, the majority of which are young professional women. She says, “Sewing is alive and well with young women; they are as obsessed as we are. Young people who sew, design, and teach have a different way of learning, shopping, and marketing than we do, but it is still rich and flourishing. We may see the demise of some of the “old” ways of doing business, but new ways will take over.”
Pamela began as a member of the Philadelphia chapter of ASG and since her move to Connecticut, has joined the Connecticut chapter. You can check out Pamela’s website at https://pamelaspatterns.com or find her on Facebook and Instagram. ASG Members receive a 10% discount on online orders and can find the discount code in the Special Offers section of the ASG website.
~ Rosemary Fajgier
The American Sewing Guild is truly fortunate to be able to count many gifted sewing designers and instructors among our friends, members, and supporters. Throughout this coming year we will be featuring some of them in our Notions Blog. We hope you will enjoy reading about them and take the opportunity to get to know them better and explore their many talents by visiting their websites, taking their classes, and discovering the wide variety of designs they bring to the home sewing market.
How to Sew Bias Strips Together
Our short video on using the Bias Tape Tool will show you how to make your own bias tape, but do you know how to join your fabric to create the bias strips? This video will show you how.
~© ASG; Sheryl Belson, Plano Chapter
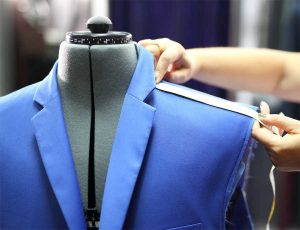
Tailoring Tricks, Part 1
So, you want to tailor a coat or jacket, but you’re not sure what that involves, but willing to take the leap.
There are basically two types of tailoring: traditional work with tedious hand stitching or fusible tailoring where you let technology do the “stitching” for you. While the former is worthy of the effort, most first-time tailoring adventures are successfully done with fusible techniques.
Choose Wisely!
 Wool or a wool blend is the best choice for a tailored garment, as it’s easily shaped with steam and good pressing techniques. Preshrink your wool selection prior to sewing—easily done by asking your dry cleaner to steam press it for you, though some wools are washable, so check the label first.
- Select quality interfacings. A woven hair canvas type is ideal for jacket or coat lapels and collars, and to stabilize some hem edges. Different weights are available to match up with the fabric weight, and it’s available in fusible for a quick application. It’s also available in sew-in if you prefer to hand stitch. Preshrink the interfacing by soaking in warm water for 30 minutes and lying flat to dry.
- Lining helps tailored garments hold their shape during repeated wearings, and it covers up the inside construction detailing. A satin-finish lining makes it easy to get the garment on and off over sweaters or other garments.
- Look for great fasteners for your tailored garment—beautiful buttons, fun snaps or hooks are ideal choices. Make your selection before starting the garment as it affects the closure construction, like the size of buttonholes or reinforcement needed for novelty closures.
- In addition to conventional thread for construction of your project, you may want to select a heavier weight for topstitching, either in a matching color or contrast, depending on the desired look.
Pattern Picks
- All major and many independent companies offer patterns for tailored garments. Coat and jacket patterns are made to fit over other garments, so purchase your usual size. Because wool or other tailoring fabrics can be costly, it’s best to test-fit the garment pattern before cutting your fashion fabric. Tissue-fit or make a muslin and note any fitting changes needed on the final pattern.
- Follow the pattern guidesheet for cutting, but if the layout allows, cut 1” seam allowances on side and under the arm seams, just to allow for adjustment if needed to accommodate thicker fabric. Be sure to use the “with nap” layout to avoid obvious shading on the finished garment. If the fabric is very thick, cut out single-layer pieces, remembering to flip the pattern for a right and left side.
- Transfer all markings to the cut pieces using chalk, removable marker or thread tailor tacks. If you can’t tell the right from the wrong side, mark them for consistency.
- If your wool is lightweight, staystitch any bias and curved edges to avoid them stretching during handling. This line of regular-length stitching is done just barely inside the seam line so it doesn’t show in the finished garment.
Pressing Matters
- You’ll be doing a lot of pressing as you construct a tailored garment, as that’s part of the shaping process. Use steam to help shape the wool—either the steam setting on your iron, or a dry iron with a damp press cloth. Do not press wool with a dry iron alone. Test-press some scraps to see which works best for your fabric, as some wools can develop an unsightly shine if pressed directly with the iron.
- Because of the bulk, it’s best to press seams open, unless the garment style dictates pressing to one side and topstitching to make a sporty mock flat-felled seam.
~Linda Griepentrog
Linda is the owner of G Wiz Creative Services and she does writing, editing and designing for companies in the sewing, crafting and quilting industries. In addition, she escorts fabric shopping tours to Hong Kong. She lives at the Oregon Coast with her husband Keith, and two dogs, Yohnuh and Abby. Contact her at .
Cozying up to Cotton
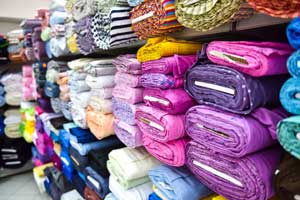
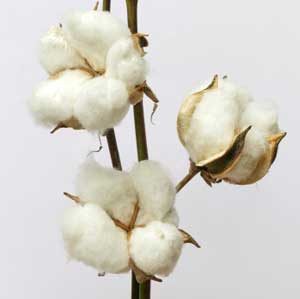 Cotton is the natural fiber from the seedpod of the cotton plants. This versatile fiber is used to make well over 90 different fabrics from calico to canvas, charmeuse to denim, velveteen, poplin, cotton jersey and much more. Cotton fabrics can be silky or rough, smooth or textured, thick or sheer, completely indestructible or lavishly luxurious. It’s soft, yet strong, is moisture absorbent and accepts dye beautifully. Cotton is also breathable, making it a great summer fabric, and is comfortable to wear. It releases odors easily, making it the perfect fabric to use in workout wear.
On the down side, cotton shrinks, may bleed and, unless blended with something else, often ends up a wrinkled mess. To counteract some of these disadvantages, cotton fabric is commonly treated with special finishes and you may see wording on the bolt end along the lines of “water repellent,” “shrink resistant,” “durable press” and more.
Pre-shrinking
Many cottons will shrink the first 2-3 times they are washed so taking time to pre-shrink your fabrics (and notions, interfacings and linings too!) will help to prevent potential problems with the finished product. Even if the fabric is labeled “needle ready” or “preshrunk,” preshrinking is often still recommended to wash out any fabric treatments that could end up being skin irritants.
What to Look For
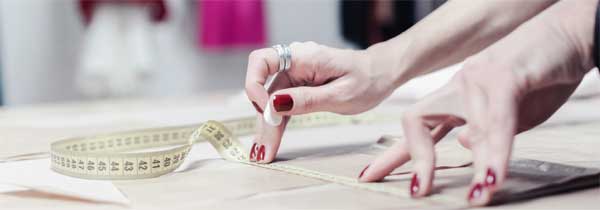
 When shopping for cotton yardage, look for a tight weave and straight grain. Lengthwise and crosswise threads should intersect at true right angles. Prints should be clear and printed plaids should be straight. Watch for one-way designs, nap, or luster that might require a one-way layout when cutting out your pattern. Adjust fabric yardage accordingly, keeping both shrinkage and layout in mind.
Helpful Tips
- Wash your cottons in cool to warm water to prevent further shrinkage.
- Don’t use fabric softener as it can dull the finish and cause fabrics to lose their shape.
- Dry on low to medium heat.
- Air dry flannel or, if using a dryer is necessary, use low heat.
- Wash jeans inside-out in cold water and keep them out of the dryer.
- If you want to avoid the iron and still have wrinkle-free clothes, intercept them halfway through the dry cycle and hang them up to complete the drying process.
~Copyright © 2019
- « Previous Page
- 1
- …
- 60
- 61
- 62
- 63
- 64
- …
- 79
- Next Page »
