Buttonholes may be one of the most feared sewing techniques—after all, it’s one of the last things you do and any slip-ups could ruin the entire project. But, alas, there’s no need to have trepidation. Let’s answer some common buttonhole making questions.
Why does my machine have multiple types of buttonholes?
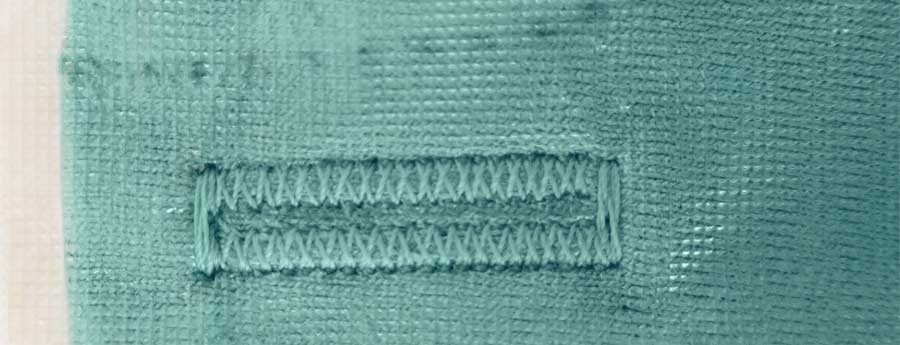
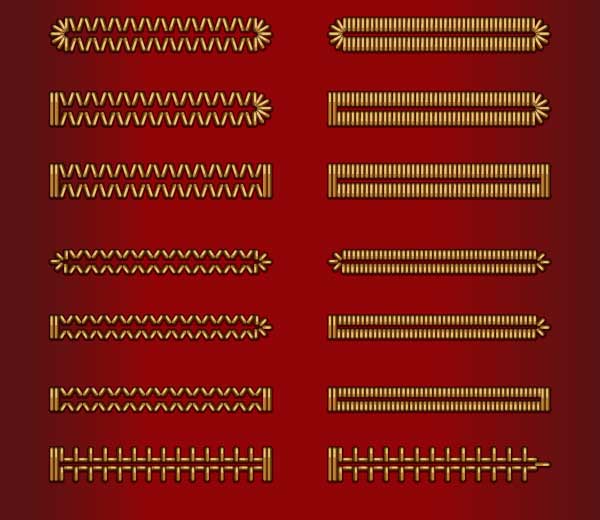
Buttonholes fall into two categories—straight and keyhole.
Straight buttonholes can have either straight ends made with a bartack, or they can have one or both ends rounded. Symmetrical straight buttonholes can be placed vertically or horizontally.

Keyhole buttonholes have a round opening at one end and they’re used primarily on tailored garments that use shank buttons, so that the shank has a place to rest when the garment is buttoned. Keyhole buttonholes are always placed horizontally.
On either style, your machine may offer differing widths between the parallel side stitching rows to accommodate differing fabric weights.
The type of buttonhole you select for a project should be based on the fabric and use. Those with tighter stitching are best for areas of high stress, while those with less dense stitching are more suited to lightweight fabrics and areas of light use. The ends are a matter of personal preference and style.
Some machines also offer specialty buttonholes, like eyelets, straight stitch or heirloom styles, or those specific to leather or vinyl.
How do I stitch a buttonhole?
The answer depends on your machine, so consult your owner’s manual for specific instructions. Some machines make buttonholes automatically, many offering a sensor foot to determine the size for you based on the button. Others offer pre-programmed sizes, or the ability to stitch an initial buttonhole and keep that in memory so that all others will be exactly the same. Still other machines require that you make a buttonhole manually.
In general, the machine stitches one side of the buttonhole, sews the end, sews the second side, then finishes with the second end, and may lock the stitches. Details of your machine’s process will be in your owner’s manual, along with options if you have them.
Do I need to interface the area where buttonholes will go?
Yes, always reinforce the area where buttonholes are stitched with a stable (non-stretch) interfacing. The interfacing not only helps with stitch quality, but it helps the buttonhole keep its shape during use. This is especially important on knits.
How big should I make my buttonholes?
The buttonhole opening size (not the total stitched length) is determined by the diameter of the button, plus the thickness. If you’ve chosen a button in the size recommended on the pattern, you may be able to follow the markings printed on the tissue. Otherwise, measure the button to determine the opening size. For flat buttons, generally it’s the diameter plus 1/8”; for domed or round buttons, use the thickest portion for measuring.

Do I need to make a sample buttonhole before working on my project?
Absolutely! Always make a sample from the same fabric and interfacing used in the project. Mark the determined length on the right side and follow the machine instructions for stitching. Slash the buttonhole and try the button through it. It should fit comfortably without strain, but not too loosely that it will come unbuttoned during wearing. Check the stitch tension and center spacing as well.
How’s the safest way to cut the buttonholes?
Buttonholes are pre-set with a designated space between the side stitching bars. Depending on your fabric thickness and texture, that spacing may need adjustment so you can cut without damaging the stitching. The test buttonhole will help determine that.
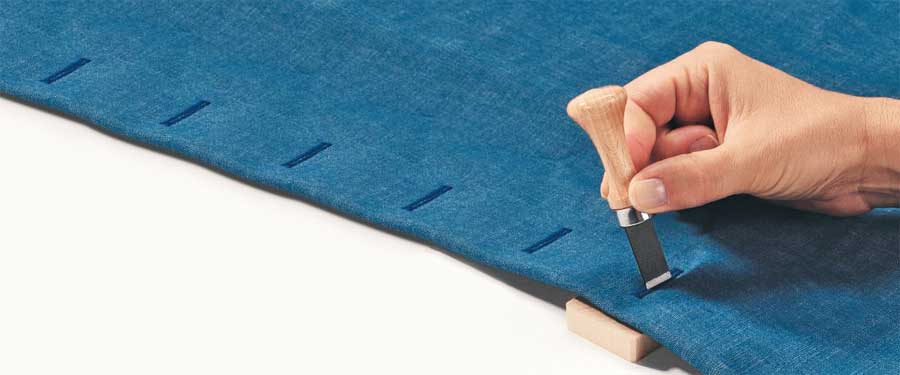
The best way to open a buttonhole is with a buttonhole cutter. It’s a sharp, chisel-type blade that accurately and cleanly pierces the opening. It’s used with a wooden block underneath to protect a table surface as you cut.

If you don’t have a buttonhole cutting tool, place a straight pin across both ends of the buttonhole and use either small sharp scissors or a seam ripper to pierce the center of the opening, then cut carefully moving toward each end. Do not cut the adjacent stitching.
~Linda Griepentrog
Linda is the owner of G Wiz Creative Services and she does writing, editing and designing for companies in the sewing, crafting and quilting industries. In addition, she escorts fabric shopping tours to Hong Kong. She lives at the Oregon Coast with her husband Keith, and two dogs, Yohnuh and Abby. Contact her at gwizdesigns@aol.com.


