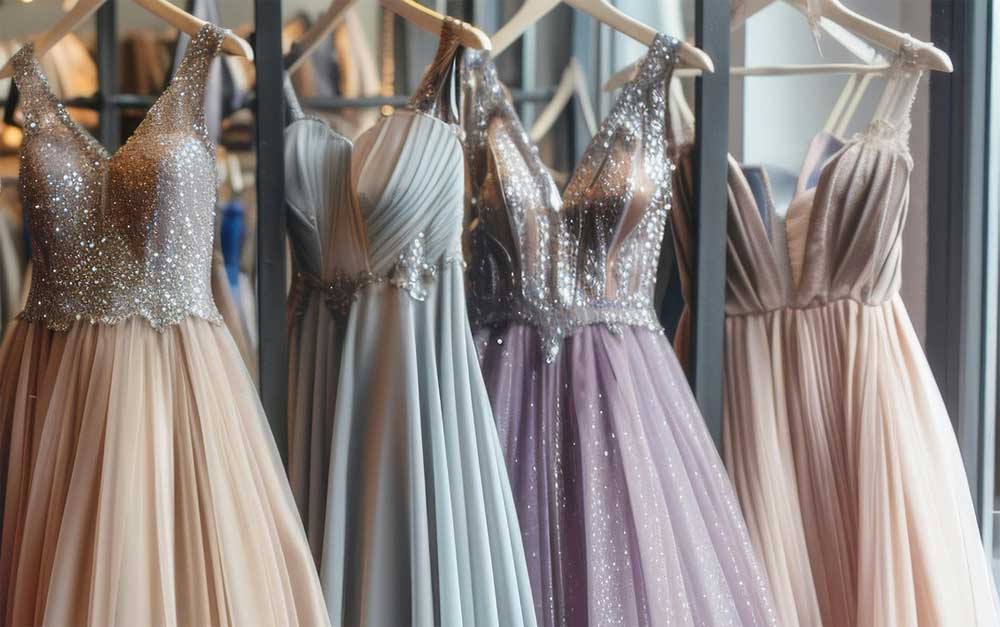
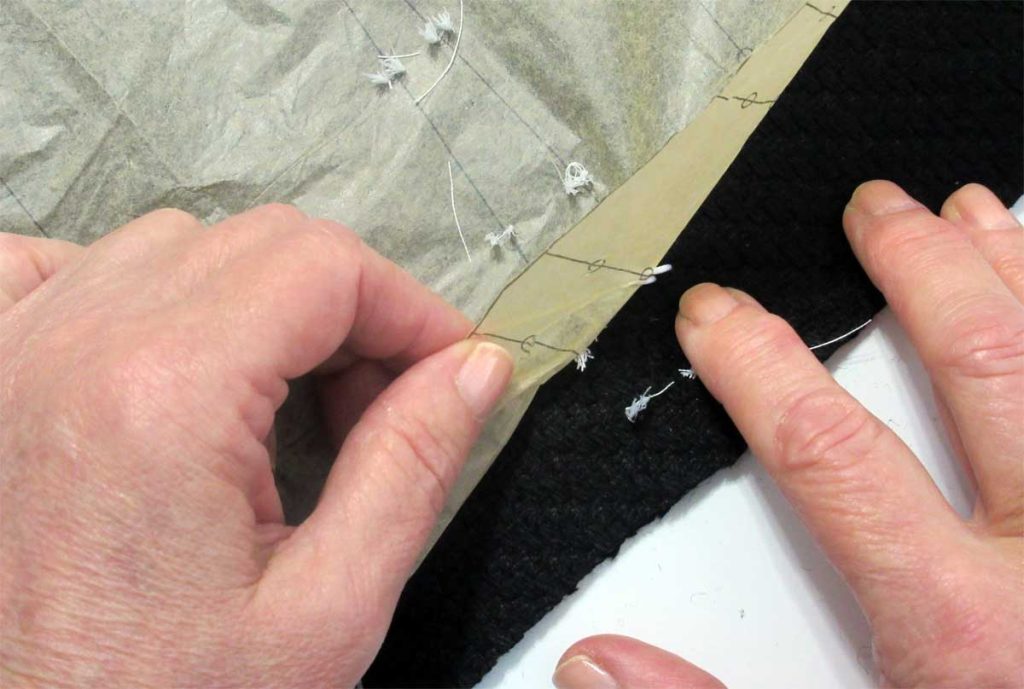
Images from the 2024 Fashion Show at ASG Conference. Special thanks to Barbara George from the San Jose, CA chapter for organizing this event!
How to: Blind Hem Stitch
Ah, hem
Whether you prefer to hem your garments by hand or machine is a matter of preference but sewing machine manufacturers have risen to the latter cause by including a blind hem stitch on most models. It may be one of those quirky-looking stitches you don’t often use, but creating an invisible hem on many fabrics is possible.
The Stitches
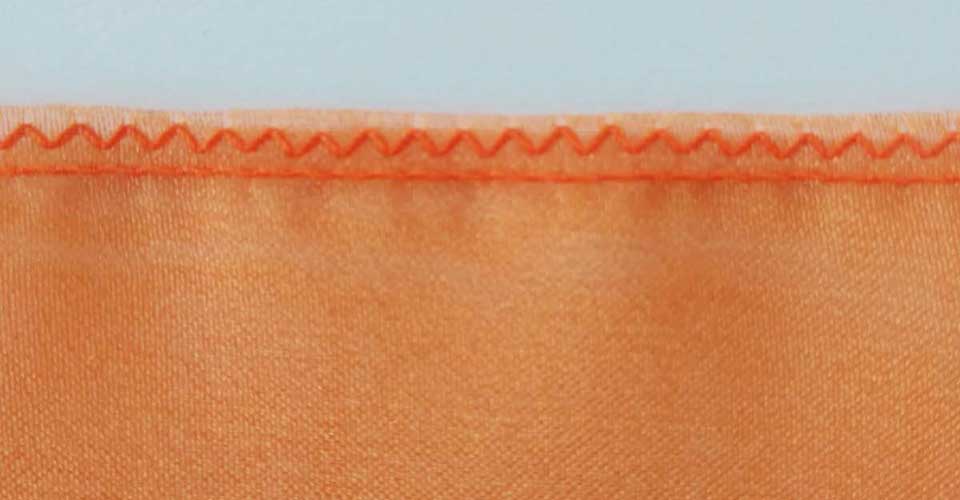
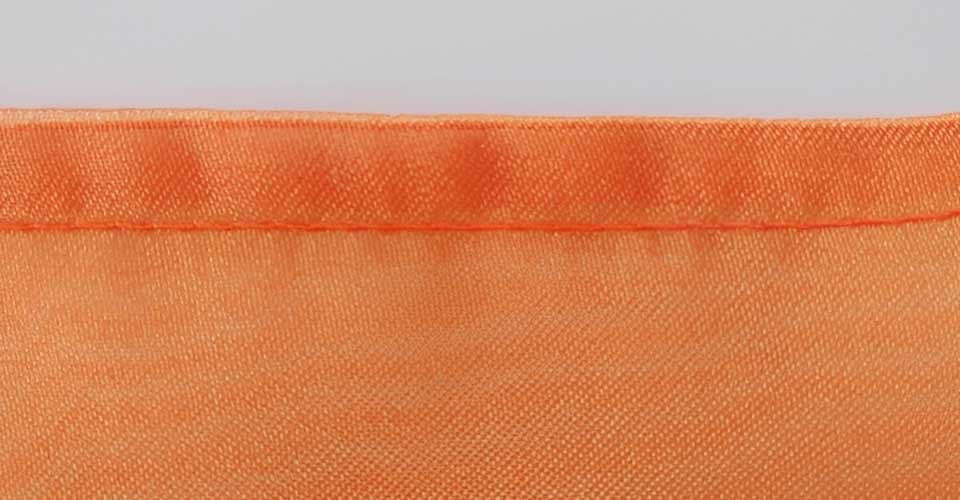
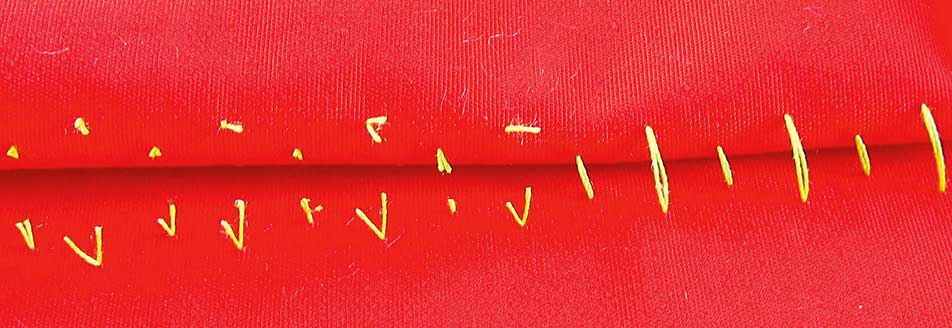
You may, in fact, have two blind hem stitches—one for knits and one for wovens. The knit stitch has multiple zigzags between larger “bite” stitches, while the stitch for wovens has straight stitches between the wide zigzag bites.
The knit zigzags allow the hemline to still have some flexibility and stretch, while the straight stitch version creates a stable hem.
Blind hem Foot
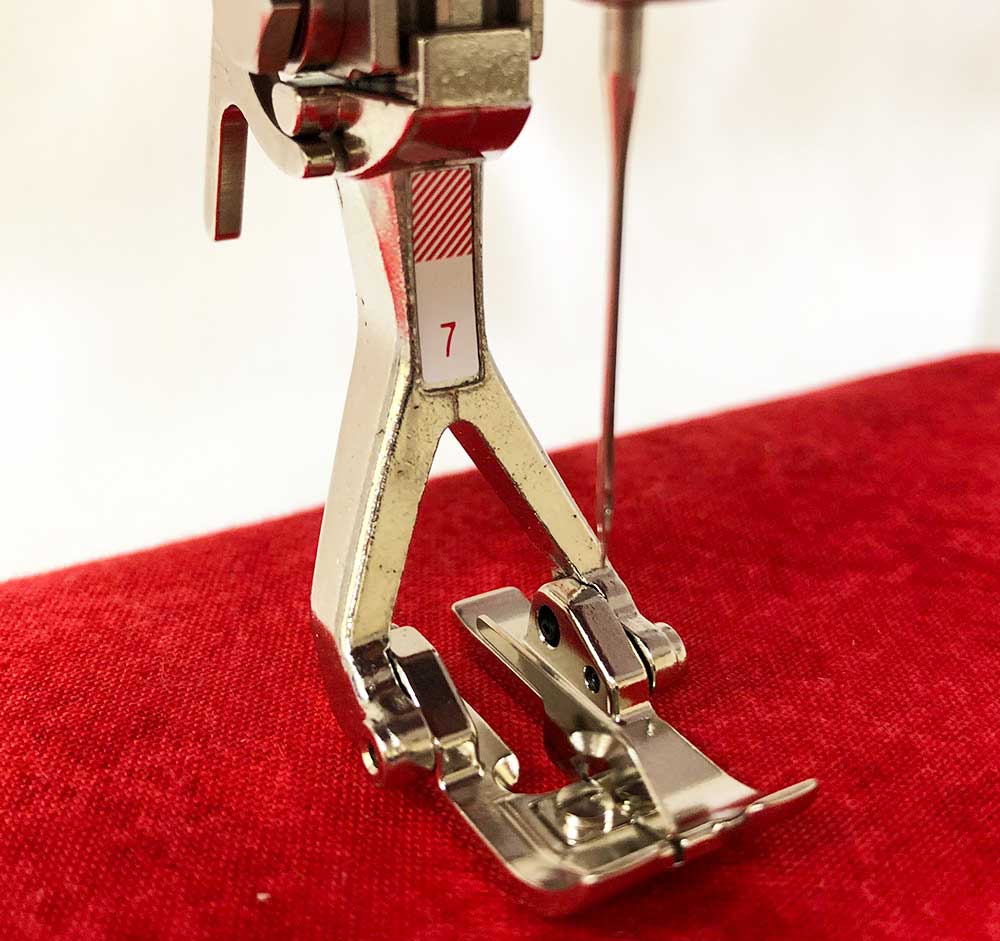
Your machine brand may also offer a specialty presser foot specifically for blind hemming. The guide bar is movable on some brands of feet, so that the wide zigzag catches only a small amount of the garment fabric and hem area.
Before you dive in to the real deal, it’s imperative to practice this process on some scraps of your project fabric before sewing the actual garment. Fine tune the stitch and placement for minimal show-through on the right side.
Choose a thread color that closely matches your fabric. If you’re working with a print fabric, choose a thread color to blend with the most dominant color. Use the same color bobbin and top thread. Tempting as it may be, it’s best not to use invisible thread for blind hemming.
On the edge
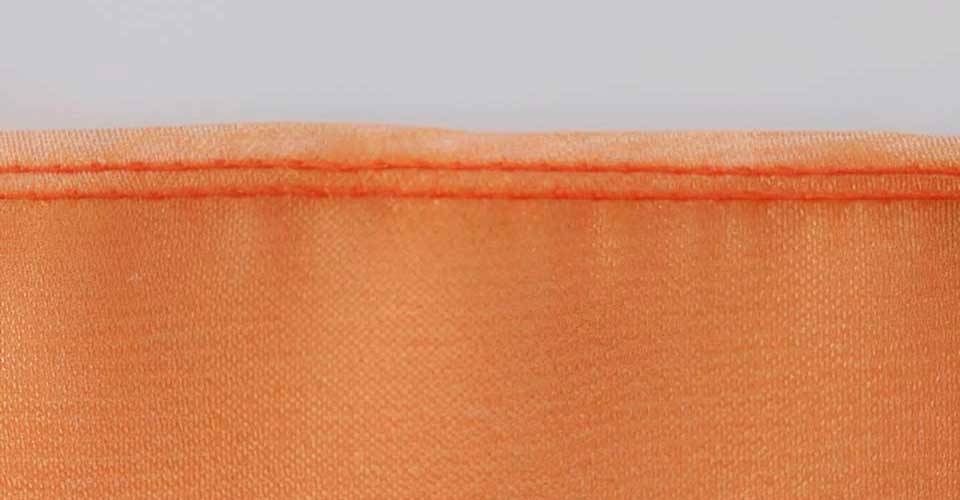
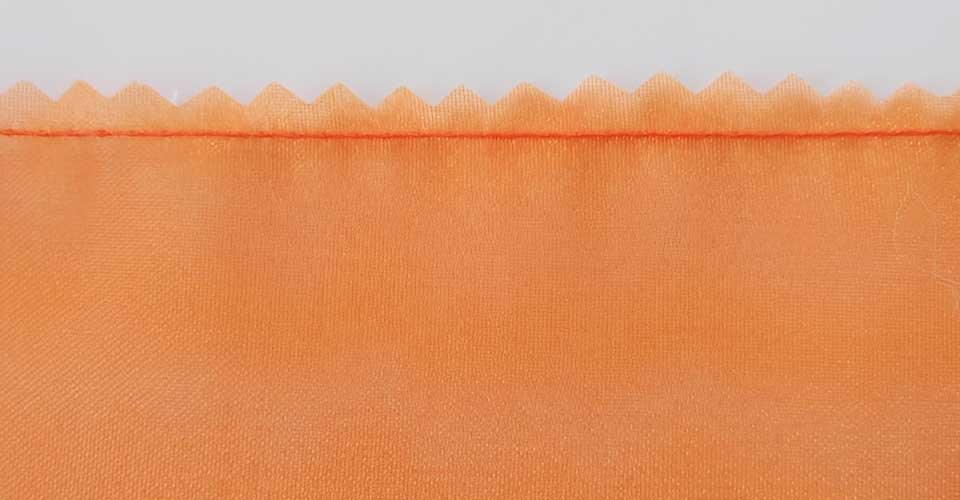
If the garment fabric ravels, finish the hem edge using a zigzag, serging or hem tape to neaten it. If it isn’t too heavy, simply press under the raw hem edge ¼” and stitch it in place.
On knit fabrics, no hem edge finish is needed, as knits don’t ravel. However, you can finish the edge if you prefer.
It’s all about folding
The key to an invisible blind hem is in the folding. First, fold and press the finished hem allowance to the wrong side. Fold the garment back upon itself leaving ¼” of the hem extending beyond the fold. Pin the folded hem in place. The ¼” extension is where the stitching will be placed.
Adjust the stitch width so that the stitching along the finished hem edge will allow the wide zigzag “bite” to catch a tiny portion of the garment wrong side. If that stitch catches too much fabric, the stitch will show prominently on the garment right side. If it doesn’t catch enough fabric, your hem will not stay in place. The key is to catch just the right amount to hold and not show. Working with a practice piece of the same fabric as your garment is key to proper positioning.
If you have an adjustable foot, you can move the stitch right or left by moving the guide that runs along the folded hem edge. Or you can adjust the stitch width, or a combination of the two for optimum catch and hold and minimal show on the right side.
In addition to adjusting the stitch width, you can also adjust the stitch length to spread out the bite stitches, depending on the fabric. But don’t lengthen the stitch too much as the hem could gape or be caught during wearing.
If your machine has an adjustable needle position, you can also use that to fine-tune the stitch placement. So, it’s a balance of the stitch width and stitch length, and the positioning of the stitch using an adjustable foot and needle positioning.
Once you’ve practiced and gotten the hang of it, then sew around the hem on your garment. When stitching is complete, open out the hem and press to set the stitching.
Fabric options
Machine blind hemming works best on textured medium- to heavy-weight fabrics. It’s ideal for wool, fleece, suitings, etc. The texture helps to hide the bite stitch thread, as does any fabric print. For lightweight fabrics and solid colors, the stitch will show more and if you’re not happy with the look, opt for another hemming method.
~Linda Griepentrog is the owner of G Wiz Creative Services and she does writing, editing and designing for companies in the sewing, crafting and quilting industries. In addition, she escorts fabric shopping tours to Hong Kong. She lives at the Oregon Coast with her husband Keith, and three dogs, Yohnuh, Abby, and Lizzie. Contact her at .
Fold-Over Elastic
Fold-over elastic (also known as FOE) is one of those notions that, once you try it, you’ll wonder how you ever managed without it. It’s a versatile, latex-free product that functions similarly to bias binding to finish a raw edge, with the added benefit of stretch and recovery so it keeps the edge up against the body. FOE comes in a variety of widths, finishes, patterns, and colors, and for that very special project, you can even dye your own.
The elastic has a channel right down the middle to easily fold it exactly in half. In most cases, the narrower the elastic, the more stretch it has. While you can use different widths of fold-over elastic on the same project but keep the stretch factor of each and where you plan to use it when choosing your yardage.
How to use it
In most cases, your elastic should be 90% of the length of your fabric. Remember to account for seaming!
Tip: If your fold-over elastic has both a shiny and a matte side, the shiny side is typically the outside or “front” of the elastic.
To start insertion, leave about 1″ of elastic hanging off the edge of the fabric. Fold the elastic, encasing the edge of your fabric, then stitch through all layers of elastic and fabric in one operation. Choose a stitch that can be centered so that it sews half on the elastic and half on the fabric. A good choice is the wavy zigzag serpentine stitch. To accommodate the stretch in the elastic, lengthen the stitch slightly. For some applications, such as when using a 5/8″ wide, satin-finish fold-over to finish a neckline, use a matching silk thread so that the stitches will blend in. In this case, position the stitches so they fall mainly on the elastic, just barely catching the fabric on the left swing of the needle. After you have done this once or twice, you will find pins are only a nuisance.
Watch this video for 4 different ways to sew with fold-over elastic:
Project Ideas
Diaper covers: For moms who prefer to use cloth diapers, diaper covers are often a “must have.” You can whip up a dozen in no time flat using 1″ fold-over elastic. The product is latex free, so it’s hypoallergenic and great for baby and functions as a binding along the straight edges of the cover. In the leg area, where a tight fit is crucial to holding in wetness, pull firmly on the elastic as you apply it. Once you are past the leg area, release the elastic so it becomes “just” a binding. Even on the straight edges, pull on the elastic ever so slightly so there will be no slack in your diaper cover.
Plan to join the ends of the elastic in an inconspicuous spot, such as at the center back. To do this, start and stop the application about 2″ on either side of where you want the joining to fall, also remembering to leave 1″ tails of elastic. Place the elastic tails right sides together and stitch a 1″ seam. Trim the seam allowance to 1/4″. Open up the seam allowance, refold the elastic, and complete the application.
Swimwear: If you use FOE for swimwear, you won’t be folding over the edge of the fabric so start by trimming 1/4″ from the seam allowances that you will be finishing with the elastic. Remember that your fabric is not folded, it will simply be encased withing the fold-over elastic.
Click the image below for an article at Brother with step by step instructions for sewing with fold-over elastic.
Other great projects include baby clothes, fitted sheets, and converting a crew neck T-shirt to a satin-edge T-shirt with a deeper neckline. You can even fix a gaping neckline or armhole with FOE.
Silk Ribbonwork by Machine
If you’re a hand embroiderer, you may be surprised to know that you can actually do silk ribbonwork on the sewing machine! Yes, it’s true… You can duplicate intricate hand-stitched flowers, stems, knots, etc. and you can create some decorative machine stitches with ribbons as well.
What you’ll need
Choose real silk ribbon for your work, not satin or grosgrain ribbons as these are too stiff. Real silk is pliable, shapes well and looks elegant. Silk ribbons come in widths from 2mm to 7mm, in both solid and variegated colors, so choose a width compatible with your design. Press the ribbon if it’s creased from packaging.
Use a monofilament thread, either polyester or nylon, in the needle, and a regular thread to match the fabric base in the bobbin.
You’ll also need a temporary stabilizer under the ribbonwork, and a stiletto or long-nose tweezer for shaping the ribbon. A hoop will help to keep your work flat—borrow the hoop from your embroidery machine if you have one or use a wooden hoop.
Set the machine
Ribbonwork by machine requires free-motion work, so lower the feed dogs, remove the presser foot and be sure the machine is set for a straight stitch. Check your instruction manual for any additional settings. Insert a new size 70/10 needle. If you’re machine has a needle-down function, use it to hold things in place as you shape the design.
Hoop your fabric with stabilizer so that the surface is flat against the machine. If you’re creating a specific design, roughly draw it on the fabric with a removable marker…or just design as you go.
Ready, set, stitch
As you build ribbon designs, start from the bottom and work to the top. For example, stems, leaves and vines should be stitched prior to adding blossoms and buds.
Anchor the end of your ribbon with a few stitches sewn in place. Travel the desired shape, barely anchoring the ribbon—go down the center space of a leaf or petal, then catch the looped ribbon along one edge. If you stitch down the center of the ribbon, your stitching will be more prominent.
To create stems, twist the ribbon and anchor the ribbon only it at the edge. Leaves can be created with loops tacked into shape, or by folding the ribbon to shape and anchoring the edges.
One of the easiest flowers to make is a daisy with looped petals. For more dimension, twist the ribbon as you shape the petal. Leave the looped end free, or for a flatter design, tack down the loop end edge. For layered flowers, start from the bottom and work upward.
Make French knots one of two ways—either wrap the ribbon loosely around the needle several times and tack down one edge, then slide off the needle. Or, tie an actual loose knot in the ribbon and tack down one edge. French knots are ideal to create flower centers, small berries or grapes, or closely cropped hair on an animal or person.
Decorative stitching
Silk ribbonwork can also be used to mimic machine or hand embroidery stitches. Mark the desired spacing on the fabric for consistency, then shape and anchor the ribbons in place invisibly. This is great for crazy patch embellishment as the ribbon “stitches” are more prominent than machine-done work.
In the end
When your ribbonwork is complete, stitch in place a few times to anchor the ribbon end, then trim closely. Clip the end at an angle to reduce fraying, or thread the ribbon into a tapestry needle and pull it to the fabric underside to anchor.
Helpful Hint: To thread silk ribbon into a tapestry needle, get help from a Needlework Threader designed specifically for that purpose. Look for one with a wide wire opening so it doesn’t crush the ribbon.
Add-ons
If you want to add more bling to your ribbonwork, think about adding some beads, pearls, crystals or charms, depending on the design. Decorative buttons also make an ideal add-on.
Machine ribbonwork can also be combined with computer-generated machine embroidery, doing a portion of a design in each technique. For example, embroider a basket, then add dimensional ribbonwork flowers.
For more information on machine ribbonwork, see C&T Publishing’s Simple Silk Ribbon Embroidery by Machine, by Susan Schrempf.
For a series of videos and ribbonwork by machine, watch the video below:
~Linda Griepentrog is the owner of G Wiz Creative Services and she does writing, editing and designing for companies in the sewing, crafting and quilting industries. In addition, she escorts fabric shopping tours to Hong Kong. She lives at the Oregon Coast with her husband Keith, and three dogs, Yohnuh, Abby, and Lizzie. Contact her at .
Théâtre de la Mode
Paris has been a center of art, literature, and fashion since the 18th century and was the first country in the world to export fashion. By the mid-19th century, Charles Worth developed the first haute couture business in Paris, presenting fashion on live mannequins. Wealthy women came to his shop to be measured and to have elegant clothing handcrafted for them. By 1930, Paris became a theater of fashion with women from all over the world coming to see and to be seen. The city not only provided the human skills but also the accessories, notions (buttons, feathers, beading, laces), textiles, and everything needed to assist in the creation of fashion.
By 1939, it was the key to the economy of France and the second largest industry. There were 900,000 employees in couture houses, accessory makers, and textile manufacturers. Then came the war! During the five years of occupation and oppression, the Germans attempted to take over the Parisian fashion industry, but the French had such a strong sense of national pride that many of the couture houses were prepared to go into hiding if necessary.
When Paris was liberated in August 1944, one million men were prisoners and five million adults and children lacked adequate food and shelter. Electricity wasn’t turned on until well after dark and during the bitter cold winter after the war, heat wasn’t available at all to the average citizen. Clothing, as everything else, was rationed. The women of the French Resistance banded together to do what they could do to save their beloved industry. (They identified one another by the “pillbox” hats that they made from pillboxes from the pharmacy and whatever bits of fabrics, feathers, and trims that they could find.) Most of them had no money for expensive clothing so they gave their coupons to the wealthy to support their beloved couture industry.
The artistry and the creative work force survived the war, but resources were in short supply. Textiles, accessories, and even sewing machine needles (which were manufactured in Germany) were almost impossible to obtain. Colored thread wasn’t available at all. However, Nina Ricci’s son, Robert, came up with an ingenious plan that would raise funds for food and education for the French war relief. It would also bolster pride in the creativity of a country ravaged by war, show that French leadership in fashion still existed in spite of the enemy occupation, and help regain American and South American clients.
The plan was to create couture clothing in miniature and theater stages for display and take them on tour. Over 50 Parisian houses of couture were invited to clothe the mannequins and teams of seamstresses and artisans created 27″ wire aperture mannequins with sculptured heads, wigs of real hair, and couture clothing. All of the clothing were made in exactly the same way as the full-size human versions, complete with linings. Milliners created miniature hats while hairstylists gave the mannequins individual coiffures. Jewelers such as Van Cleef and Arpells and Cartier contributed small necklaces and accessories. Some seamstresses even crafted miniature undergarments to go under the couture designs. Accessories, including shoes, hats, and hand bags complete with compacts and lipstick were made. Fabric was woven to scale and all details were perfect down to the tiniest buttons, buttonholes, and working zippers. These miniatures were nicknamed “dollies” and became part of the travelling Théâtre de la Mode exhibit.
Théâtre de la Mode was a spectacular exhibit with 237 dollies and 13 theater sets that opened on March 28, 1945 at the Louvre. It proved that Paris had not suffered in her heart, but that creativity was still there. France asked London to stage the exhibit in order to contribute to the war relief and it was attended by over 120,000 people. The mannequins served as French ambassadors as Théâtre de la Mode toured Stockholm, Leeds, Barcelona, Copenhagen, London, Vienna, New York. It closed in San Francisco in September 1946. Théâtre de la Mode had served its purpose and by 1950, haute couture was again flourishing.
After the show closed in San Francisco, the gems were sent back to Paris and the dollies were abandoned. In fact, they disappeared. Then, in the early 1980s Stanley Garfinkel, an oral historian from Kent State University, heard about them when he was in Paris doing research on Dior. The story of French mannequins presumably lost after World War II piqued his curiosity and he began a quest that took several years. His search for these treasures finally took him to the Maryhill Museum of Art near Goldendale, WA on the Columbia River in 1986 where he found most of the dollies still resting in their shoeboxes. After much negotiation, he arranged to have them returned to Paris to be refurbished. The artists were again challenged to clean, restore, and to bring the dollies back to life. Elaine Bonabel, who created the mannequins, was still living and able to supervise. What a thrill it must have been for those original artists to work with their creations again!
On May 10, 1990, Théâtre de la Mode opened for the second time at the Louvre. The Parisians were exuberant! It’s reported that Americans who attended the opening were treated like royalty with food, lodging, transportation, and every amenity given to them in gratitude for their part in bringing the dollies home again. A touching scene was the women of the French Resistance appearing in the very same pillbox hats that they wore during the war almost 50 years ago. From there, Théâtre de la Mode went on tour again and then was returned to the Maryhill Museum of Art in March 1996.
Currently, the museum is home to nine re-built sets and restored mannequins dressed in period casual and formal wear. Each year, three of the nine sets are on display. In 2024, all or part of three different Théâtre de la Mode sets will rotate onto view
Visit the Maryhill Museum to find exhibit dates.
~Updated. Based on an article by Judy Barlup
- « Previous Page
- 1
- …
- 3
- 4
- 5
- 6
- 7
- …
- 59
- Next Page »