Zentangle®, is where art and craft meet meditation and careful thought.
 Zentangle®, founded by Rick Roberts and Maria Thomas, is a method of creating complex art from repetitive lines and easily sketched forms, all while enjoying a relaxing state of thoughtfulness. It’s a lot like the doodling we’ve all done while waiting on a phone call or listening to a less-than-engrossing lecture. The supplies are simple – just a pencil, pen and paper. But you can use anything you want… like shoes!
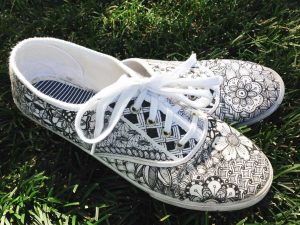
Although Zentangle® itself is deliberately non-representational and doesn’t take on a specific form, it has inspired a number of other works of art. When I started drawing these intriguing black-and-white patterns, I wanted to take them out of my sketchbook so others might enjoy them. In the back of my closet was a pair of inexpensive white canvas sneakers. I’d bought them with the intention of decorating them somehow, but never gotten around to it. It seemed the moment had arrived.
Supplies
 To decorate my shoes, I used a black Pigma Micron pen, size 1.0, for drawing on my shoes. It’s a good all-purpose size that can draw fine lines or fill in larger spaces. It’s also permanent on fabric. Fabric pens or Sharpie markers are other possibilities.
The hardest part of the project is getting started and making that first mark on a pure white surface. My advice is to dive right in. Remind yourself that the shoes were inexpensive and if you’re really not happy with the end result, you can wear them in your garden (visiting rabbits won’t be critical). Part of the magic of this drawing technique is that you can keep adding more detail – extra lines, darker shading – until wavering lines blend right in and stray marks become part of the pattern.
Let’s Doodle!
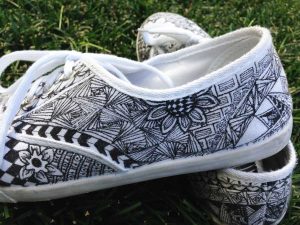
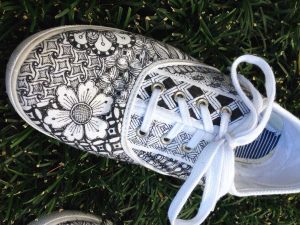
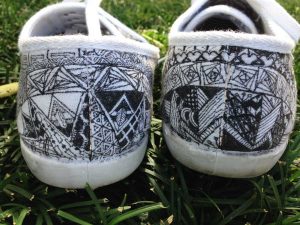
 Mentally divide your shoes into sections. The shoes’ construction seams will provide some guidance. I especially like the semicircle on the heel of each shoe and the wavy seams around the shoelace holes. Draw a grid on a section, just a simple crosshatch of horizontal and vertical lines about 1/2″ apart. Now fill in the squares of the grid any way you like, creating your first area of pattern.
For variety, draw a pop-art flower on another part of the shoe. Make patterns of lines or circles on the flower petals, and fill in the background around the blossom with swirling lines or another grid-based design. Keep adding shapes and patterns, filling in areas between specific designs with more patterns. Strive for a balance of light and dark areas; placing a pattern with a lot of black next to an area of white space will make the division stand out, while two areas of balanced black-and-white shading will blend together.
 It’s easy to find patterns for inspiration on the Internet or in books (be mindful of copyright laws). Architectural details, wrought iron fences, and flower in the garden also provide inspiration. As sewing enthusiasts, we have still more sources of doodle patterns to explore, like quilting motifs, patchwork patterns, and the decorative stitches on our sewing machines.
Now here’s an idea: taking doodle art to fabric and thread! Maybe my next project will be embellishing a solid-color fabric with doodle-inspired stitches. Wouldn’t that be fabulous as the flap on a handbag or as a jacket lapel?
There are Zentangle® books and pens available at local quilt stores and online. Zentangle® also offers classes by certified teachers.
~Adapted from a post from October 3, 2014 by Rebecca Kemp Brent, Ph.D., author of “Redwork from The WORKBASKET,” “Machine Embroidery Wild & Wacky” and numerous other magazine articles and books. She can be seen in several episodes of It’s Sew Easy. Visit her website at rkbrent.com.


