If you hate waistbands, bandless waist garments may be your new favorite style. A bandless waist skirt, also known as a waistband-free skirt, is a style of skirt that does not have a separate or visible waistband. Instead, the waistline is created by folding and shaping the fabric itself, and the top edge is finished with a shaped facing or ribbon rather than a waistband. Also called faced or contour waists, this type of skirt offers a clean, streamlined look and can be a versatile addition to your wardrobe.
You can purchase patterns without waistbands, such as Vogue 1942 or 1683, or you can adjust your favorite skirt pattern to eliminate the waistband on a fitted pattern with darts.

In this article, we will be converting our traditional waistband finish to a bandless waist. The waist will be finished with scalloped-edge grosgrain ribbon that is turned to the inside. Be sure to read through the instructions before starting.
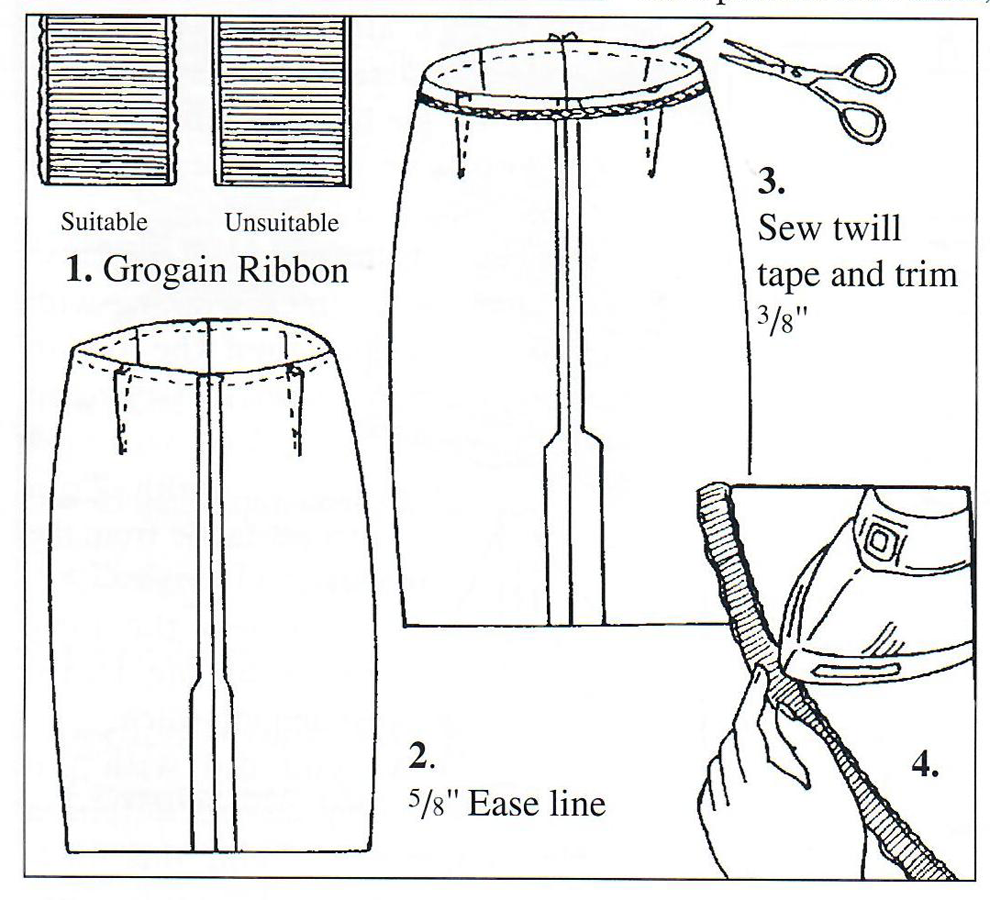
The grosgrain ribbon you purchase should have tiny, scalloped edges and needs to be 1″ in width. This type of ribbon is commonly known as Hatter’s ribbon and can be molded and shaped with an iron. Grosgrain ribbon with a straight edge cannot be molded and will not conform to the shape of the body.
Fabric Selection
Choose a fabric that is suitable for the desired style of the skirt. Consider factors such as drape, weight, and stretch, depending on the look you want to achieve.
Skirt Construction
Cut and construct your garment through the waistband step.
Step 1: Before applying the grosgrain, make sure that the waist of the garment measures 1″ to 1 1/2″ larger than your waist.
Step 2: Sew an ease-line around the waist at 5/8″ to ease in the fullness to your waist size.
Step 3: Stabilize the waist by sewing a piece of twill tape to the waistline seam on the wrong side of the fabric. Trim 3/8″ away from raw edge at waistline.
Step 4: Shape grosgrain ribbon with an iron, stretching one outside edge slightly as you press. This will allow the ribbon to sit comfortably on your waist.
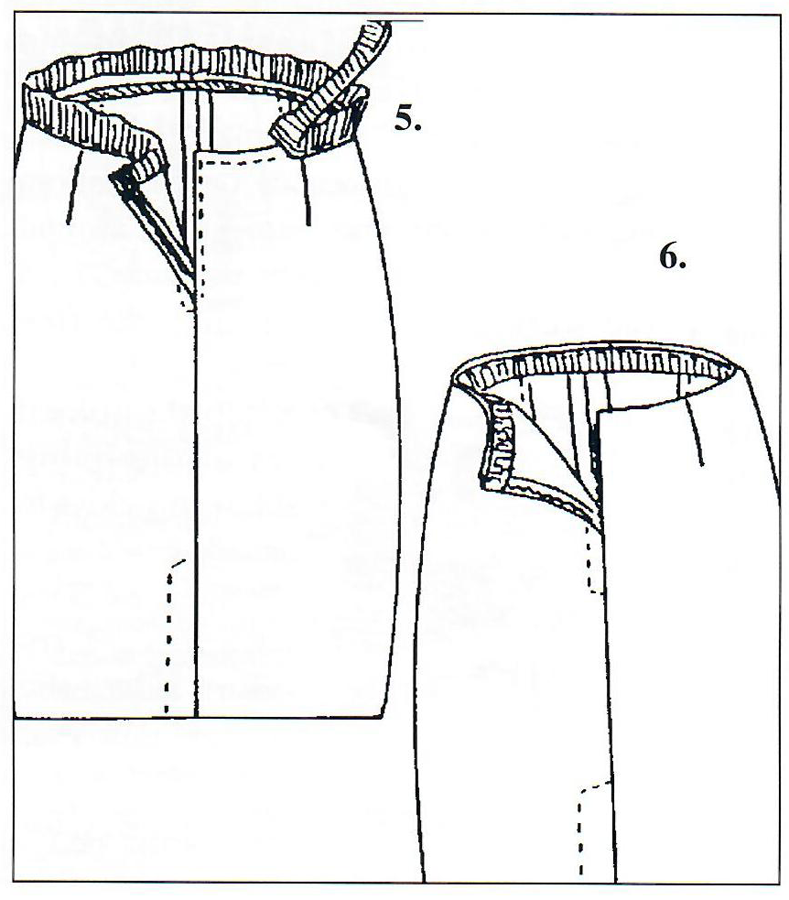
Step 5: Fold under raw end of ribbon 1/2″ — a conventional seam is not used here to eliminate bulk.
- Overlay the ribbon, folded edge out, onto the right side of the garment, matching fold of ribbon to the edge of the skirt opening and lining up the unstretched, lengthwise edge of the ribbon with the twill taped stitching line.
- Topstitch the ribbon into place all around the waist, sewing 1/8″ from the edge of the ribbon, very close to the twill tape stitching line.
Step 6: Fold back 1/2″ on the ribbon end to finish it when you reach the side opening. Turn ribbon to the inside of the garment. Place over tailor’s ham and press. Try on the skirt and feel the comfort. Stretching and molding the ribbon before sewing is the key.
~ This article was adapted and modified from an article by Sandra Betzina from Power Sewing that appeared in a previous issue of Notions.


