We all love sergers for stitching and finishing our seams all in one operation. Those loopers and needles just seem to zing along the edges, but what happens at the ends is something to note. You can’t backstitch with a serger like a conventional machine. Do you just cut off the threads and hope for the best, or do you plan a neat finish for the threads that would make your home ec teacher proud?
There are several options for finishing the ends of serger seams, depending on the location and actual type of seam you’re using.
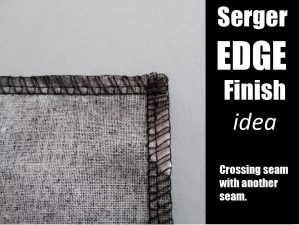
 The easiest way to anchor serger threads is to cross them with another line of stitching. For example, if you’ve serged seams in a skirt, you’ll be crossing them with a waistband or facing and a hem finish. The perpendicular stitching is enough to hold the serger threads in place and keep them from raveling.
Another way to finish serger seams is to apply seam sealant to the threads, let it dry, then trim the threads close to the fabric. This is a great option for rolled hems or places where you don’t want other visible fastening of the threads. The down side of this method is that seam sealant can make the threads a bit stiff (depending on the product brand), it can be a bit messy to apply so best to do so with a pin to avoid getting it on the adjacent fabric, and you have to wait for it to dry before moving on in the construction process. (You can speed up the drying process by sandwiching the area between paper towels and pressing.)
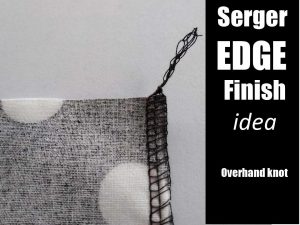
 How about knotting the threads? Good idea, and it can be done two ways. First, simply tie the serger chain in a loose overhand knot, use a pin to push it down to the fabric edge and tighten the knot to secure. Cut off the thread ends close to the knot. Depending on the thread and location, this can make a highly visible fastening. Another knotting option is to separate the threads from the serger chain so that you have them paired—one looper and one needle together, and tie a small knot with the two close to the fabric, then clip the ends. This makes a more discreet knot than the overhand version, and is great for decorative threads or outside stitching.
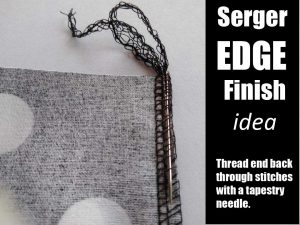
 Yet another option is to thread the serger chain ends back through the serger stitch itself. You can use a tapestry needle or loop puller to slide the chain ends back about an inch through the looper stitches before trimming the ends. A needle threader can be helpful for getting the chain into the needle eye and corralling multiple threads together. {photo}
As you begin to sew a line of serger stitches, it’s easy to secure the tail at the same time, by simply lifting the presser foot and bringing it around to the top surface of the fabric. Lay it on the fabric where the looper stitches will encase it as you serge the seam. It’s important that the chain lies between the needle and the blade to avoid cutting it.
Wrapping it up
Choosing the right method for ending it all depends primarily on the location of the area you’re securing. For outside and decorative stitching, choose a method that’s as unobtrusive as possible. Inside, select a method that gives a secure finish without too much bulk for your project.
~Linda Griepentrog
Linda is the owner of G Wiz Creative Services and she does writing, editing and designing for companies in the sewing, crafting and quilting industries. In addition, she escorts fabric shopping tours to Hong Kong. She lives at the Oregon Coast with her husband Keith, and two dogs, Yohnuh and Abby. Contact her at gwizdesigns@aol.com.


