


Ever wondered how to line-up/match the pattern of your fabric across seams? This 1-minute tutorial is a sure fire way to get it right!
Selvages: On the Edge
What is the selvage?
Selvages are the edges of woven fabrics—the place where the weft (crosswise) threads turn around to form the next row during the weaving process. Some selvages are thicker than the fabric itself, as often there are more threads per inch at the edges to help keep the edges straight during the weaving process.
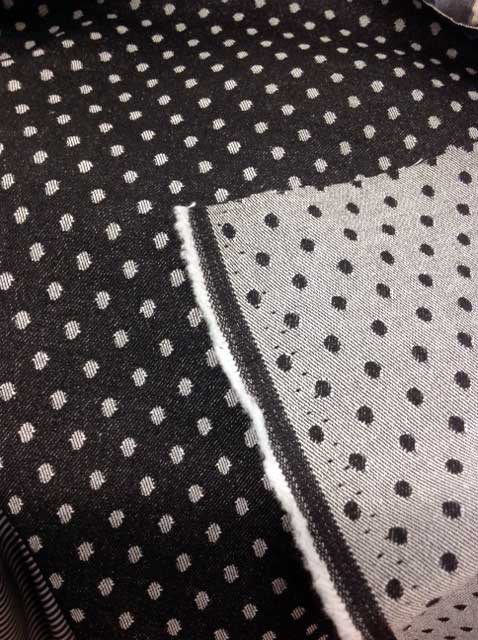
Selvages may be the same color as the fabric, or they may be a contrast. Interestingly, contrast threads are sometimes woven in the selvages. On some velvets and velveteens, you may see metallic threads along the edges.
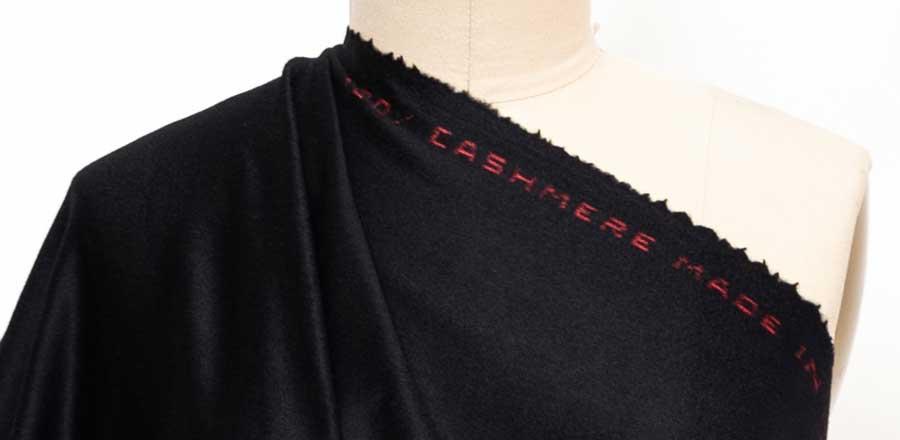
On high quality and imported fabrics, sometimes the requisite information like fiber content and country of origin is actually woven into the selvage in a contrasting thread color.
 Selvages are not always straight—they can be fringed or looped, depending on the type of loom used and the finishing processes.
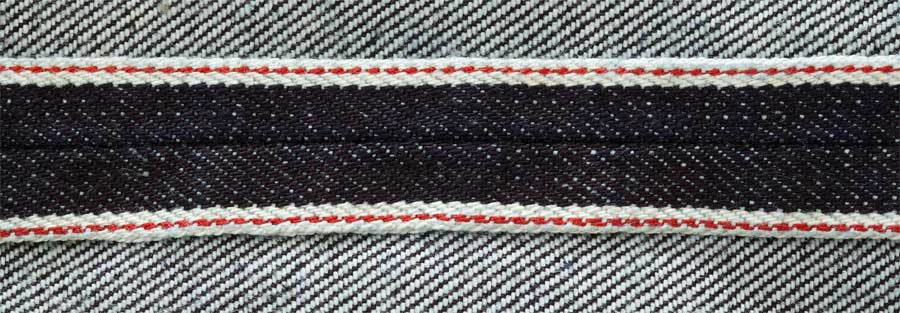
On fabric like denim where the warp (lengthwise) threads are a different color than the crosswise threads, the selvages may be totally different looking than the fabric body itself.
Information, please
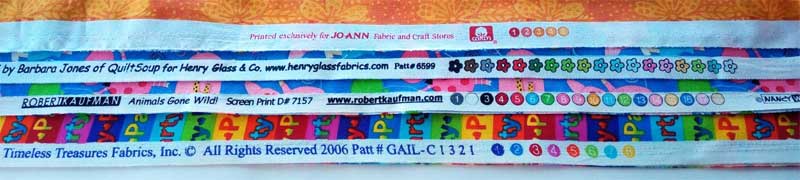
You can find a variety of information bits on most selvages, but some have none. Look for the brand name, the designer’s name and sometimes the fiber content and/or care instructions, like “dry clean only.” You may also find the date the fabric design was copyrighted, and on printed fabrics, you may see lots of colored dots or shapes along the edge. These fun indicators tell how many different color screens were used in the printing process of the particular fabric.
- Some selvage edges include the website for the fabric brand or a social media reference. Designers have even been know to add an inspirational message on the selvage.
- In addition, home décor fabrics may show an indication of the repeat of the pattern, and sometimes an arrow showing which direction is up in the patterning.
Saving Selvages
Because of their tighter weave, the selvages may shrink differently from the fabric itself, so many people just cut the selvages off before cutting out the project.
While you can certainly trim and toss them, you can also use them creatively. If your project has a straight seam edge, you can cut it on the selvage to avoid raveling and perhaps add a decorative touch to the seam edge. A pant leg seam or a loose fitting, straight-cut jacket would be two great places to cut on the selvage for pre-finished seam allowances. Selvages are also a great edge for pockets or straight hems, either exposed for interest, or just as an edge finish.
Trimmed selvages are often used to stabilize a stretchy area—like a shoulder seam in a knit T-shirt. Lightweight woven selvages, like silk organza, are ideal for this use, as they’re sheer and don’t add a lot of bulk as they span the seamline. Interesting cut-off selvages can also be “reapplied” to an area as a decorative trim, often combined with ribbons, braids or decorative stitching. Fun selvages are also great to insert as a flat piping.
Selvages (with some attached fabric width) can also be used for bindings or garment ties.
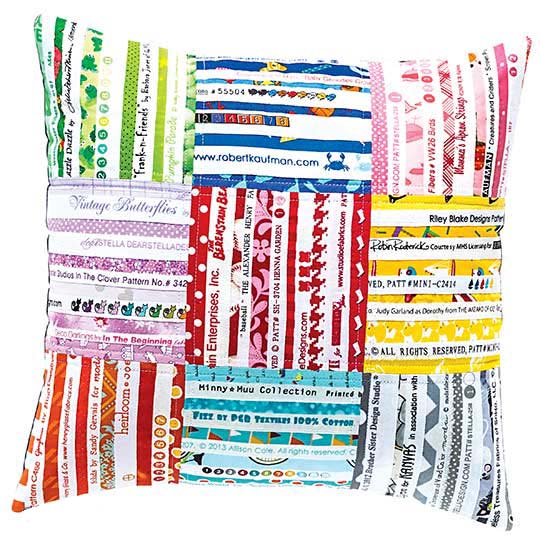
Quilting Ideas
If you’re a quilter, perhaps you keep all your cotton selvages for other projects. It’s easy to strip piece them together on a lightweight backing to make quilt blocks or other projects. When you trim the selvage, leave at least ¼” beyond the actual selvage and use that for joining. Layer the strips one edge over the other and zigzag the edges in place through the backing until you fill the space needed.
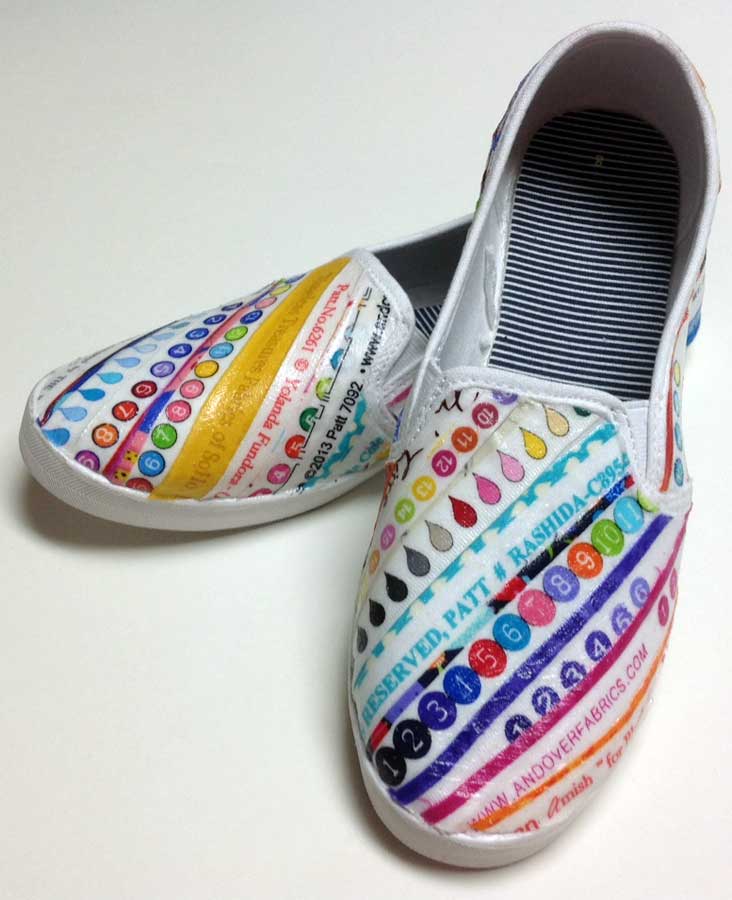
Crafting Ideas
For crafting, trimmed selvages are ideal for decoupaging onto projects—like basic tennies {photo}, picture frames, boxes, vases, etc. Just overlap the raw edge portion and seal with the medium.
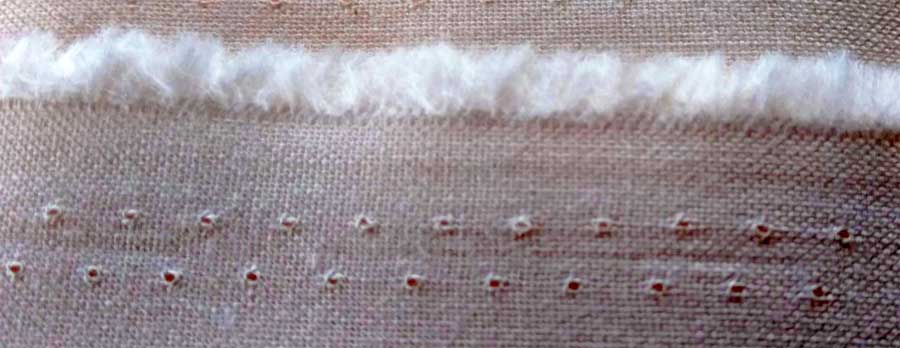
Holey Moley
What are those holes along the selvage? They’re called tenter holes and they’re used to hold the fabric to a frame during the printing and finishing processes.
~Linda Griepentrog
Linda is the owner of G Wiz Creative Services and she does writing, editing and designing for companies in the sewing, crafting and quilting industries. In addition, she escorts fabric shopping tours to Hong Kong. She lives at the Oregon Coast with her husband Keith, and two dogs, Yohnuh and Abby. Contact her at .
Working with Pre-Cut Fabrics
If you’re a quilter, chances are you’re familiar with pre-cut fabric groupings, but if you’re not a quilter, the term may be new to you.
Pre-Cuts Explained
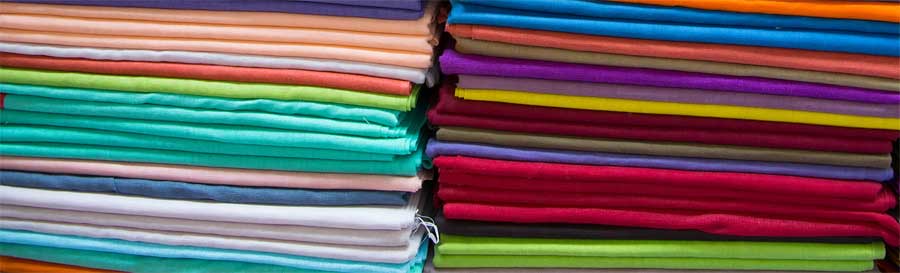
Most manufacturers offer their lines in coordinated groupings of various numbers of fabrics—often including prints, solids and perhaps dots or stripes that all go together. For those reticent about their own abilities to coordinate and mix patterns and colors, pre-cuts eliminate that stress, as they’re all planned to go together and there’s no decision making required.
Choosing a pre-cut bundle is a great way to sample a multitude of prints without having to purchase yardage of each fabric in the line—a huge cost saver. In addition, using pre-cuts saves time—not only for shopping, but also because you don’t have to cut all the pieces from yardage. Because they’re all cut at the same time, the pieces are all the same size.
Pre-cuts usually include one or two pieces for each fabric in the specific line and generally total twenty to forty-two pieces of the same size. The groupings can be made from a single fabric line or they can be chosen for other similarities, like all dots and stripes, all batiks, various prints in the same color range, or sometimes all neutrals.
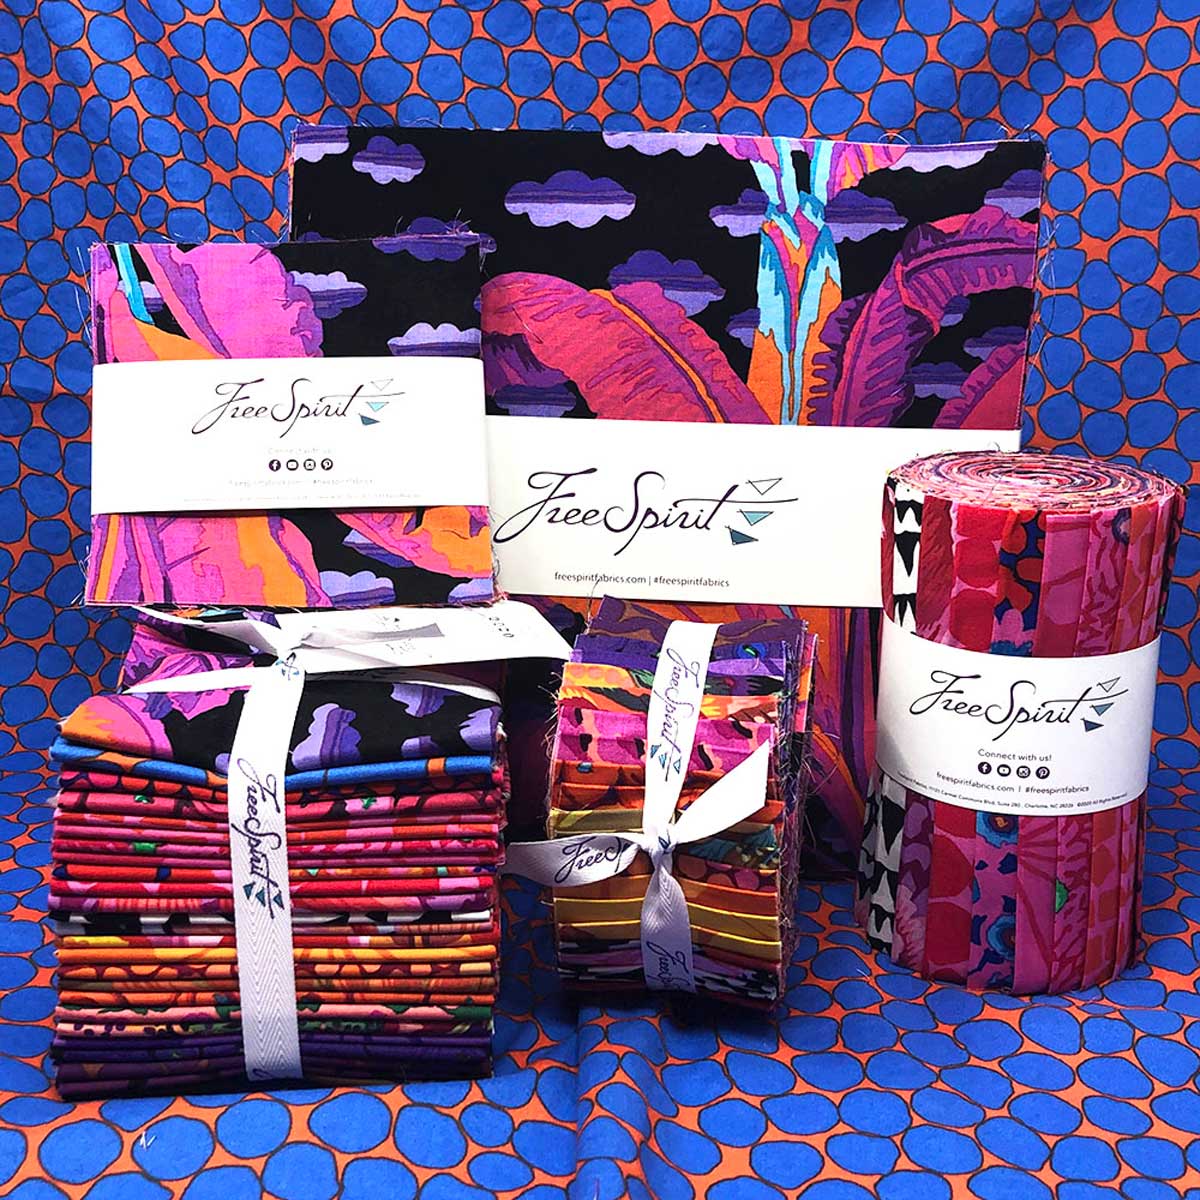
Sizing
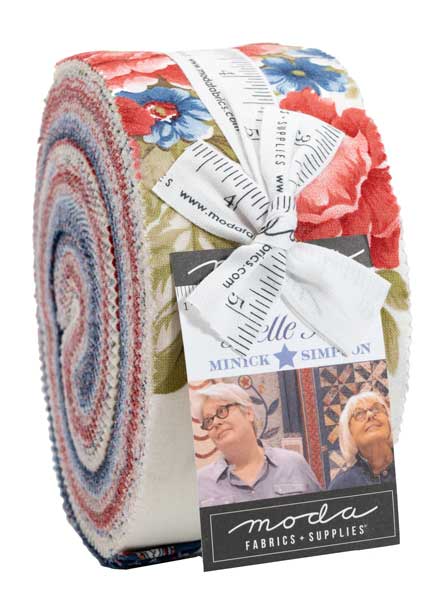
These handy time savers come in a variety of sizes and with a multitude of name variations, depending on the manufacturer. Look for monikers like Jelly Rolls, Charm Packs, Layer Cakes, Pops, Stackers, Roll-ups, etc. Most are quilting cottons, but there are also bundles of wools and other fabrics offered.
Common pre-cut sizes include strips of 1 ½”, 2 ½” or 5” by the width of the fabric. Squares come in 2”, 2 ½”, 5”, 6” and 10” variations. In addition, there are die-cut triangles, diamonds and hexagons available, and of course the more familiar fat quarter (18” x 22”) and fat eighth (9” x 22”) options.
During the manufacturing process, fabrics are layered and either die-cut, laser cut or manually cut into the preferred size/shape. The number of layers being cut at once is dependent on how many fabrics are in a given collection, and if there are multiples given of any.
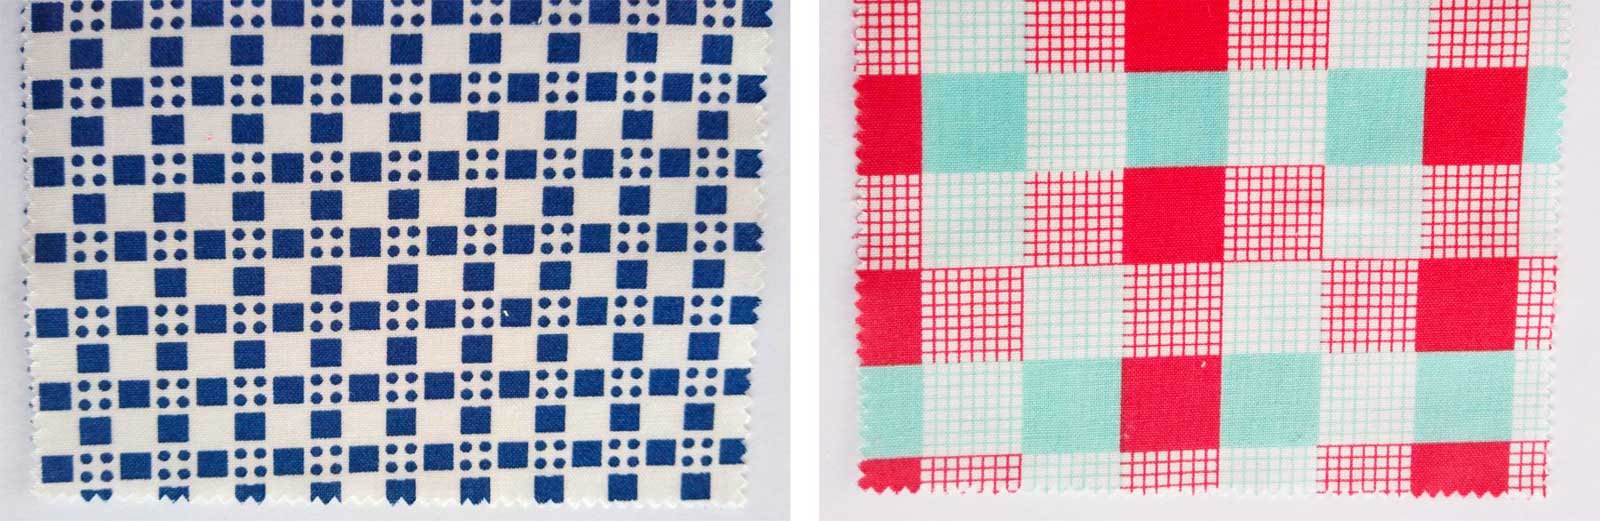
 Many pre-cuts come with pinked edges to help prevent fraying {photo}, while others have straight-cut edges and may be plastic wrapped for the same reason. For those pre-cuts with pinked edges, use the peak to measure seam allowances, rather than the valley portion of the zigzag.
Using Pre-Cuts
Pre-cuts generally do not get pre-washed, as doing so can create a mess of lint and threads as pieces fray. But, if you compelled to do so, place them in a mesh bag and use a gentle cycle or simply place them in a basin of hot water to soak.
To help keep the edges of your fabric neater, use a lint roller along the edge of the pre-cuts before using.
There are many quilt patterns available that are specific to pre-cut sized pieces and they can also be used for all kinds of small projects where buying by the yard may not be necessary to cut the needed pieces. The 2 ½” x width-of-fabric strips are ideal for binding.
Measure the pre-cut pieces to be sure that they are accurately sized and if not, adjust pieces accordingly that you cut from yardage to pair with the pre-cuts. Some pre-cuts are actually larger than the stated size, while others may be slightly smaller.
And don’t forget—you can cut pre-cuts into small cuts if your pattern requires it. For example, a 10” pre-cut square can yield four 5” squares or sixteen 2 ½” squares, or some combination thereof.
Patterns
Sometimes a distinct pattern may not align with the cut edges on pre-cuts, causing the design to appear crooked. What can you do? If the issue is bothersome to you, think about recutting the piece along the design lines and using it as a smaller piece for another project.
~Linda Griepentrog
Linda is the owner of G Wiz Creative Services and she does writing, editing and designing for companies in the sewing, crafting and quilting industries. In addition, she escorts fabric shopping tours to Hong Kong. She lives at the Oregon Coast with her husband Keith, and two dogs, Yohnuh and Abby. Contact her at .
Fireside Chat: Shankari Paradee
We hope you enjoy this 25 minute chat with Shankari (a.k.a. Sewl Sister) as she talks about making quilts and memory bears with a plan for zero waste. Her goal is to live in a world with no landfill fabric. We think you will enjoy her story and be inspired! Visit the Sewl Sister website at https://www.sewlsister.com/
~Sheryl Belson
Border Prints 101
When shopping for fabric, we’re accustomed to seeing rows of bolts with an allover print. But look a little deeper and you’ll find some with unique features—border prints! Border prints are fun to work with and allow you to showcase this print feature in creative ways.
What is a border print?
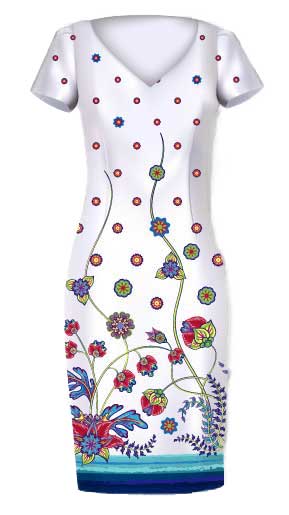
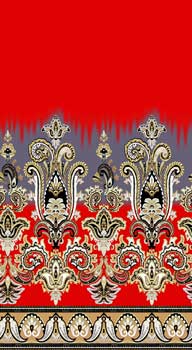 Instead of a fabric having the same patterning across the full width of the fabric, border prints have a different pattern along one or both edges. The bands of distinct prints can be narrow or wide, and can extend their emphatic look across the fabric’s full width in some instances creating a beautiful graphic element.
- A double border print may have the same or differing designs along each fabric edge. A common pairing is to have one narrow border and one wider one.
- A border print is parallel to the fabric’s selvage, ready for showcasing in a garment, accessory or quilt and can be found on a woven fabric or along the cut edge of a knit.
- Another type of fabric considered a border print has a lengthwise edge detail like scallops or fringe along one or both sides.
Working with a Border Print
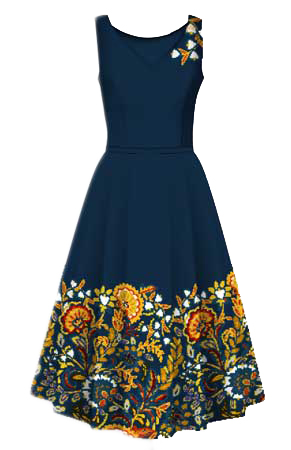 The primary difference in working with a border print is that the project needs to be on the crosswise grain of the fabric, rather than the traditional lengthwise spec. The design area is best showcased along a straight edge, like a skirt or sleeve hemline, pant leg, jacket hem, etc., though it doesn’t need to be at the bottom of a garment. The border can also be used along a pocket edge, in a bodice area or even at the waistline.
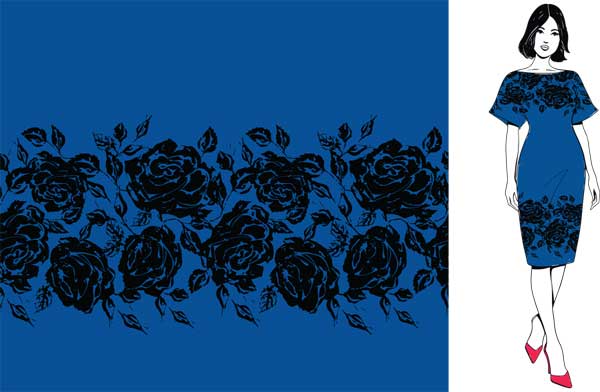
If you prefer to use the border vertically instead of horizontally, think about a jacket front, wrap skirt or side-seam accent. If you choose this orientation, be sure the border design isn’t directional—for example, you probably don’t want flower stems horizontal on a jacket front, or people lying down along a wrap skirt edge. The print should really be non-directional for vertical use.
Border prints can also be used to accent small areas, like collars and cuffs, totes, etc., and are also ideal for home décor projects, like on a curtain hem, pillow or quilt border.
Like any distinct print, matching is always a good idea, so consider where you may need to match a distinct pattern before you begin cutting. A hemline border should match at the side seams to avoid breaking the visual patterning.
Pattern Adaption
 Some patterns are designed specifically to be used with border prints, but most are not. Look for designs with straight edges, like a gathered or pleated skirt, if you want to feature the print along the hemline.
- If the area you want to use the print in is curved, you’ll need to straighten it or risk losing part of the border to the curve.
- Redraw your pattern’s grainline to reflect the new orientation on the fabric. Use a ruler to change up the standard grainline 90°. Double check the fabric width to accommodate the new orientation.
- Since some border prints are close to the selvage, it may be necessary to modify a hem depth if you want to use the print along the bottom of a skirt. A narrower hem, or a faced hem, could both be options depending on the design placement.
Yardage Adaptation
The amount of yardage needed for a border print will likely differ from what was originally called for if the garment was originally cut on the lengthwise grain. After redrawing the grainline on the pattern pieces, do a test layout to refigure the fabric before purchasing. Keep in mind that it’s best to cut all the garment pieces on the same grain to avoid any variance in directional prints or shading.
The width of the fabric may limit the use of the border on certain garments, or require you to piece a garment if you’re intent on using a particular fabric.
Note that you can also trim off the border and reattach it if needed, to get the look you want in your project.
Now that you know more about them, when you see a border print fabric, think about how you can showcase it in your next project!
~Linda Griepentrog
Linda is the owner of G Wiz Creative Services and she does writing, editing and designing for companies in the sewing, crafting and quilting industries. In addition, she escorts fabric shopping tours to Hong Kong. She lives at the Oregon Coast with her husband Keith, and two dogs, Yohnuh and Abby. Contact her at .
