American Sewing Guild (ASG)

Visit our blog Visit the ASG Facebook page Visit ASG on Pinterest Visit ASG's YouTube channel Visit ASG on Instagram
  • Home
  • Join ASG
    • Join Online
    • Chapter Locations
    • Member Benefits
    • Member Brochure
    • Join by Mail
  • Education & Classes
  • Resources
    • Contests & Awards
    • Giving Back
    • Hall of Fame
    • Links
    • Travel and Tours
    • Measurement Chart
  • Shop
    • ASG Store
    • Chapter Products
    • Video Resources
  • Blog
  • About
    • About Us
    • Donate to ASG
    • ASG Sensitivity Statement
    • FAQ’s
    • Start a Chapter
  • Contact
  • Member Login
    • Login First!
    • Members Only
    • Leadership Only
    • Website FAQ’s
    • Logout
  •  

November 27, 2020

Fast and Easy Fringed Edge Finishes

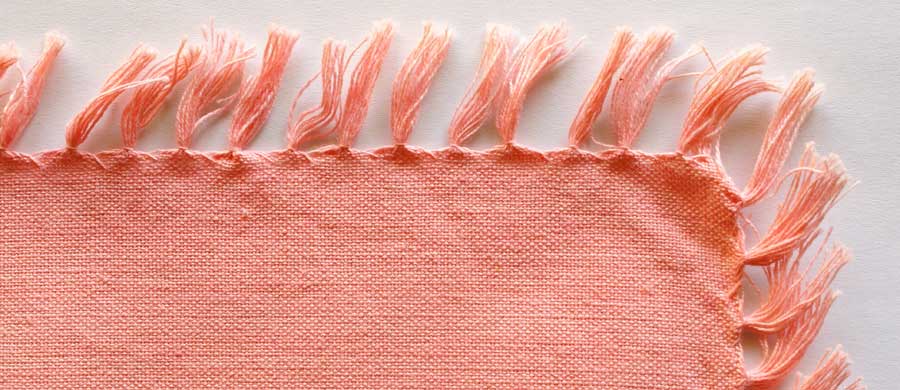
If you’re looking for a fast and easy edge finish, there’s nothing easier than fringe! It works on single-layer placemats, scarves, patches and pockets, or with a little more effort, you can insert fringe into a seam or hem.

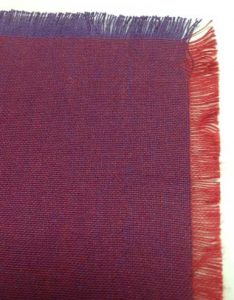
The results of fringing are not always what you expect, as some fabrics are woven with different color threads going lengthwise and crosswise, so you get totally different colors in one direction from the other. Denim is a good example, as white threads are usually used one way and indigo the other.

The Basics

Select a woven fabric (knits cannot be fringed using this technique). Fabrics like linen, burlap, gauze, wools and bouclés are ideal candidates. The looser the weave, the easier the fringing process.

  • To create a simple fringe, be sure your project edge is cut parallel to the fabric grain. Sew a line of stitching where you want the fringe to stop, then start pulling threads up to the stitching line. The stitching thread can match the fabric or contrast with it.
  • For easier removal, use a needle or a large pin to help separate the fabric threads and gently pull them across the fringed area. Note that if your project has a right-angle corner (like a scarf), there will be a gap in the thread fringe at the corners.
  • If you want to knot the fringe, either singly or with thread groups, allow extra length for that process. Test-fringe a sample to see how much length you need for either a square knot or an overhand knot.
  • For a top-fringed pocket, cut the pocket top on the straight grain and extend it the desired fringe length (no hem). For a fringed sleeve hem, determine the sleeve length, then extend the lower edge the desired fringe length, being sure to keep a straight grain edge.
  • Single-layer scarves can be fringe-finished on all edges or just the ends, like on a muffler.

Inset Fringe

  • Inserting fringe into a seam allows for more placement flexibility and allows for placing it on a curve as well.
  • To make a fringe strip, cut a straight grain strip the desired width of the fringe, plus the requisite seam allowance. Stitch and fringe as noted above. On very loosely woven fabrics, layer two strips for a denser fringe.
  • Use the fringe strip as you would a piping, basting it along one layer of the seamline with the fringe facing the bulk of the project. Then top with the second layer of the project, and sew just inside the basting line. When you turn the project right side out, the fringe will extend beyond the seamed edge.
  • For long fringe strips, simply abut the ends of multiple fabric strips as needed. If you need a bulkier fringe, layer two strips atop each other and treat as one layer.

Design Tip: inset fringe can be made from matching or contrasting fabric.
Trim Tactics

If desired, you can add a ribbon or trim along the stitched edge of fringe as an accent, whether it’s single layer or inserted into a seam.

Don’t forget to check the selvage of your fabric, as some have fun fringes that can be used as is, and they already match!


~Linda Griepentrog
Linda is the owner of G Wiz Creative Services and she does writing, editing and designing for companies in the sewing, crafting and quilting industries. In addition, she escorts fabric shopping tours to Hong Kong. She lives at the Oregon Coast with her husband Keith, and two dogs, Yohnuh and Abby. Contact her at .

Did you enjoy this article?
Are you an ASG member?
This field is for validation purposes and should be left unchanged.

Tagged With: fringe, fringed edges, jacket, jeans, knotted fringe, learn to sew, placemats, scarves, sewing tip

April 3, 2020

Can Silks be Washed?

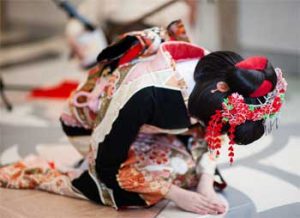
One of my college classmates was a very recent immigrant from Korea and she once asked me to help her wash her “dance kimono.” Naturally I was eager as it is “common” knowledge that silks should never be washed. What I learned continues to influence my sewing today.

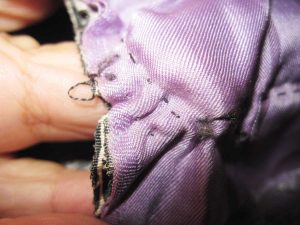
Her kimono was pieced of over 50 strips (up to 3″ in width) of silks, plus bindings (such as strips edging the collar) in different colors. Because the dyes were not colorfast, she had to take the entire kimono apart and wash every color separately, then press and sew back together with long stitches.

Lesson 1

Wash all fabrics separately until you determine whether the dyes are colorfast (like sweatshirts!).

Lesson 2

Don’t complain if a Western-style garment needs to be pressed after washing ─ doing laundry really could be worse.

The collar area was doubled fabric; it did not have a separate interfacing material and the excess was not secured so kimono collar would wrinkle and bunch up if washed.

Lesson 3

Baste or quilt any intact original kimono collar to wash. If making western style garments, make sure interfacings are secured. If deconstructing kimono to re-purpose fabrics, the collar probably has double the visible fabric.

Obi (belt) is generally the most elaborate part of the costume. It is also very stiff, the purpose is partly like a corset. For a light-weight silk, the stiffness is provided by covering a very dense canvas-like fabric, which is always blocked to retain the original size – unless you don’t plan to reassemble the obi.

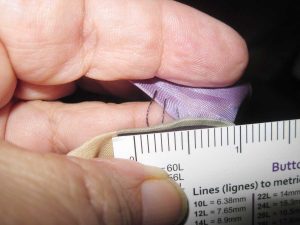
Stitch lengths

Lesson 4

Unseen construction materials affect whether silk (or any) garments can be washed, so pre-shrink.

Some silks reveal textures that may not be apparent until wet. These fabrics may have quite subtle matte/shiny differences due to threads that are spun differently and thus shrink at different rates. All of these silks are intended to be blocked when washed.

Lesson 5

If you like texture, enjoy, even if you now have less fabric! Better to adjust plans than to finish and then shrink.

The following are things I’ve learned from deconstructing and re-purposing obi and kimono.

Both obi and kimono fabrics are woven in widths of 10-14 inches, and the garments utilize that to the fullest. The rounded corners of sleeves are left square and not trimmed, with the excess fabrics bunched up in the curved area.

Curved corner on a sleeve

If smaller sizes of kimono are made, seams are made extra wide but not cut off. If extra width is needed an entire extra panel of fabric may be sewn into the side and is not cut or could be half the width, with very wide seam allowances. Extra length will probably be turned up on the inside to replace some of the lining fabric. All of this is to take advantage of taking apart garments to wash, as when re-assembled fabrics can be turned to even out wear or to change the fit/size. No worries if you gain or lose a little weight; alter each time you wash!

Seam allowances

Most of the rolls of fabric were made specifically for either obi or kimono, with pre-planned cutting marks. Bolts of fabric are a new concept. This means that the fancy portions of obi could be in the only area(s) that show, while plain fabric is woven for the rest. Do not assume the entire length is what is seen on the outside.

Some fabrics such as brocades and jacquards may fall apart or unravel if cut. This is not a problem for kimono or obi as the fabrics are nearly always left with selvages intact, with the exception of obviously pieced dance and fancy garments.

INSPIRED? Antique Pattern Library has antique kimono fabric designs and stencils in the “J” and “K” sections.

Lesson 6

Test a small cut before re-purposing kimono or obi; particularly be careful if threads are carried on the back. Also examine carefully to locate any possible embroidery and avoid cutting through that area. Embroidery threads may not be colorfast so know it could possibly bleed when washed, particularly true on ornate garments.

Examine carefully if there are any metallics. If painted/stenciled it could be metallic leaf that is not washable as it will flake off. If the metallic is woven in, test first but the threads are probably washable if of the same weight as the other threads. If the metallic threads are heavier or if embroidered, it is probably NOT washable due to the construction method of heavier metallic threads.

There are several ways to use for garments: (1) kimono are wrapped and tied, so many people can wear as open jackets/vests without altering; (2) side inserts can be added to keep the front area intact: use the bottom of long kimono, sleeves, linings, parts from a second kimono, other fabrics; (3) I’ve taken kimono apart completely and re-sewed into large enough blocks to cut Western-style blouses and jackets.


~Hope Wright, ASG Member, Springfield Lincolnland Chapter

Did you enjoy this article?
Are you an ASG member?
This field is for validation purposes and should be left unchanged.

Tagged With: kimono, sewing tip, silk, texture

March 17, 2020

Sewing with Vinyl

This quick video has 3 tips for sewing with vinyl.


Did you enjoy this article?
Are you an ASG member?
This field is for validation purposes and should be left unchanged.

Tagged With: sewing, sewing tip, vinyl

January 8, 2020

How to Sew Bias Strips Together

Our short video on using the Bias Tape Tool will show you how to make your own bias tape, but do you know how to join your fabric to create the bias strips? This video will show you how.

https://www.asg.org/wp-content/uploads/2020/01/How_Do_I_Sew_Bias_Strips_HQ.mp4

~© ASG; Sheryl Belson, Plano Chapter

Tagged With: bias strips, sewing, sewing tip

December 20, 2019

Stash Busting: Take UFO’s Off the Radar

We all have a stash of projects in drawers, on shelves and in containers that have been started but never quite crossed the finish line. ASG member, Hope Wright, had a stash of UFO’s and a plan and now she’s sharing her tips and hints on how an online challenge in 2011 inspired her to finish an unprecedented 926 projects. (Yes, 926!)

Here’s Hope’s story…

Sewing fills my days. Not to mention the living room, bedroom and closetsSort, Sort, Sort

I first started in 2011 during a challenge from an on-line group.  Attempting to use only “from my stash,” I first gathered all the projects I had already started in to one place.  I then sorted them by estimating how long it would take to finish each project. The first group were projects that would take just an hour to finish. Next came projects that could be done in an evening after work. Finally, projects I could do on a Saturday.

By using this system, I have completed 926 projects to date. I do add projects to my stash, but I try very hard to finish everything I think I can complete in an evening or on a Saturday morning.  Longer projects still await!

Organize

Organize your kits, stash and tools in some way that makes sense to you, or at least gather them together so you can find them.  For me, I have most of my tools  and gadgets in a bookcase in my sewing room.

Try organizing your projects by type of material, where to work, time it will take to complete, color, expense, etc.  Group projects that are repetitive. For example, cut out several projects in one session and make your own kits.

Get rid of anything you have no desire or need to finish. Take that group and consider if someone else may want it for their UFO stash.  I’ve given several boxes of supplies to a school art program.  Remember, it’s also okay to just put it in the trash!

Make Three Lists

  1. Projects to get to this coming year.
  2. Projects, ideas, and stash in storage. This includes actual kits you have and ideas to do “someday” – or as one person said, her Craft Retirement Account.
  3. Projects completed. It is great to see what you’ve accomplished!

Categorize Active Projects

An important function for me is that I always actively work on 3 projects at any one time, with 3 to 9 more in line so I never have “down” time. Everything else remains stored away; anything more than 12 is simply too overwhelming.  My active projects are categorized by where I can do them:

  • Something to do at home, but can’t be done in front of the TV (such as using the cutting table or sewing machine). These are often things I do on the weekend rather than after work. Many projects then move to the next category.
  • Something I can work on while listening to TV, such as pressing, hand sewing, or embroidery. Some projects then move to the next category.
  • Something I can do in a waiting room, meeting, or traveling. These projects are easy to stop at any point, small to pack or carry, do not require extra light, magnification, or a table to spread out.  I always have a project in a tote bag with all supplies to be able to work on it.  I nearly always keep one in the car.

Projects with Deadlines

I work on anything with a deadline first, even if I have a lot of time.  It is much better to finish something six months early than a day late. Between all my clubs and church, I do a dozen or more programs and deadline projects during a year. I put them first on my “to do” list on January 1 and indicate the deadline.

Finally, I also look at promises already made before I agree to do something more.  I try to finish Christmas gifts before Thanksgiving week so I can enjoy holiday parties. Since most groups have their programs planned a year at a time, I know I will start working in December on programs for the coming year. I will seldom start anything else until they are done. Find what works for you to take those UFO’s off your radar!


~© Hope Wright, ASG Member

Tagged With: sewing, sewing tip, Sewing UFO's

  • « Previous Page
  • 1
  • 2

Become a Member

Join the only national organization dedicated to Advancing Sewing as an Art and Life Skill.

Join Now button

Blog Article Categories

  • ASG Conference
  • Chapter Stories
  • Embroidery
  • Fitting
  • Learn to Sew
  • National Sewing Month
  • Products, Books, & Patterns
  • Projects
  • Quilting
  • Sewing
  • Sewing Techniques
  • Sewing Tips
  • Sewing Tours
  • Videos
  • Disclaimer
  • Privacy Policy

American Sewing Guild
National Headquarters
9660 Hillcroft, Suite 230
Houston TX 77096
713-729-3000 | 713-721-9230 Fax
www.ASG.org

ASG wordcloud - education, conference, discounts, videos, special offers, tours and more

Copyright © 1998–2025 · American Sewing Guild · All Rights Reserved