


This quick video has 3 tips for sewing with vinyl.
Ending it All (serger stitching, that is)
We all love sergers for stitching and finishing our seams all in one operation. Those loopers and needles just seem to zing along the edges, but what happens at the ends is something to note. You can’t backstitch with a serger like a conventional machine. Do you just cut off the threads and hope for the best, or do you plan a neat finish for the threads that would make your home ec teacher proud?
There are several options for finishing the ends of serger seams, depending on the location and actual type of seam you’re using.
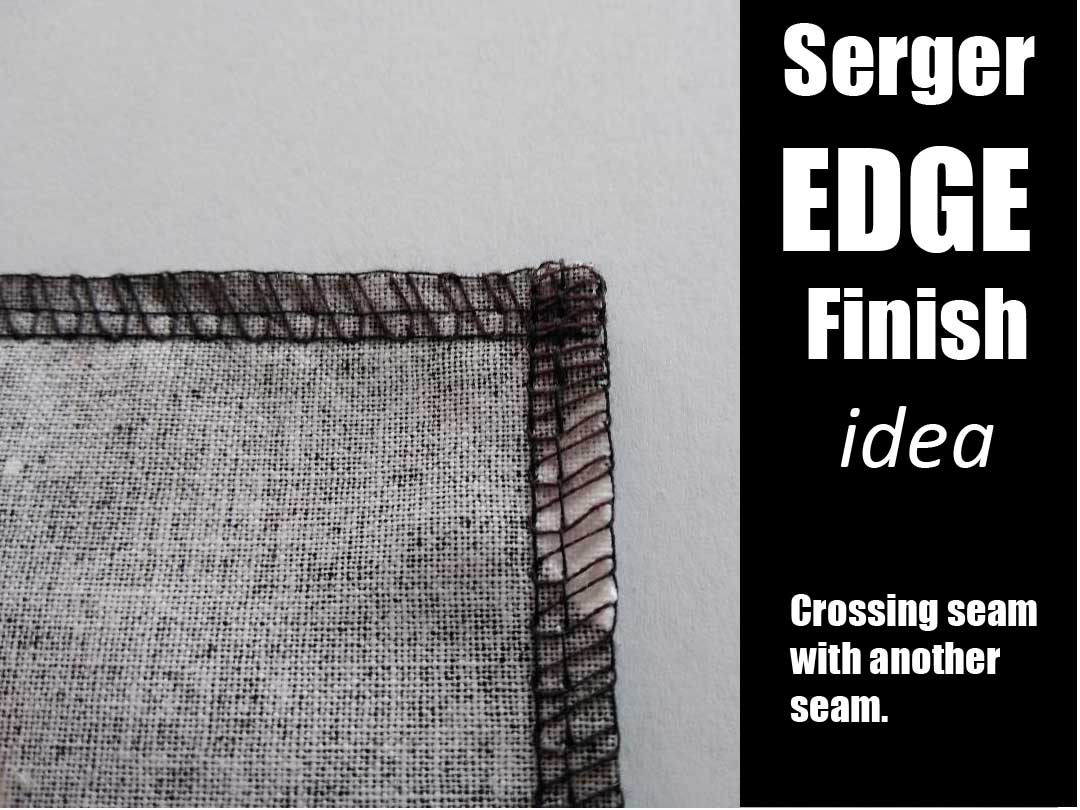 The easiest way to anchor serger threads is to cross them with another line of stitching. For example, if you’ve serged seams in a skirt, you’ll be crossing them with a waistband or facing and a hem finish. The perpendicular stitching is enough to hold the serger threads in place and keep them from raveling.
Another way to finish serger seams is to apply seam sealant to the threads, let it dry, then trim the threads close to the fabric. This is a great option for rolled hems or places where you don’t want other visible fastening of the threads. The down side of this method is that seam sealant can make the threads a bit stiff (depending on the product brand), it can be a bit messy to apply so best to do so with a pin to avoid getting it on the adjacent fabric, and you have to wait for it to dry before moving on in the construction process. (You can speed up the drying process by sandwiching the area between paper towels and pressing.)
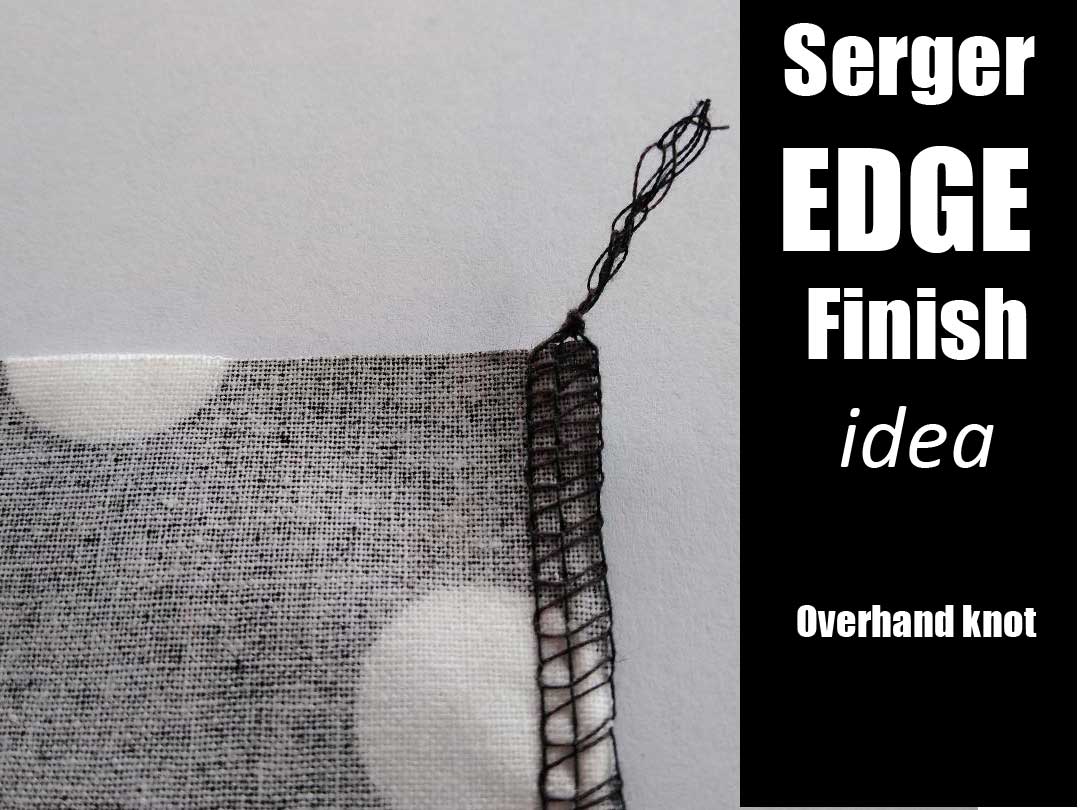 How about knotting the threads? Good idea, and it can be done two ways. First, simply tie the serger chain in a loose overhand knot, use a pin to push it down to the fabric edge and tighten the knot to secure. Cut off the thread ends close to the knot. Depending on the thread and location, this can make a highly visible fastening. Another knotting option is to separate the threads from the serger chain so that you have them paired—one looper and one needle together, and tie a small knot with the two close to the fabric, then clip the ends. This makes a more discreet knot than the overhand version, and is great for decorative threads or outside stitching.
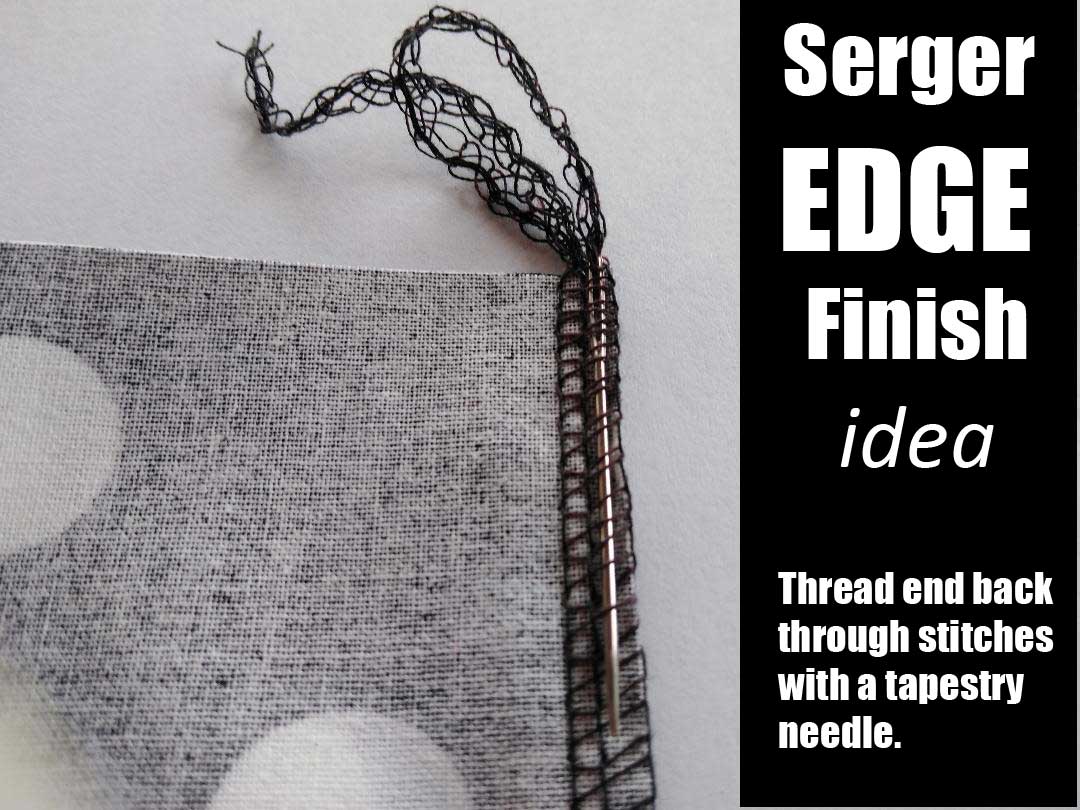 Yet another option is to thread the serger chain ends back through the serger stitch itself. You can use a tapestry needle or loop puller to slide the chain ends back about an inch through the looper stitches before trimming the ends. A needle threader can be helpful for getting the chain into the needle eye and corralling multiple threads together. {photo}
As you begin to sew a line of serger stitches, it’s easy to secure the tail at the same time, by simply lifting the presser foot and bringing it around to the top surface of the fabric. Lay it on the fabric where the looper stitches will encase it as you serge the seam. It’s important that the chain lies between the needle and the blade to avoid cutting it.
Wrapping it up
Choosing the right method for ending it all depends primarily on the location of the area you’re securing. For outside and decorative stitching, choose a method that’s as unobtrusive as possible. Inside, select a method that gives a secure finish without too much bulk for your project.
~Linda Griepentrog
Linda is the owner of G Wiz Creative Services and she does writing, editing and designing for companies in the sewing, crafting and quilting industries. In addition, she escorts fabric shopping tours to Hong Kong. She lives at the Oregon Coast with her husband Keith, and two dogs, Yohnuh and Abby. Contact her at .
Adding Ease to Your Garment
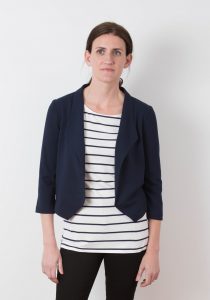
A few years ago, I adapted my knit Grainline Studio Morris blazer pattern so I could make it with some luscious silk matka. I knew I had to adjust the pattern since my fabric of choice had absolutely no stretch in it. I decided to take a tried-and-true (TNT) pattern designed for a woven fabric and “frankenpattern” the knit blazer into a woven blazer. I took some of the pattern pieces from the Archer Buttonup pattern (also designed by Grainline) and came up with new cutting lines for the Morris. I used the Archer upper back, arm scythe, and upper sleeve to redraft the blazer pattern and was just sure I had made all the pattern adjustments to shift from a zero-ease design that works with the stretch of a knit to a design that would work with a non-stretch woven. I finished the blazer and couldn’t wait to put it on only to discover it was a bit too tight across the upper back. I hadn’t added enough EASE! I know I am not the only person who has experienced this.
Can We Put Your Mind at Ease?
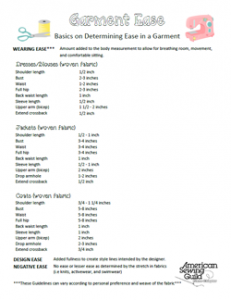 We’d like to put your mind at ease with some information and a free garment ease template created by members of the Plano, TX chapter that shows the minimum amount of ease you’ll need to add in your garment for a comfortable fit. Identifying the correct amount to include is vital to avoid an outcome like the one in my blazer story. We hope this ease cheat-sheet helps you!
What is ease?
In its simplest form, ease is the additional room in a garment in excess of the actual body measurement. There is much more to ease than this simple definition though — there is wearing ease, design ease and negative ease. Each of these impacts the finished measurement of a garment in different ways.
- Wearing ease provides ease of movement. It is the difference between the actual body measurement and the finished garment measurement. The template will help you understand this kind of ease. It gives you guidelines that will help you be sure you have at least enough room in your garment for comfortable movement as you wear it.
- Design ease provides the style. It is also referred to as style ease or fashion ease. It is additional ease added beyond what is needed for movement to create specific styles ranging from close fitting to very loose-fitting garments. It also comes into play when the design of the garment includes things like pleats, gathers, or tucks.
- Negative ease is associated with fabrics that stretch (such as knits or woven fabrics with lycra added) or are cut on the bias, producing a certain degree of stretch. In this case, the finished garment measures the same as the actual body measurements, or more often, even smaller. The degree of stretch produced in each fabric plays a big role in how much negative ease a garment will need for good fit. Negative ease is used in garments like activewear and swimwear.
How do I calculate the right amount of wearing ease?
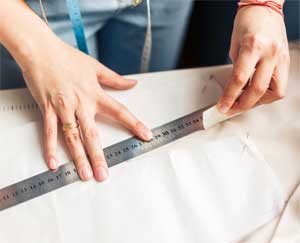
When choosing the size you will make in a pattern, look not only at the body measurements, but also the finished garment measurements. Many patterns will include this information for at least the 3 primary measurements – bust, waist and hips. If your pattern does not include this information on the pattern, you can calculate it yourself by simply measuring the pattern pieces in those locations and removing the amount included for seam allowances. Compare the finished garment size to your personal body measurements to be sure you will have a comfortable fit before you start cutting.
More about Negative Ease
 As already stated, negative ease simply means that your finished garment measurements will be the same or smaller than your actual body measurements. When sewing with knits or stretch woven fabrics, the same accommodation for wearing ease is not required since the fabric will stretch as the body moves. Just because your finished garment is smaller than your actual body measurement doesn’t mean you won’t be able to get it over your head. The more negative ease you incorporate just means you will get a more fitted look in the final garment. In most cases, you will probably target no more than 1”-3” negative ease in your design. More than that and you may wander into that “Incredible Hulk” look that has people wondering if you will burst through the seams at any moment.
Of course, the percentage of stretch in your fabric choice and whether it has 2-way or multi-directional stretch play a huge role in determining the right amount of negative ease. The higher the percentage of stretch built into the fabric you have chosen for your project, the higher the percentage of negative ease you are likely to need in your pattern.
There are lots of “rules” out there for how to calculate the right amount of negative ease for a given fabric, but here is a good starting point:
- Cut a 6”x3” piece of fabric.
- Stretch the fabric to its comfortable maximum length.
- Calculate the percentage of stretch
- Addition stretch length/original length = percentage of stretch
- Examples:
- If the 6” piece stretches to 9”, the fabric has 50% stretch.
- If the 6” piece stretches to 7”, the fabric has 15% stretch
- For a comfortable fit, try starting with the same amount of negative ease at the percentage of stretch in your fabric, up to but not exceeding that 1”-3” guideline mentioned earlier.
- Thinner fabrics do best with less negative ease to avoid a see-through effect. Thicker fabrics can handle more negative ease and give a more acceptable form-fitting look.
Remember, these are starting point rules and you will develop your own that best fit your own personal taste and adapt with each fabric you choose to work with.
Don’t forget Design Ease
With all this talk about negative ease, let’s not leave this discussion without going back to the concept of design ease. Even with stretch fabrics, design ease has a role to play. It is perfectly acceptable to decide to add design ease into a garment made with a very stretchy fabric. It will take your garment from form-fitting to soft, graceful drape and still have a beautiful look. You are the designer and you are in charge!
Now it’s you turn!
We hope this gets you started on your journey of understanding ease and fit. This is a topic often discussed in ASG monthly group meetings around the country. Many groups focus on this kind of topic frequently and would love to meet you. Talk to someone in your local chapter to find out what is happening there. ASG loves to walk alongside fellow sewing friends in their sewing journey!
~Debby Bowles and Sheryl Belson, ASG Plano Chapter
Linda MacPhee named Keynote Speaker for 2020 Conference

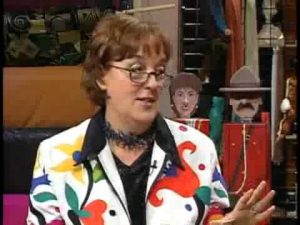
ASG is excited to announce that international designer Linda MacPhee will be the keynote speaker at the 2020 conference in San Antonio. As our way of introducing her to you, we have selected her as our independent designer of the month for February. Linda hails from Alberta, Canada and will be once again making her way back to conference.
Sears Catalog for Inspiration
As number 5 of six kids and raised on a family farm in northern Alberta, money wasn’t abundant. In fact, her early memories include going through the Sears catalog with her siblings and picking out their favorite outfits, only to have a local seamstress try to duplicate them from old garments. Even then she realized the finished product never really did live up to the picture she had chosen and hoped for. That’s why she decided at an early age to try her own hand at sewing. She sewed her first garment when she was about 12 when she wanted a new dress for her cousin’s wedding. “My dress was quite successful I remember; but because I knew nothing of fitting, I had to position myself against a wall so I could use my one hand to hold/grab a handful at the back of the dress to make it look like it fit! I guess that dressmaker likely influenced my desire to create my own look. Looking at family pictures now she really was a master as my brothers were in good looking suits that she had recycled from whatever. My mother didn’t sew or have any interest in sewing, although I’m sure she must have mended and repaired things as necessary. Our dressmaker, Mrs. Schmitt, was from Germany and was truly a master at the sewing machine. (We had a treadle of course!)”
Concerning her formal training, Linda commented, “I joined the local 4-H sewing club when I was old enough and that was my only training until I graduated from high school. I enrolled in Home Economics at the University of Alberta as by that time I was sewing all my clothes and was interested in learning more.”
It Started With a Parka
While working as a district Home Economist for the Department of Agriculture (extension agent) in Northern Alberta and at one of her meetings with 4-H groups, Linda met a leader who had on a beautiful Parka. She was a nurse and had recently immigrated from the Phillipines. While chatting, Linda learned that the woman had made it herself. That set her mind in motion and she set about to make one herself. It was no easy task for the woman had tanned her own coyote skin for the fur trim and had sourced her own fabric (wool duffle) from the local Hudson Bay store. Linda explained, “Well, I didn’t tan my own skin but decided if she (a nurse) could do it so could I—a Home Economist! So I did!! My favorite childhood story that I had read to me many times was “The Little Red Hen,” and the theme has fulfilled itself many times in my life!”
 She continued, “One of my responsibilities as the extension agent was to teach adult sewing classes to rural women. I met lots of people and with my parka on, came many requests to make them for people. I had learned also how to make moccasins/mukluks from some of the Native American ladies I had worked with. So in my spare time I started making parkas and matching mukluks for a never ending line up of customers. I charged them $100 which seemed pretty good at the time! I realized quite quickly that the demand would never end, so I decided to teach people how to do it themselves. That was the start of my business!”
The Inuit ladies of the N.W.T. had been making parkas for years so those parkas were the inspiration for the basic design. Wanting her parkas to be different, she added applique and trim, and each one became its own work of art. She came up with many different patterns for parkas and applique designs to help people come up with their own look.
Creating the World’s Easiest Patterns
In commenting on her patterns Linda added, “I have always wanted patterns to be simple, “not rocket science.” I had basic pattern drafting from my university training, but my object was to have as few pattern pieces as possible and as simple construction as I could too. My object was to have everyone be able to make one of whatever I designed. My line of “world’s easiest” patterns were best sellers and business boomed. World’s Easiest meant the pattern was usually one, two or three pattern pieces total! I then taught an army of instructors to help in my quest to get everyone sewing. We then franchised our shops across Canada and life was good (but very busy). By this time I was married and my husband who was an R.C.M.P. officer turned down a transfer and joined the business full time which is the only way I could have carried on. Yes…. we are still happily married 52 years later!”
On the future of sewing…
“I’m seeing a renewed interest in recycling coming from the younger people, and that I find so exciting. They have inspired me to recycle/recreate, and I have made many patterns to help with this aspect of sewing. Once this group discovers the potential of the sewing machine, they will be hooked! This direction has brought me full circle to my humble first attempt!”
In her quest to teach the world to sew, she decided the best way to do it was by having her own T.V. show. It was quite a task to get going but she and her husband managed and directed “Sew Much Fun” and ran with it for 6 seasons (72 shows) which showed on Canadian channels as well as PBS in the U.S. They then developed that into “Linda Macphee’s Workshop” which ran for another 6 seasons. “That was likely the highlight of my career,” she added. “I was awarded the “Woman of Vision” by CTV Television and YWCA “Entrepeneur of the Year” and also an “Award of Merit” from the Canadian government for Business. My alma mater, University of Alberta, awarded me their highest Distinguished Alumni Honor award.”
When asked about her favorite aspect of her job, she replied, “It is creating/designing the original garment and then seeing it through to a pattern to enable me and others to teach the world.”
However, she also reflected, “I have been saddened by the lack of Home Ec training in schools where I think the spark should begin! I never did take Home Ec. in school as my school was too small to have it. I, of course, did take it in University and did earn my teaching degree but opted to teach adults instead of youth.”
“If we can keep the world sewing, I think the future is bright. How you ask? I think the patterns have to be kept quick and easy. More sewing T.V. shows like mine would certainly help to show how easy it can be. For example…..in all the garment patterns I designed (well over 200) there was never a buttonhole in any of them. That was something that a novice might not do well, and my motto always was ‘make it look like you didn’t make it!’”
Being from Canada, Linda was never part of ASG as a member. She said, “I was a sort of member of the Holt Michigan group who I worked with/for many years. I very much enjoyed my work with many ASG chapters across the country. I was always promoting the formation of Canadian groups, but we just don’t have the population to make it work.”
 Today Linda describes herself as “sort of retired” and only does “private gigs.” She has stopped doing major sewing shows, but loves doing her own version of fashion shows using local women as models for her garments. She spends her winter months in Mesa, Arizona and finds fun in doing smaller gigs for the multitude of retirement parks within driving distance. You can check out Linda’s patterns at her website at www.macpheeworkshop.com.
~Rosemary Fajgier
Tailoring Tricks, Part 2
Fusibles
Fusible interfacings are de rigueur for today’s tailoring aficionados. They are easy to apply and a great option for building structure and shape into a tailored garment without laborious hand stitching.
Types of Fusibles
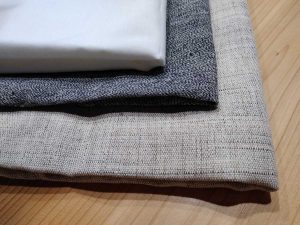
- Wovens have lengthwise and crosswise threads that make them stable in both directions. If they’re cut on the bias, they offer some stretch and draping, like on a jacket roll line or lapel. Hair canvas, a type of woven interfacing, is often used in tailored garments to build shape.
- Knits offer built-in stretch for shaping and draping, and can also be used to back an entire garment section to add body to fabrics like loosely woven bouclés or lightweight wool flannels.
- Non-wovens are crisp and paper-like, and generally aren’t used in tailoring projects since they offer no draping or molding attributes. They’re better saved for craft projects.
Note that each type of interfacing is available in several weights, from light to heavy, and should be chosen to match the weight of the garment fabric.
More than one type of interfacing is often used in a single tailored garment. For example, a lightweight knit might be used to back a jacket front and back, while fusible hair canvas is applied over it in the upper shoulder and lapel areas. A heavier weight bias-cut woven may be used in a collar stand area, over hair canvas applied directly to the entire collar. The choices depend on the end result you’re looking for—soft and drapable to firm and supported. Always test before you fuse!
Preshrinking
Preshrink all interfacings, as later shrinkage can ruin your garment. Simply fold the interfacing and submerge it in warm water for 30 minutes, then hang or lie flat to dry. Do not press fusible interfacing.
Cutting
Your pattern guide should tell you where to use interfacing and may have separate pattern pieces for cutting it. Common places to add stability are the garment back to support the shoulder, armscye and neck areas; on facings (behind buttonholes) and lapels, in sleeve hems, sleeve caps, and on collars, cuffs and pockets. Depending on the interfacing weight, you may want to trim it out of the seam allowances and/or darts to help reduce bulk.
Fusing
One side of fusible interfacing has adhesive dots on it, and the opposite side does not. It’s important that you place the interfacing with the adhesive side against the fabric wrong side. Once fused, the interfacing and fabric behave as one entity as far as drape, handling and sewability are concerned.
 Different types/brands of interfacings require different fusing techniques, so be sure to read the label. Some require steam, others dry heat, while still others specify a damp press cloth. Note the fusing time and iron temperature for proper adherence.
To begin fusing, choose a flat pressing surface and smooth the interfacing onto the companion fabric piece wrong side. Be sure to press, not iron the pieces in place: Pressing is a lifting motion, while ironing is sliding the iron along the surface. To fuse properly, hold the iron in one place for the specified amount of time, then lift it and move to the next area, overlapping the first section slightly. Repeat to cover the entire garment area for complete fusing.
Always allow the fused garment sections to cool before moving them from the pressing surface. If you move them while warm, it can affect adhesion and cause distortion.
For smaller garment pieces, like collars and cuffs, it’s easier to fuse an entire fabric section and then cut out the pieces than it is to try and match up small cut pieces of interfacing with pre-cut garment sections.
Once all the interfacing pieces are fused to their matching garment sections, transfer the pattern markings to the interfacing layer and move forward with construction.
~Linda Griepentrog
Linda is the owner of G Wiz Creative Services and she does writing, editing and designing for companies in the sewing, crafting and quilting industries. In addition, she escorts fabric shopping tours to Hong Kong. She lives at the Oregon Coast with her husband Keith, and two dogs, Yohnuh and Abby. Contact her at .
- « Previous Page
- 1
- …
- 8
- 9
- 10
- 11
- 12
- …
- 16
- Next Page »
