Help! I’ve marked my fabric and I can’t get it out!
No matter what you are sewing, you often need to find a way to mark key points on the fabric. You might need to mark stitching lines for darts, placement for pleats, buttonholes, or pockets. But nothing is more heartbreaking than to find that the marks have made a permanent home on the fabric and become center stage in your final project.
 Top priority is always to choose the right marking tool that will do its job and leave when it’s done. This article will remind you of a few options to select from to achieve that result. But since we all occasionally need a little help when we fall, it is also important to have a few ideas in your arsenal for what to do when those marks refuse to leave when you want them to.
So, here we go. Let’s start with a few marking options, complete with strong points and weak points, for you to consider. Then we will wrap up with a few ideas to help you save the day if one of them results in a “fall” you have trouble getting up from.
Regardless of which marking tool you use, the most important thing you need to know is test, test test!
Frixion Pens
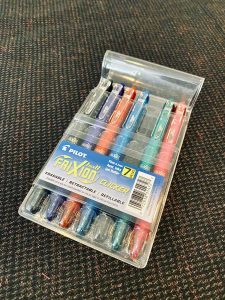 Frixion Pens are a personal favorite of mine. They are easy to find online, in office supply stores and some fabric stores. They work great on smooth fabrics but not so well on textured fabrics. Watch out, though. If you press too hard when marking, they can mar the fabric and leave a ghost line. Ask me how I know this… Press just firmly enough to make the marking visible but not scar the fabric. They erase quickly and easily with heat or steam but be forewarned that if you plan to take your project to the North Pole, those marks just might reappear. Yep, extreme cold can do that, just like magic! There’s a whole chemistry lesson that explains why, but that is for another day.
Tailor’s Chalk
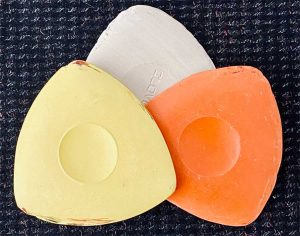 Tailor’s Chalk comes in two types, with wax and without. Chalk without wax works particularly well on smooth fabric textures. It usually brushes away without leaving a residue, though sometimes too quickly so handle the marked fabric with care. Chalk with wax is a better choice for heavier and textured fabrics as it won’t disappear into the fibers or as quickly, waiting for the heat of an iron to disappear.
The downside of tailor’s chalk is that it gets dull and sometimes crumbles which means you will need to sharpen it. You can easily sharpen it by using a simple sharpening tool from makers like Dritz, or you can sharpen it by carefully (no injuries, please!) scraping the sharp edge of the blade of your paper scissors or an Exacto knife along the edge of the chalk.
Chakoner
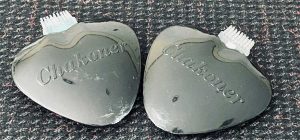
Chakoner is a powdered chalk receptacle with a dispensary wheel that makes a super fine chalk line. It rolls easily over both smooth and textured fabrics without leaving ghost lines and has a brush to help with removing the chalk when you are done. Chakoner’s are refillable, but refilling can be a messy and frustrating job. The most common tip for accomplishing that tricky task is to pour the chalk into the little hole on top of the Chakoner using a small homemade paper cone, which has mostly negative reviews. In the category of repurposing household items for other purposes, one user reported using a.. wait for it… turkey injector with a large gauge needle! It was reportedly still a bit fiddly but more effective than the paper cone. Wonders never cease!
Air/Water Soluble Pens
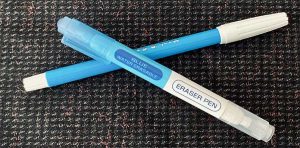
Air/Water soluble pens work well for marking lines and dots and usually leave no residue afterwards. Water soluble pen marks can usually be removed with a damp cloth or cotton swab or a spritz from a spray bottle. Air soluble marks should dissolve into thin air within 12-24 hours on their own, so they are not a good choice if you are marking ahead but won’t get to the sewing for a day or two. Sometimes the markings can bleed, distorting the exact location of the mark so take care not to press the pen on the fabric too long. Also, be aware that these pens can dry out so be sure to replace the cap tightly after each use.
Thread
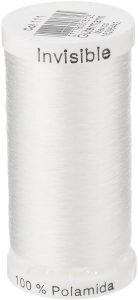
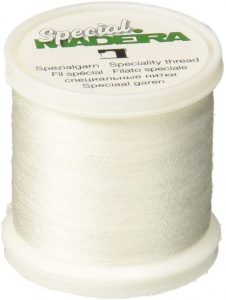
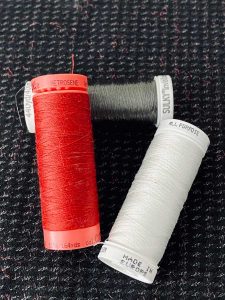 Thread can be used for tailor’s tacks and thread tracing and will never leave ghost lines or residue. It is a more time-consuming way to mark and you need to handle the marked pieces with care to be sure the thread doesn’t pull out before using the markings. This method is especially popular with those who are sewing couture garments.
But, what if it doesn’t go away?
With so many options, you are sure to find just the right marking tool for your project. But what if even after you have tested your marking tool on a scrap piece of fabric and made the perfect choice, one of those markings, in a very visible location of course, just won’t disappear. We are right back where we started in this article, “Help! I’ve marked my fabric and I can’t get it out!”
When that happens — and it inevitably will at some point — here are a few tips that just might help you save the day. You still can’t escape that testing advice. The last thing you want to do is make matters worse by trying one of these tips only to find out your fabric absolutely hated the idea and now you have not only the marking pen visible, but also a not-so-lovely spot from where you tried to remove it.
- The ghost lines sometimes caused by Frixion pens might be removed with either Amodex or Mötsenböcker’s Lift-Off 3 if the line is not the result of pressing so hard that you have marred the fabric. Both are available on Amazon and sometimes in grocery stores.
- Lightly rubbing chalk markings with a Wet Wipe or vinegar water will often remove stubborn markings without affecting the fabric at all. And since new moms tell us baby wipes can clean ANYTHING, this idea is probably worth trying!
- Gently rubbing the mark with a Mr. Clean Magic Eraser is said to be effective for removing some markings.
- To remove stubborn wax-based chalk markings, place a layer of plain brown paper (like a paper bag) over the stain and press (not rub) for several seconds.
- Stubborn water-soluble marks may be removed by letting the fabric soak in a bowl of lukewarm mildly soapy water. After soaking for a generous amount of time, fill the bowl with cold tap water and rinse until all the soap is gone.
- You may also have luck forcing a stubborn air-soluble mark away by dabbing with a cotton swab that’s been wet with rubbing alcohol.
Here’s hoping you never ever need any of these “save the day” tips. But at least you have a few to try if you do.
~Sheryl Belson, ASG Plano Chapter


