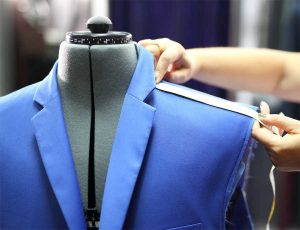
So, you want to tailor a coat or jacket, but you’re not sure what that involves, but willing to take the leap.
There are basically two types of tailoring: traditional work with tedious hand stitching or fusible tailoring where you let technology do the “stitching” for you. While the former is worthy of the effort, most first-time tailoring adventures are successfully done with fusible techniques.
Choose Wisely!
 Wool or a wool blend is the best choice for a tailored garment, as it’s easily shaped with steam and good pressing techniques. Preshrink your wool selection prior to sewing—easily done by asking your dry cleaner to steam press it for you, though some wools are washable, so check the label first.
- Select quality interfacings. A woven hair canvas type is ideal for jacket or coat lapels and collars, and to stabilize some hem edges. Different weights are available to match up with the fabric weight, and it’s available in fusible for a quick application. It’s also available in sew-in if you prefer to hand stitch. Preshrink the interfacing by soaking in warm water for 30 minutes and lying flat to dry.
- Lining helps tailored garments hold their shape during repeated wearings, and it covers up the inside construction detailing. A satin-finish lining makes it easy to get the garment on and off over sweaters or other garments.
- Look for great fasteners for your tailored garment—beautiful buttons, fun snaps or hooks are ideal choices. Make your selection before starting the garment as it affects the closure construction, like the size of buttonholes or reinforcement needed for novelty closures.
- In addition to conventional thread for construction of your project, you may want to select a heavier weight for topstitching, either in a matching color or contrast, depending on the desired look.
Pattern Picks
- All major and many independent companies offer patterns for tailored garments. Coat and jacket patterns are made to fit over other garments, so purchase your usual size. Because wool or other tailoring fabrics can be costly, it’s best to test-fit the garment pattern before cutting your fashion fabric. Tissue-fit or make a muslin and note any fitting changes needed on the final pattern.
- Follow the pattern guidesheet for cutting, but if the layout allows, cut 1” seam allowances on side and under the arm seams, just to allow for adjustment if needed to accommodate thicker fabric. Be sure to use the “with nap” layout to avoid obvious shading on the finished garment. If the fabric is very thick, cut out single-layer pieces, remembering to flip the pattern for a right and left side.
- Transfer all markings to the cut pieces using chalk, removable marker or thread tailor tacks. If you can’t tell the right from the wrong side, mark them for consistency.
- If your wool is lightweight, staystitch any bias and curved edges to avoid them stretching during handling. This line of regular-length stitching is done just barely inside the seam line so it doesn’t show in the finished garment.

Pressing Matters
- You’ll be doing a lot of pressing as you construct a tailored garment, as that’s part of the shaping process. Use steam to help shape the wool—either the steam setting on your iron, or a dry iron with a damp press cloth. Do not press wool with a dry iron alone. Test-press some scraps to see which works best for your fabric, as some wools can develop an unsightly shine if pressed directly with the iron.
- Because of the bulk, it’s best to press seams open, unless the garment style dictates pressing to one side and topstitching to make a sporty mock flat-felled seam.
~Linda Griepentrog
Linda is the owner of G Wiz Creative Services and she does writing, editing and designing for companies in the sewing, crafting and quilting industries. In addition, she escorts fabric shopping tours to Hong Kong. She lives at the Oregon Coast with her husband Keith, and two dogs, Yohnuh and Abby. Contact her at .


