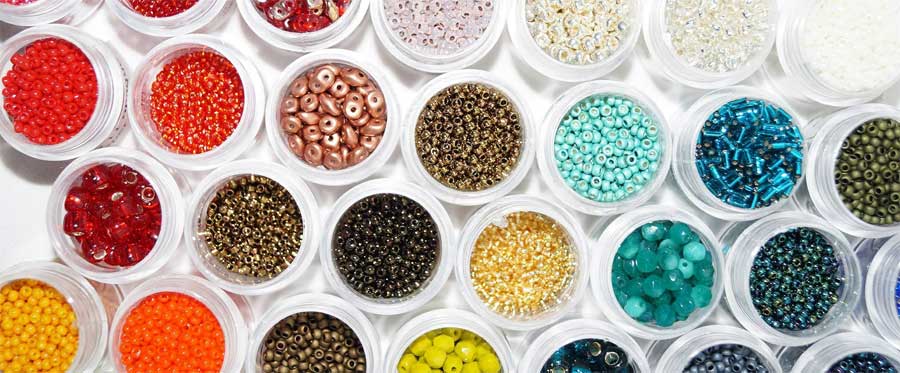
What is it about beads that make these shiny objects so alluring? Take one bead by itself and nothing much happens; group several together and you’ve instantly created an eye-popping sensation.
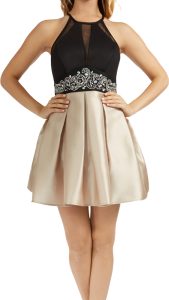
Bead embellishment has been around for hundreds of years, appearing in everything from ethnic costumes to haute couture. In fact, beading has become so mainstream that one can’t help but notice beads adorning everything from clothing to accessories to home decor. As sewists, we have a unique ability to add these shimmering touches to any of our creations with minimal expense.
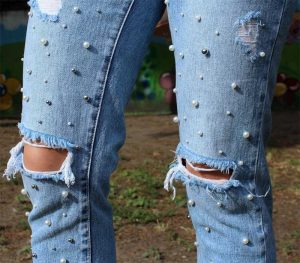
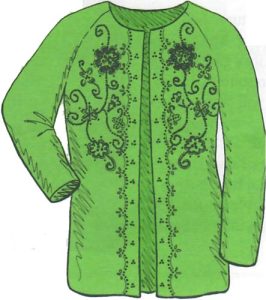
Beadwork is a very broad term that encompasses techniques for making jewelry and other three-dimensional objects. Our focus here is on bead embroidery — using beads to embellish fabric. Beads can be applied to plain old fabric in a random pattern, to a fabric with a transferred design, to pre-printed fabric, a fabric with an embroidery design, or to a purchased garment. Another idea is to add beads to an existing trim. The repeating pattern trims provides an accurate template to follow as you apply the beads.
Start on your path to a beading addiction by practicing some stitches. Keep it simple by practicing just one stitch and using only one color of beads, but in two or three different sizes. Create multiple samples and, even if you make a mistake, don’t bother to undo it because, after all, these were just samples. Before long, you’ll begin to realize that the “mistakes” were nothing more than variations that can become a gold mine of three-dimensional beading ideas just waiting to be used.
Look for inspiration in various mediums for help giving you fresh ideas for your projects, whether it’s in a bead-focused publication, in a store, or in a high-fashion magazine.
Bead Basics
 Beads come in every imaginable size and shape. They can be made of plastic, glass, metal, bone, shell, gemstone, wood, rubber, polymer clay… the list goes on! Basically, anything with a hole can be considered a bead. Even those without a hole, such as a cabochon, fall into the bead category. In the case of a bead without a hole, the application technique is to couch it, cage it, or as a last resort, glue it down.
Remember that not all beads are alike. Consider the quality, uniformity of shape, and colorfastness. Some beads also have sharper edges than others. This fact should be considered when applying beads to areas of stress in a garment. If you do not happen to live near a good source for beads, there are wonderful online mail order sources.
How many beads will you need?
This is where creating a sample is important. If using a hank of beads, it helps to use an entire strand to bead a sample to determine how far a hank will go. If using beads from a tube or a vial, weight might be a better estimate. The weight on tube or vial packaging is generally labeled in grams. Weigh all the beads, create the sample, then weigh the leftover beads. Subtract the current weight from the initial weight and the resulting number is the weight of beads in the sample. Having a small digital postage or kitchen scale that alternates between ounces and grams is perfect for this task.
Fabric Facts
 The list of fabrics suitable for beading ranges from laces and chiffons to very heavy fabrics, such as tapestries and leathers. Besides fabric, beading can also be done on lace trims, ribbons, and 3-D embellishments (such as fabric flowers and crocheted rosettes). Because bead work becomes heavy very fast, especially when using glass beads, your fabric may require some sort of support. If this is the case, determine which stabilizing medium will prevent distortion and hold your design in its original shape. Choices include stabilizers made for machine embroidery, flannel (a favorite choice), muslin, organza, self fabric, interfacing, and grosgrain ribbon. Sometimes the best stabilizer might even be another bead, just like you would use a flat button to back a heavier button on a leather jacket.
Beading Supplies
It doesn’t take much to get started on your beading journey. The basic requirements are patience, a good light source, a comfortable chair, a needle, a hank of beads, thread, fabric, and a basic instruction book. Note the order of importance! A good needle is probably more important than the choice of bead — after all, if a needle doesn’t feel comfortable in your hand, you may not be very motivated to get started.
 Lighting: Beading can be very tiring, so begin with good lighting. In addition to working in a well-lit room, a task light or lighted magnifying lamp will help to keep eye strain at bay and make the detail work a little easier. Look for “daylight” rated bulbs or lamps. Daylight rated lighted can also help you to accurately color-match thread to fabric.
Needles: Traditional beading needles are generally very thin and flexible and often are not appropriate for beading on fabric because the motion of the hand-stitching requires a stiffer needle. In most cases for beading on fabric, a sharp needle will work the best. For creating fringe, try a milliner’s needle, which is longer. Remember, though, that not all needles are alike. You need a stiff needle that is thin enough to be able to go through the beads at least twice. Look for Japanese needles (size 9 sharp), John James needles (size 10 milliners), or the Roxanne English needles (size 11 sharp).
Thread: Although ordinary sewing thread can be used for beading in something that won’t see much movement, such as a home decorating project, it’s best to use thread made specifically for the purpose. Beading thread will be stronger and less likely to tangle, especially when working on a garment.
Hoop: Beading can be done with or without a hoop. If you choose to hoop your fabric, be sure to cushion all the hard edges by wrapping them with yarn, muslin strips, twill tape, etc.
Beading Stitches
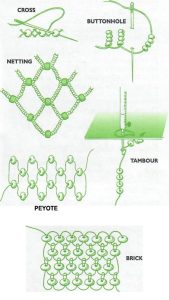 Terms that refer to styles of stitching include bead embroidery (traditional hand embroidery stitches such as cross stitch and buttonhole stitch executed in beads), netting, peyote, brick, square, right-angle weave, fringes, herringbone, and tambour (which uses a hooked needle to make a continuous chain stitch). There are entire books written on each subject, as well as plenty of YouTube videos and beader blog posts to learn the different techniques. You don’t have to be proficient at all these stitches, but you should familiarize yourself with each technique.
Understanding the basic jewelry-making stitches will expand your vision of bead embellishment on fabric. Basically there are three ways to embellish fabric with beads:
- Beads can be sewn directly on fabric.
- They can be sewn to a backing, then the backing is trimmed and the bead work is appliqued to fabric.
- Beaded components are made freehand using jewelry-making techniques (i.e., using a bracelet pattern for a strap on a dress, a tank top, a waistband, etc.) and then appliqued to fabric.
When beading on fabric, never attach every single bead individually. If you do, chances are your fabric will pucker. For attaching multiples of beads, stitch options include the running stitch, the backstitch, or couching. Another solution is to create the beaded component as a separate applique, and then attach it to your project by sewing through some of the beads within the beaded design.
Transferring Techniques
If you’ve found a particular design you like, you can easily transfer the design or even bead over a pre-printed design. Transfer pens, transfer pencils, dressmaker’s carbon, thread tracing, or pouncing powder all work well. However, one easy method is to trace the design onto tissue paper, then baste the paper to the fabric. Bead through the paper and the fabric, then remove the paper. Tear-away stabilizer can also be used, but test it first to be sure it tears cleanly away from the project.
Storing/Preserving Beadwork
The more elaborate your beadwork, the heavier it gets, so store it flat. Avoid storing it in plastic bags/storage containers as condensation can build up inside them.

Depending on what the base fabric is and the colorfastness/quality of the beads, your beaded project can be hand washed. Upon starting a beaded project, anticipate whether or not it will need to be washed. As with any sewing project, if the answer is “yes,” pre-wash all the fabrics and notions, and soak the beads. After a good soaking, dry them on a piece of white fabric and look for any staining. If stains occur, look for new beads.
Hand wash your finished work, reshape it, and lay it flat to dry. Dry it as fast as possible, but never in direct sunlight. Note that it takes longer to dry under humid conditions than in dry conditions. Choose your wash day wisely!
~ Anna Mazur is a former accountant who turned her love of sewing into a passion. A member of the Connecticut ASG Chapter, she began to hand embroider as a child; by the age of 12, she discovered garment sewing. Her work has appeared on HGTV’s “Sew Much More,” the Fairfield and Bernina Fashion Shows, and in many publications, including Threads magazine, Quilting Arts, Belle Armoire, and Sew News. She is currently an author for Threads Magazine. This article is adapted from an article previously published in Notions.


