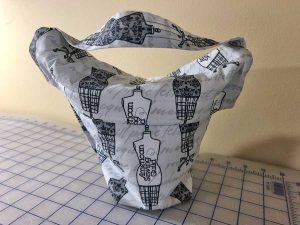
 Whether you are packing supplies to take to ASG Conference, or heading to a chapter stitching event, this caddy is the perfect way to safely and easily take your travel iron with you. I made the caddy to fit my Sun Beam Compact Travel Iron model #GCSBT-100, but there are similar size models by Dritz, Rowenta, and other Iron makers. It also fits nicely in my sewing machine caddy along with my 9”x 12” Omnigrid combination cutting and pressing board.
Materials
- 24” x 11” body fabric
- 3” x 11” body fabric for handle strap
- 24” x 11” lining fabric
- 24” x 11” Insul Brite fabric (insulated to protect from heat)
- 7” ¾” Hook & Loop Velcro
- 3” piece of Wonder Under
- Quilter Ruler with 45 degree angle marking
Legend
- RS = right side of fabric
- WS = wrong side of fabric
Instructions
Strap: Fold 3” x 11” strip of fabric in half lengthwise WS together and press. Open and press both long edges in, ½” to WS then fold again 1” to WS overlapping, giving you a 1” wide strap. Now stitch lengthwise to reinforce the strap along both edges and up the middle. Set strap aside for next step.
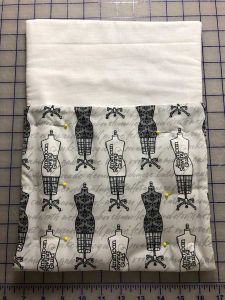
Body of Bag: Layer Insul Brite, lining fabric RS up and then body fabric WS up. Insul Brite will be your bottom layer against the needle plate when you sew. Pin layers together around the inside of the rectangle to hold the layers together. Place long top edge of the strap to RS of body fabric layer 3 ½” down from top edge, double check your fabrics if using a one way directional fabric for your body fabric to make sure the direction of your strap and body are going the same way (Image 1). Stitch around all four edges using a 3/8” seam allowance but leaving a 3’ opening for turning on the bottom edge. Run an extra row of stitching over the strap edges to reinforce (Image 2).
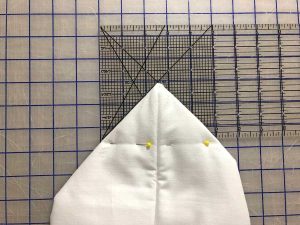
Before turning, clip off the corners outside the corner stitching to allow for less bulk at the corners, be careful not to clip your stitches (Image 3). Turn and press, using a piece of Wonder Under to close the opening.
Closure: With panel facing RS up, place hook side of Velcro centered at bottom, ¼” up from edge and stitch in place. Leave at least ¾” on each end to accommodate your side seams, trim Velcro if necessary. Lining side up, place the loop Velcro at the top and stitch in place ¼” from top edge, lining up with the bottom edge placement.
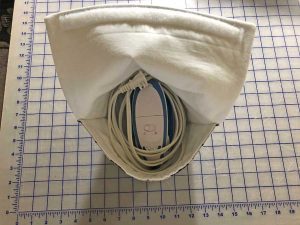
With WS together, fold bottom edge up to 5” below top edge and stitch both side seams using ¼” seam allowance or as small as possible, back stitching at top edge to reinforce. (Image 4)
Turn the bag inside out and box the bottom seams. To box the bottom, use a quilter ruler with a 45 degree angle guide. Pin across bottom of the angle on both edges to create the boxed bottom and sew along pinned edges. (Image 5) Turn RS out.
This little iron caddy, with it’s bucket shape, will hold my iron and a few other small items. It also fits into the open space of my machine for travel.
~Carolyn Meyers, ASG Member, Bucks County Chapter


