Zippers have a bad rap as being difficult to work with; however, they are simple to insert when stitched correctly with the proper feet. I recommend using the All-Purpose Foot and the Edge Stitching Foot. You’ll marvel at the ease of inserting zippers in pockets, pillows, handbags and garments when using the right tool. Consider letting a zipper make a statement on your next project by using decorative zippers. The opportunities are endless and the results so much fun. Whether for garments or bags, you can insert zippers trouble free, the easy way.
Did you know that zippers were originally designed for closure on boots? As time progressed zippers were added to garments for closure instead of the traditional buttons. Today, zippers can be seen everywhere, not only garments, but shoes, luggage, sports and outdoor products like tents, sleeping bags, home décor, jewelry, trims and the list goes on and on. The sky is the limit.
Zippers are available in many configurations
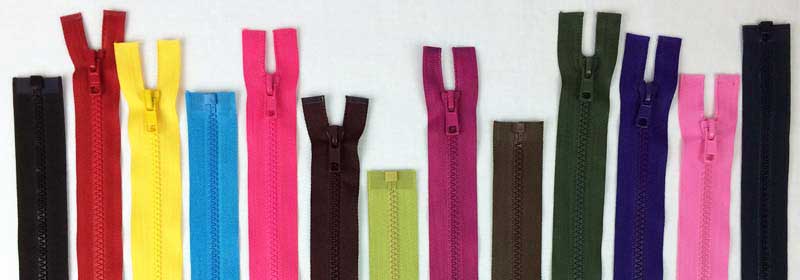
- They may be purchased by the yard or in a roll, closed end (C/E), open end or separating (O/E) to name a few.
- The sliders may have several different options as well — locking, 2-way open-end/separating, double slide, and reversible.
- They are available in metal, nylon coil, molded plastic teeth and rhinestone.
- They are also available in a variety of sizes
- #3 is the tradition size used for a dress, skirt or pants. The coil is approximately ⅛” or 4mm.
- #5 is a size used in jackets or outer wear. The coil or teeth (chain) are approximately ¼” or 6mm.
- The size of the chain may be larger for luggage and other sports related products, or smaller for children’s wear, dolls and such.
Of course, much of this has changed, nowadays, with zippers being used in a variety of ways other than the traditional.
My Favorite Zippers
 My favorite zippers are #3 coil for inside pockets of handbags or small bags, and #5 for handbag closure, jackets and coats. I particularly love the nylon coil, plastics and rhinestone zippers. In general, I shy away from metal zippers because of the weight, tendency to pull or snag soft fabrics, and possibility to break needles if not properly applied.
Size it Right
Did you know you can shorten a zipper — very carefully, of course — by cutting it? Make sure to purchase the right zipper for your needs though. A separating zipper must be purchased as a separating zipper and can only shortening from the top. A closed end zipper can never be made into a separating zipper as the home sewer does not have the equipment to add the retainer box and insertion pin to a zipper.
Inserting a Zipper
Now that some of the basics are out of the way, this is my favorite way to insert a zipper when the teeth or coil are exposed. It is by no means the only way to insert a zipper, but it is a basic way that I consistently use in my projects. It is also the beginning way of several zipper insertion techniques that I use.
- Align the cut edge of the fabric with the edge of the zipper tape so that the right sides are facing each other (right sides together). The zipper stop and zipper slider may extend from each end for easier insertion. Place the needle to the far left position. Stitch the length of the zipper with the All-Purpose Foot leaning against the zipper coil.
- Fold the fabric over to expose the zipper coil. Position the Edge-stitching, Edge Joining or Ditch Quilting Foot with the bar between the zipper coil and the fold of the fabric. Move the needle position slightly left of the fold and stitch across.
- Repeat this process on the other side of the zipper.
- Option: When using a decorative zipper tape, apply these instructions in reverse. In other words, begin Step 1 with the wrong sides together so that when the zipper tape is folded back the tape is exposed.
Discount ahead! Continue reading for a limited time discount on Zippers at www.Ghees.com
Extra Zipper Tips
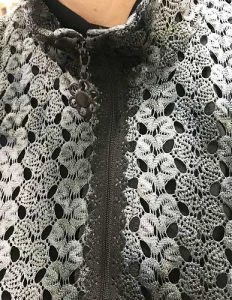 Use decorative or specialty zippers to enhance the design of the garment or bag.
- For special effects, create your own look. Choose two zippers in coordinating colors. Unzip them and swap the colors. Zippers must be of the same style, size of teeth and slider for this design idea to work.
- Many times, the zipper pull is in the way of accurate stitching. To maintain a straight stitching line, stop before reaching the zipper pull, leaving the needle in the down position. Lift the presser foot, unzip the zipper a few inches and stitch past the bulky area.
- It is much easier to work with zippers that are too long and trim the excess off. Always be certain the slider is included in the project before trimming the excess tape. Refer to how to “Fix a Zipper.”
- Because of the bulk in many project, use a Jeans Needle to avoid breaking the needle. Be extremely careful while stitching over bulky areas. Stitch slowly.
- To avoid melting the zipper coil on polyester, nylon, or plastic zippers, or scratching the iron with metal zippers, do not press the zipper chain. Use a medium to cool iron setting when pressing around the zipper area of a project.
- Use the sewing machine foot that makes the task easier. The Edge Joining Foot, or Ditch Quilting Foot, a foot with a guiding bar in the center of the foot, provides perfect alignment of stitches from the edge of the zipper tape or stitching the binding.
How to Fix a Zipper
It is very easy to “fix a zipper” or add a slider to yardage. Place the slider on one side of the zipper teeth (chain) and hold with your thumb and finger. Place the other side of the zipper teeth into the slider and give it a little tug. You will feel the teeth catch in the slider. Pull the slider to close the zipper. Be sure to stitch over each end of the zipper to protect. The same instruction works with the coil type zippers.
Decorating with Zippers
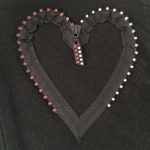 Though zippers were designed for function, they can certainly be used for decoration. This 8” rhinestone zipper was stitch on the back shoulder of a vest. Baste along each edge of the zipper tape leaving thread tails at the beginning and end. Open the zipper. Gather the thread to form the heart shape. Miter the ends of the zipper tape to match the shape of the heart. Use a small zigzag stitch to hold the zipper heart shape on the base fabric.
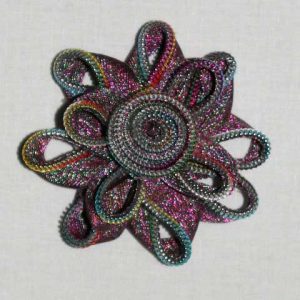
Cut zippers or zipper yardage to create fantasy flowers. Use glue or hand stitching to hold the shape. Glue is easier!
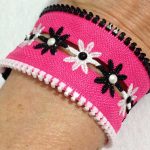 Make a bracelet with zippers or yardage. One 18” zipper will make 2 bracelets. Simply use an awl to remove the stop or cut the stop off. Pull the zipper chain apart. Overlap the tape and stitch using an open type decorative stitch to hold the tape together. Add snaps or rhinestones to embellish. Use embroidery stitches to hold the zipper tape together.
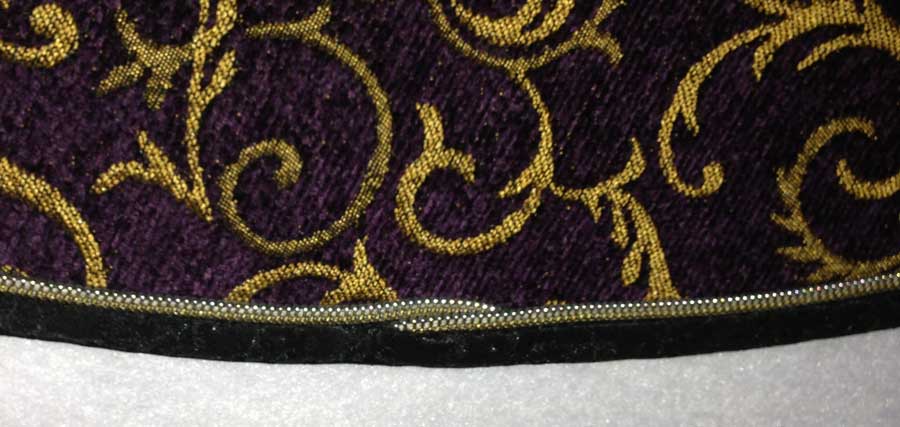
Use zippers or zipper yardage instead of corded piping. This photo shows the beginning and ending when a seam allowance is not available to hide the ends. It may be necessary to trim or clip the tape when curves are part of the project as the zipper tape does not have any give. I like to use the Piping Wizard to trim evenly and accurately. This is nylon coil zipper that looks like metal.
Discount
Enjoy a 30% discount on everything in the Zipper category of www.Ghees.com through midnight on July 13, 2019 using code zipit30asgj. After that date, ASG members can log in to the Members Only area for a discount code for 15% off all non-sale items in the Ghee’s store. Discounts cannot be combined.
~Linda McGehee, Ghees
© Copyright 2019 Ghee’s all rights reserved
Ghee’s
PO Box 4424
Shreveport LA 71134
www.ghees.com


